Delicious Homemade Pierogi Recipe: A Savory Family Classic
Crafting a mouthwatering homemade pierogi brings pure comfort straight to your kitchen table.
Polish dumplings pack incredible flavor in every delicate pocket.
Soft dough wraps around savory fillings that dance with traditional goodness.
Generations of cooks have perfected these delightful parcels, passing down secrets from grandmother to daughter.
Skilled hands knead, stuff, and seal each pierogi with love and precision.
Crispy edges and tender centers make these dumplings an irresistible treat.
Jump into this classic recipe and create something special that connects you to hearty eastern European culinary traditions.
What Makes Homemade Pierogi So Comforting
Ingredients To Make Homemade Pierogi
For the Dough:For the Filling:For the Finishing and Serving:Cooking Instructions For Homemade Pierogi

Step 1: Create Silky Smooth Pierogi Dough
Gather flour, salt, egg, and water in a mixing bowl. Knead the ingredients together with your hands, working the dough until it becomes elastic and smooth. The kneading process should take about 5-7 minutes, developing a beautiful texture that will make your pierogi extraordinary.
Step 2: Relax the Dough
Cover the dough with a clean kitchen towel and let it rest at room temperature for half an hour. This crucial resting period allows the gluten to relax, making the dough more pliable and easier to work with.
Step 3: Whip Up a Creamy Potato Filling
Prepare the delectable filling by combining:Season with salt and pepper to create a mouthwatering mixture that will make your pierogi irresistible.
Step 4: Roll Out the Perfect Dough
Sprinkle a light dusting of flour on your work surface. Roll out the rested dough until it’s thin and even, about 1/8-inch thick. The goal is a delicate, uniform sheet that will cradle your flavorful filling.
Step 5: Shape Your Pierogi Pockets
Use a round cookie cutter or the rim of a glass to cut perfect circular dough pieces. Aim for circles about 3 inches in diameter – the ideal size for a delightful pierogi.
Step 6: Stuff and Seal with Love
Place a small spoonful of potato-cheese filling in the center of each dough circle. Be careful not to overfill – you want just enough to create a burst of flavor. Fold the dough over, creating a beautiful half-moon shape. Pinch the edges firmly to seal, ensuring no filling escapes during cooking.
Step 7: Boil to Perfection
Bring a large pot of salted water to a gentle boil. Carefully drop the pierogi into the water in small batches. Watch for them to float to the surface – this means they’re fully cooked, which typically takes 3-4 minutes.
Step 8: Crisp Up the Finish
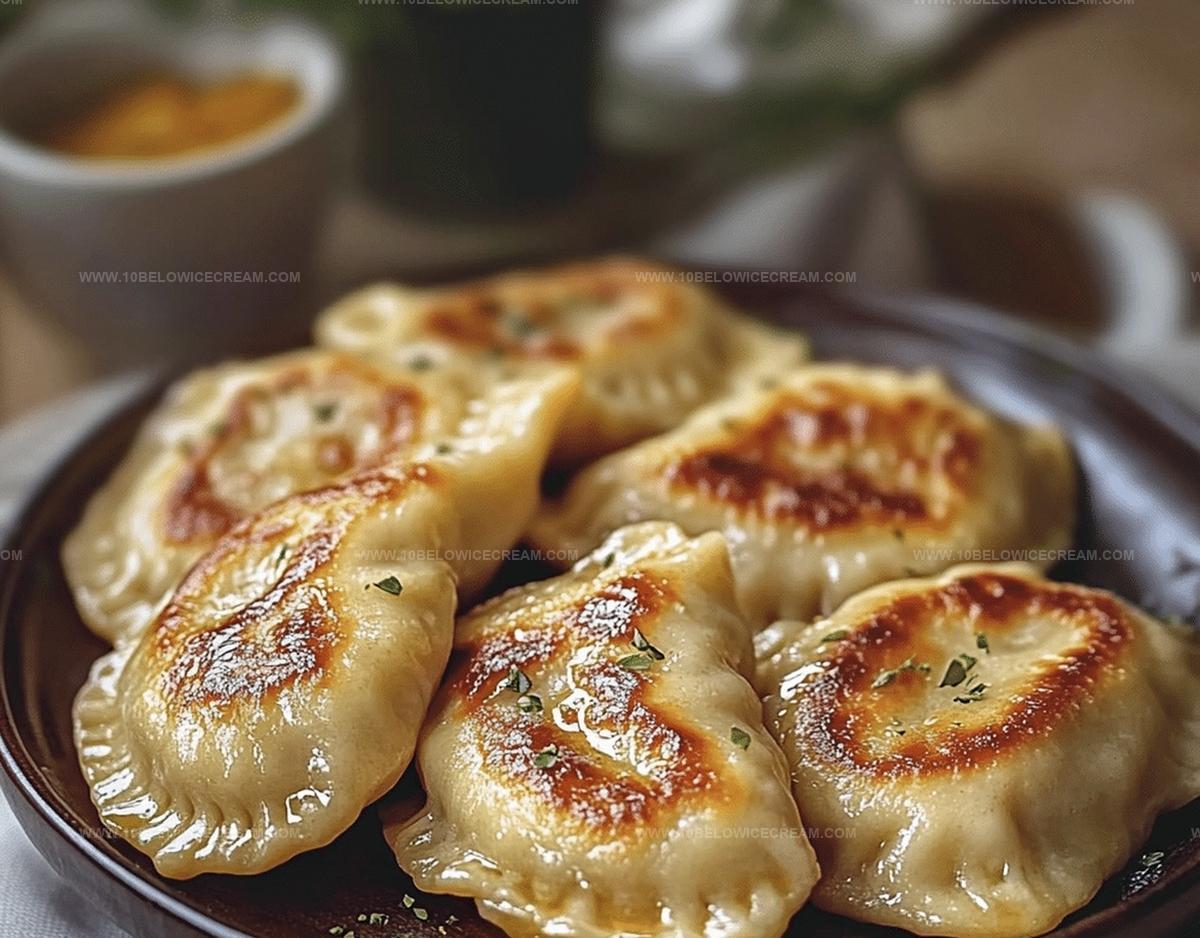
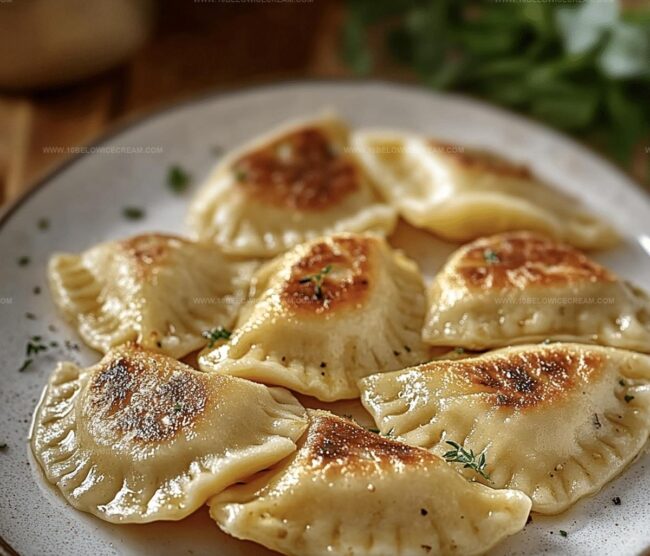
Remove the pierogi with a slotted spoon and let excess water drain. Melt butter in a skillet over medium heat. Gently pan-fry the boiled pierogi until they turn a gorgeous golden brown, about 2-3 minutes on each side.
Step 9: Serve with Flair
Plate your pierogi hot and fresh. Top with a generous dollop of sour cream and sprinkle with chopped chives. Enjoy this classic comfort food that brings a taste of tradition to your table.
Helpful Hints For Homemade Pierogi Prep

Homemade Pierogi Variations To Consider

Pairing Suggestions For Homemade Pierogi
How To Store Homemade Pierogi
Questions About Homemade Pierogi
Yes, you can prepare the dough up to 1 day in advance. Wrap it tightly in plastic wrap and refrigerate. Let it come to room temperature before rolling out.
Absolutely. Place uncooked pierogi on a baking sheet, freeze until solid, then transfer to a freezer bag. They’ll keep for 3 months and can be boiled directly from frozen.
Use a fork to crimp the edges firmly. Ensure no filling touches the edges when sealing, and keep the dough edges dry to help them stick together.
Print
Delicious Homemade Pierogi Recipe
- Total Time: 42 minutes
- Yield: 4 1x
Description
Polish pierogi shine as comfort cuisine packed with potato, cheese, and sauerkraut goodness. Crispy pan-fried edges and rich filling promise a delightful culinary journey you’ll savor bite after delectable bite.
Ingredients
Main Ingredients:
- 2 cups all-purpose flour
- 1/2 cup water
- 1 egg
- 1/4 tsp salt
Filling Ingredients:
- 2 cups mashed potatoes
- 1/2 cup shredded cheddar cheese
- 1/4 cup diced onions
Cooking/Finishing Ingredients:
- 2 tbsp butter
- 1/4 cup sour cream
- 2 tbsp chopped chives
- Salt and pepper to taste
Instructions
- Craft the dough by combining flour, salt, egg, and water in a mixing bowl, kneading until a smooth, elastic texture develops, approximately 5-7 minutes.
- Cover the dough with a clean kitchen towel and allow it to rest at room temperature for 30 minutes, enabling the gluten to relax.
- While the dough rests, prepare the filling by blending mashed potatoes, shredded cheddar cheese, and diced onions, seasoning with salt and pepper to create a creamy, flavorful mixture.
- Roll out the rested dough on a lightly floured surface to about 1/8-inch thickness, creating a thin, even sheet.
- Use a round cookie cutter or glass to cut uniform circular dough pieces, approximately 3 inches in diameter.
- Place a small spoonful of potato-cheese filling in the center of each dough circle, being careful not to overfill.
- Fold the dough over the filling, creating a half-moon shape, and firmly press the edges together to seal, preventing filling from leaking during cooking.
- Bring a large pot of salted water to a gentle boil, then carefully drop the pierogi into the water in batches.
- Cook the pierogi for 3-4 minutes, or until they float to the surface, indicating they are fully cooked.
- Remove the pierogi with a slotted spoon and drain excess water.
- In a skillet, melt butter over medium heat and lightly pan-fry the boiled pierogi until golden and crispy on both sides, about 2-3 minutes per side.
- Serve hot, garnished with a dollop of sour cream and sprinkle of chopped chives for a classic, comforting presentation.
Notes
- Kneading the dough thoroughly ensures a smooth, elastic texture that prevents tearing when shaping pierogi.
- Resting the dough allows gluten to relax, making the dough more pliable and easier to roll out without springing back.
- Use a fork to crimp edges tightly, creating a decorative seal that prevents filling from leaking during cooking.
- Consider alternative fillings like sauerkraut, mushrooms, or sweet fruit variations to explore different flavor profiles and dietary preferences.
- Prep Time: 30 minutes
- Cook Time: 10-12 minutes
- Category: Lunch, Dinner, Appetizer, Snacks
- Method: Boiling
- Cuisine: Polish
Nutrition
- Serving Size: 4
- Calories: 250
- Sugar: 1g
- Sodium: 320mg
- Fat: 9g
- Saturated Fat: 5g
- Unsaturated Fat: 3g
- Trans Fat: 0g
- Carbohydrates: 36g
- Fiber: 2g
- Protein: 7g
- Cholesterol: 55mg
Olivia Brooks
Contributing Writer
Expertise
Education
Culinary Institute of America
Accelerated Culinary Arts Certificate Program
Focus: Culinary fundamentals, nutrition, and healthy cooking technique
Olivia believes good food should feed both the body and the soul. She earned her Accelerated Culinary Arts Certificate from the Culinary Institute of America, where she focused on nutrition and practical cooking techniques that make healthy eating easy.
At 10 Below Ice Cream, Olivia shares single-serving recipes that are fresh, plant-forward, and full of heart. She loves helping people eat better, without stress, strict rules, or sacrificing flavor.
Beyond the kitchen, Olivia spends her time tending her backyard garden, practicing yoga, and discovering hidden gems in Portland’s food scene.