
Fluffiest Chocolate Yogurt Cake Recipe for Sweet Moments
Crafting a delightful chocolate yogurt cake brings pure culinary magic to your kitchen.
Soft, moist textures emerge from an unexpected blend of ingredients.
Creamy yogurt works its wonder, creating a remarkably tender crumb that melts in your mouth.
Rich chocolate notes dance through each slice, promising decadent satisfaction.
Simple pantry staples combine effortlessly to produce this irresistible dessert.
Beginners and seasoned bakers alike will find joy in this straightforward recipe.
Prepare to fall in love with every single bite.
What Makes Nigella Chocolate Yogurt Cake Amazing
Everything You Need For Nigella Chocolate Yogurt Cake
Wet Ingredients:Dry Ingredients:Spice and Seasoning:How To Bake Nigella Chocolate Yogurt Cake

Step 1: Warm Up the Oven
Get your oven ready by heating it to 350°F (175°C). Prepare a 9-inch round cake pan by lightly greasing the sides and bottom, then line it with parchment paper for easy cake removal.
Step 2: Blend Wet Ingredients
In a spacious mixing bowl, whisk together:Blend these ingredients until they form a smooth, well-combined mixture.
Step 3: Mix Dry Ingredients
In a separate bowl, combine the dry ingredients:Stir these ingredients thoroughly to ensure even distribution.
Step 4: Combine Mixtures
Gently fold the dry ingredients into the wet mixture. Stir until just blended, being careful not to overmix. The batter should look smooth with no visible flour streaks.
Step 5: Bake the Cake
Pour the batter into the prepared cake pan. Slide the pan into the preheated oven and bake for 50-60 minutes. Check for doneness by inserting a toothpick into the center – it should come out clean when the cake is fully baked.
Step 6: Cool and Release
Allow the cake to rest in the pan for 15 minutes. Then carefully turn it out onto a wire cooling rack. Let the cake cool completely before serving.
Step 7: Serve and Enjoy
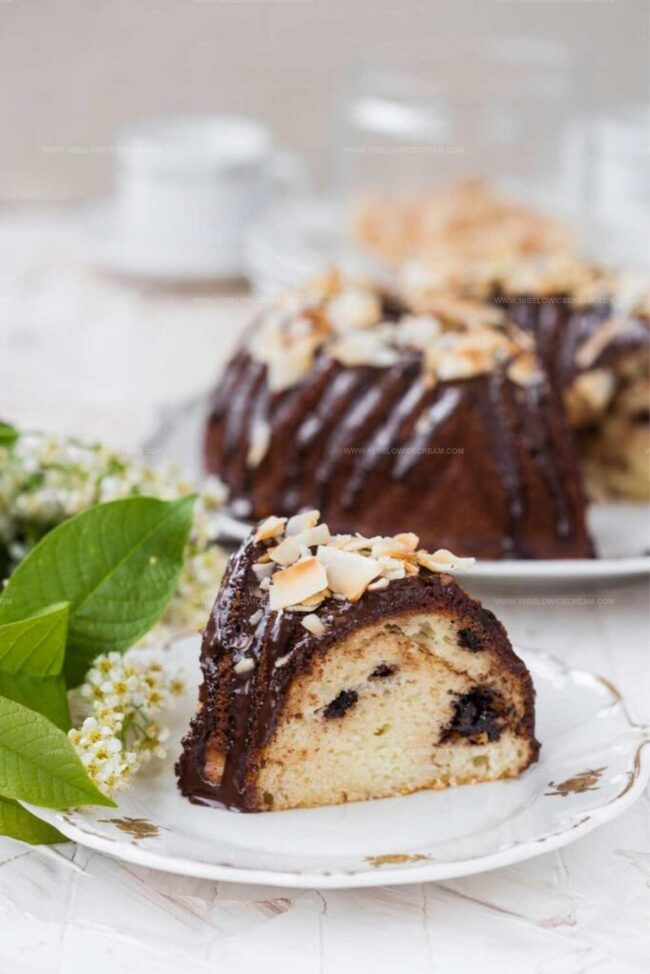
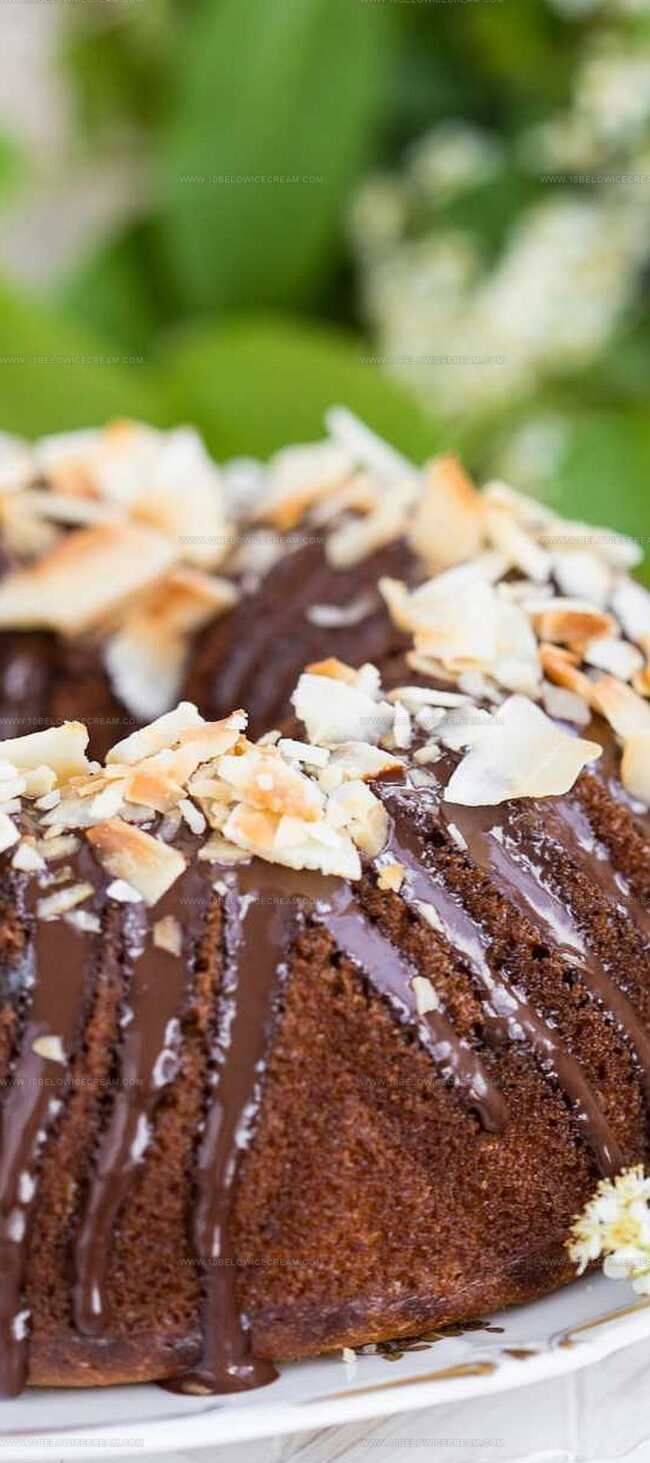
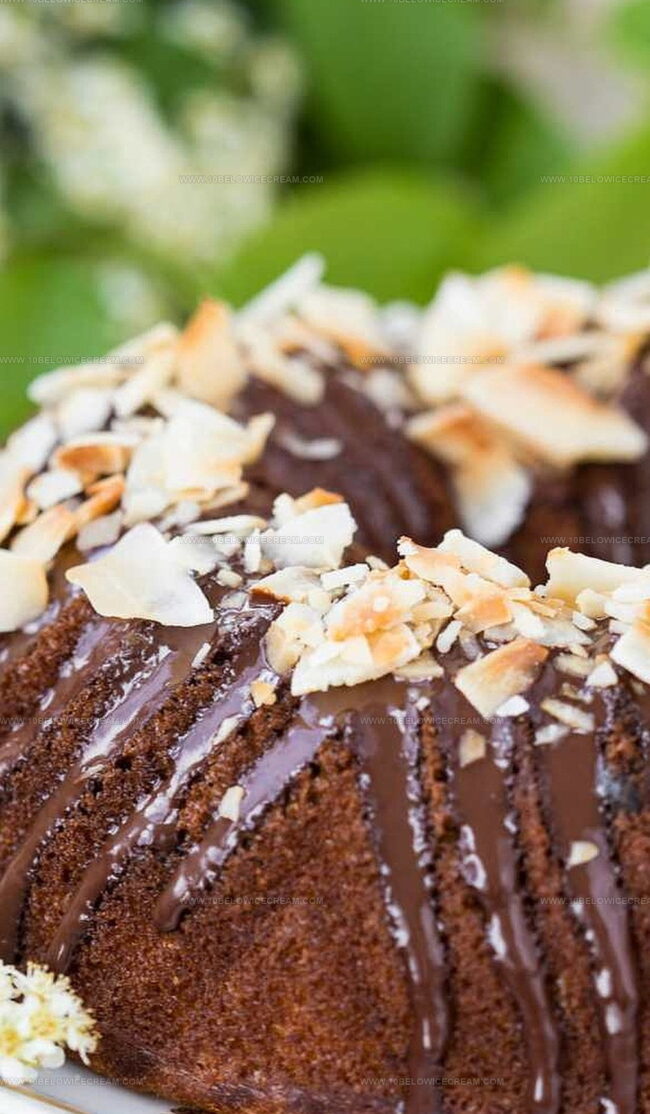
Slice and serve the cake as is, or dress it up with a dollop of whipped cream or a sprinkle of fresh berries for extra delight.
Tips That Help With Nigella Chocolate Yogurt Cake
Different Takes On Nigella Chocolate Yogurt Cake
What Tastes Great With Nigella Chocolate Yogurt Cake
Storing Nigella Chocolate Yogurt Cake The Right Way
Nigella Chocolate Yogurt Cake FAQ Guide
Yes, this chocolate yogurt cake is super simple. You only need basic mixing skills and standard kitchen tools. The recipe uses common ingredients and requires minimal technical baking expertise.
Absolutely! You can substitute coffee with milk, water, or even orange juice. The liquid helps blend ingredients and adds moisture to the cake, so any neutral or complementary flavor works well.
Yogurt makes the cake incredibly moist and tender. It adds a subtle tanginess, reduces the amount of oil needed, and creates a softer texture compared to traditional cake recipes. Greek yogurt works best for extra richness.
Print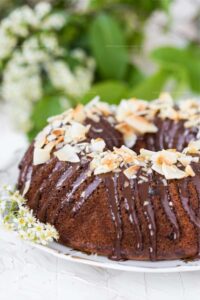
Chocolate Yogurt Cake Recipe
- Total Time: 1 hour 10 minutes
- Yield: 8 1x
Description
Rich chocolate yogurt cake delivers a moist, indulgent dessert that melts in your mouth. Delicate crumb and deep cocoa notes invite you to savor each delightful slice of this irresistible homemade treat.
Ingredients
Main Ingredients:
- 1.5 cups whole wheat flour
- 0.5 cup cocoa powder
- 1.5 cups full-fat yogurt
- 1 cup white sugar
- 3 eggs
- 0.5 cup canola oil
Leavening Agents:
- 2.5 teaspoons baking powder
- 0.75 teaspoon baking soda
- 0.5 teaspoon salt
Flavor Enhancers:
- 2 tablespoons brewed coffee
- 1 teaspoon vanilla extract
- 1 teaspoon ground cinnamon
- 1 pinch ground nutmeg
Instructions
- Prepare baking equipment by greasing a 9-inch round cake pan and lining with parchment paper at 350F (175C).
- Create a smooth wet mixture by whisking yogurt, sugar, vegetable oil, eggs, brewed coffee, and vanilla extract in a large mixing bowl until fully incorporated.
- In a separate bowl, sift together dry ingredients including flour, cocoa powder, baking powder, baking soda, ground cinnamon, salt, and ground nutmeg.
- Gently fold dry ingredients into wet mixture, stirring until just combined to maintain a light cake texture without overmixing.
- Transfer batter into prepared cake pan, ensuring even distribution and smooth surface.
- Bake in preheated oven for 50-60 minutes, checking doneness by inserting a toothpick into center – it should emerge clean with minimal crumbs.
- Allow cake to rest in pan for 15 minutes to stabilize structure, then carefully transfer to wire cooling rack.
- Cool completely to room temperature before serving, optionally garnishing with whipped cream or fresh berries for enhanced presentation.
Notes
- Swap yogurt for dairy-free alternatives like coconut or almond yogurt to make the cake vegan-friendly and accommodate lactose-intolerant guests.
- Reduce sugar by using ripe mashed bananas or unsweetened applesauce for a healthier version that maintains moisture and natural sweetness.
- Add extra texture and nutrition by mixing in chopped nuts, dark chocolate chips, or dried fruit like cranberries to enhance the cake’s flavor profile.
- Check cake doneness early by testing with a toothpick around 45 minutes to prevent overcooking, ensuring a moist and tender crumb that doesn’t dry out.
- Prep Time: 10 minutes
- Cook Time: 50-60 minutes
- Category: Desserts
- Method: Baking
- Cuisine: American
Nutrition
- Serving Size: 8
- Calories: 234
- Sugar: 17 g
- Sodium: 178 mg
- Fat: 11 g
- Saturated Fat: 2 g
- Unsaturated Fat: 9 g
- Trans Fat: 0 g
- Carbohydrates: 27 g
- Fiber: 3 g
- Protein: 6 g
- Cholesterol: 50 mg
Jackson Reid
Founder & Recipe Developer
Expertise
Education
Holyoke Community College – HCC-MGM Culinary Arts Institute
Certificate in Culinary Arts
Focus: Farm-to-table cuisine, sustainable cooking practices, and hands-on kitchen training
Jackson’s love for cooking began one dish at a time. After earning his Culinary Arts Certificate from Holyoke Community College’s HCC-MGM Culinary Arts Institute, he focused on what mattered most: creating recipes that are simple to follow and full of flavor.
At 10 Below Ice Cream, Jackson brings together global influences and a less-is-more approach. His recipes reflect his belief that good food doesn’t need to be complicated; it just needs to make sense, taste great, and feel right.
When he’s not testing ingredients or adjusting seasonings, you’ll find him hiking near Asheville, exploring local markets, or chasing the best light for food photos.