
Ultimate Chocolate Chip Caramel Bars Recipe That Melts Hearts
Sweet memories often bubble up when crafting delectable chocolate chip caramel bars that melt hearts instantly.
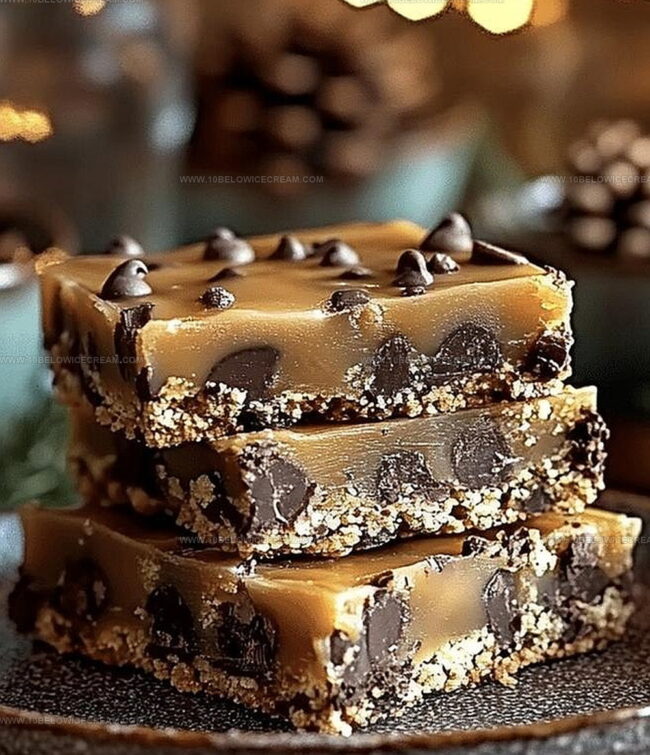
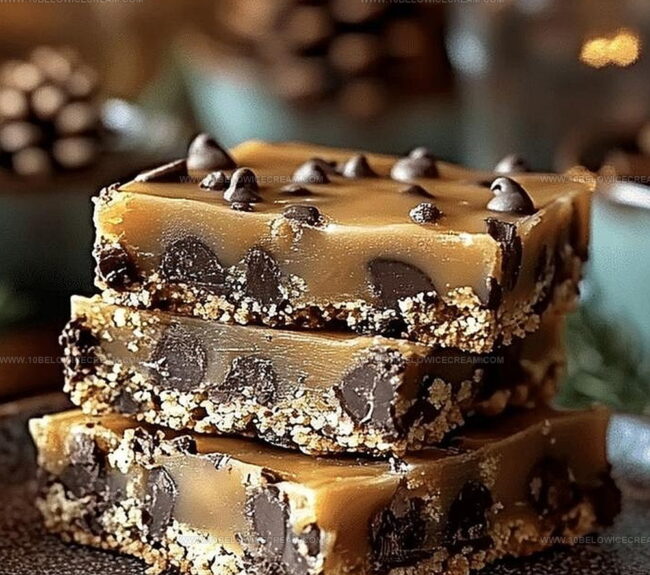
Layers of gooey caramel intertwine with rich chocolate morsels, creating a dessert that whispers comfort.
Crisp edges and soft centers promise an irresistible experience for anyone seeking indulgence.
Baking these treats brings warmth to kitchen counters and smiles to faces.
Chocolate lovers will appreciate the delicate balance between sweet caramel and classic chip flavors.
Unexpected textures dance across your palate with each carefully prepared bite.
You simply must try this decadent recipe that turns ordinary moments into spectacular culinary celebrations.
What Makes Chocolate Chip Caramel Bars So Tasty
What Goes Into Chocolate Chip Caramel Bars
For the Base:For the Wet Ingredients:For the Filling and Topping:Simple Steps For Chocolate Chip Caramel Bars
Step 1: Warm Up The Oven
Crank the oven to a cozy 350°F and line a 9×13-inch baking pan with parchment paper, letting it hang over the edges for super easy bar removal later.
Step 2: Mix Dry Ingredients
Grab a medium bowl and whisk together flour, baking soda, and salt until they’re perfectly blended and look like a uniform powdery mixture.
Step 3: Cream Butter And Sugar
In a large mixing bowl, beat softened butter and brown sugar until they transform into a fluffy, light cloud-like consistency with zero sugar crystals remaining.
Step 4: Add Egg Magic
Crack eggs into the butter mixture one at a time, mixing thoroughly after each addition. Splash in vanilla extract and blend everything until smooth.
Step 5: Combine Wet And Dry
Gently fold dry ingredients into the wet mixture, stirring carefully until a soft, consistent dough forms without overmixing.
Step 6: Prepare First Dough Layer
Set aside about one-third of the dough for topping. Press the remaining dough evenly into the prepared baking pan, creating a solid foundation.
Step 7: Sprinkle Chocolate Base
Scatter chocolate chips across the dough layer, ensuring an even distribution of chocolatey goodness.
Step 8: Drizzle Caramel Sauce
Pour caramel sauce generously over the chocolate chips, making sure every inch gets a delicious caramel coating.
Step 9: Add Caramel Chunks
Strategically place caramel chunks across the sauce layer to create unexpected bursts of sweet texture.
Step 10: Create Crumbly Topping
Crumble the reserved dough over the caramel layer, making a rustic top that lets peek glimpses of the gooey caramel underneath.
Step 11: Bake To Perfection
Slide the pan into the oven and bake for 25-30 minutes until the top turns a beautiful golden brown with crispy edges.
Step 12: Cool And Set
Remove from oven and let the bars cool completely in the pan. Use the parchment paper overhang to lift out the entire batch.
Step 13: Slice And Serve
Cut into squares and serve at room temperature for the ultimate caramel and chocolate experience that’ll make taste buds dance.
Smart Tips For Chocolate Chip Caramel Bars
Different Takes On Chocolate Chip Caramel Bars
Tasty Pairings For Chocolate Chip Caramel Bars
Best Way To Store Chocolate Chip Caramel Bars
Your Questions About Chocolate Chip Caramel Bars Answered
Soft, high-quality caramel sauce and thick caramel chunks create the best flavor and texture. Homemade or premium store-bought brands provide rich, deep caramel notes.
Yes, you can replace brown sugar with white sugar, use margarine instead of butter, or swap chocolate chip varieties. Ensure ingredient measurements remain consistent.
Look for a golden-brown top with slightly crisp edges. The center should appear set but still slightly soft. A toothpick inserted near the center will come out with a few moist crumbs.
Print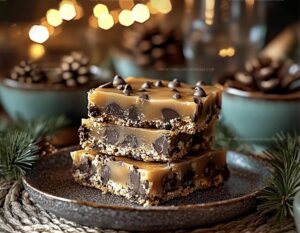
Chocolate Chip Caramel Bars Recipe
- Total Time: 50 minutes
- Yield: 12 1x
Description
Sweet layers of buttery caramel and rich chocolate meld together in these irresistible chocolate chip caramel bars. Crisp edges and gooey centers promise delightful indulgence that will make dessert lovers swoon and crave another bite.
Ingredients
Dry Ingredients:
- 2 cups all-purpose flour
- 1 tsp baking soda
- 1/2 tsp salt
Chocolate and Caramel Ingredients:
- 2 cups chocolate chips
- 1 cup caramel sauce
- 1/2 cup caramel chunks
Wet Ingredients:
- 1 cup unsalted butter
- 1 cup brown sugar
- 2 large eggs
- 1 tsp vanilla extract
Instructions
- Preheat the oven to 350°F and line a 9×13-inch baking pan with parchment paper, allowing slight overhang for easy removal.
- Whisk together flour, baking soda, and salt in a medium bowl, creating a uniform dry mixture.
- Cream softened butter and brown sugar in a large mixing bowl until light and fluffy, ensuring no sugar granules remain.
- Incorporate eggs one at a time into the butter mixture, mixing thoroughly after each addition, then blend in vanilla extract.
- Gradually fold the dry ingredients into the wet mixture, stirring until a smooth, consistent dough forms.
- Reserve approximately 1/3 of the dough for the top layer, pressing the remaining dough evenly into the prepared baking pan.
- Distribute chocolate chips across the base layer, creating an even chocolate foundation.
- Drizzle caramel sauce generously over the chocolate chips, ensuring complete coverage.
- Sprinkle caramel chunks strategically across the caramel sauce layer for added texture.
- Crumble the reserved dough over the caramel layer, creating a rustic, uneven top that allows glimpses of the caramel underneath.
- Bake for 25-30 minutes, or until the top turns golden brown and the edges appear slightly crisp.
- Remove from oven and allow to cool completely in the pan before lifting out using parchment paper.
- Slice into squares, serving at room temperature for optimal gooey caramel and chocolate experience.
Notes
- Chill the reserved dough for 15-20 minutes before crumbling to ensure a more defined, crumbly texture on top.
- For a gluten-free version, substitute all-purpose flour with a 1:1 gluten-free baking blend, maintaining the same measurements.
- Enhance the caramel flavor by using dark brown sugar instead of light brown sugar, which adds deeper, more complex sweetness.
- Prevent caramel from burning by ensuring an even drizzle and avoiding pooling in any single area of the bar.
- Prep Time: 20 minutes
- Cook Time: 25-30 minutes
- Category: Desserts, Snacks
- Method: Baking
- Cuisine: American
Nutrition
- Serving Size: 12
- Calories: 384
- Sugar: 22g
- Sodium: 120mg
- Fat: 22g
- Saturated Fat: 13g
- Unsaturated Fat: 9g
- Trans Fat: 0g
- Carbohydrates: 44g
- Fiber: 1g
- Protein: 3g
- Cholesterol: 50mg
Jackson Reid
Founder & Recipe Developer
Expertise
Education
Holyoke Community College – HCC-MGM Culinary Arts Institute
Certificate in Culinary Arts
Focus: Farm-to-table cuisine, sustainable cooking practices, and hands-on kitchen training
Jackson’s love for cooking began one dish at a time. After earning his Culinary Arts Certificate from Holyoke Community College’s HCC-MGM Culinary Arts Institute, he focused on what mattered most: creating recipes that are simple to follow and full of flavor.
At 10 Below Ice Cream, Jackson brings together global influences and a less-is-more approach. His recipes reflect his belief that good food doesn’t need to be complicated; it just needs to make sense, taste great, and feel right.
When he’s not testing ingredients or adjusting seasonings, you’ll find him hiking near Asheville, exploring local markets, or chasing the best light for food photos.