
The Fluffiest White Bread Recipe for Homemade Goodness
Crafting a delightful white bread recipe can transport you to a world of warm, comforting aromas wafting through your kitchen.
Soft, pillowy slices promise pure satisfaction with every bite.
Baking becomes an art form when you understand the delicate balance of ingredients.
Simple techniques unlock the secret to creating perfectly golden loaves that rival artisan bakeries.
Kneading dough connects you to generations of home cooks who have cherished this timeless tradition.
Flour, yeast, and a touch of patience combine to create magic on your countertop.
Let’s embark on a delicious journey that will fill your home with irresistible freshly baked goodness.
Why Mary Berry White Bread Recipe Works Every Time
Everything You Need For Mary Berry White Bread Recipe
Yeast Base:Dry Ingredients:Wet Ingredients:Simple Steps To Make Mary Berry White Bread Recipe
Step 1: Activate the Yeast
Combine warm water with sugar or honey in a bowl. Sprinkle yeast over the mixture and let it sit until it becomes frothy and bubbly, which signals the yeast is alive and ready to work.
Step 2: Create the Dough Base
Ingredients:Mix these ingredients together, stirring until a soft, shaggy dough begins to form. The mixture will start to come together but won’t be smooth yet.
Step 3: Develop the Dough Consistency
Continue adding flour gradually, mixing until the dough pulls away from the sides of the bowl and becomes less sticky. The goal is a smooth, elastic texture that’s not too dry or too wet.
Step 4: Knead the Dough
Work the dough either by machine or by hand. If using a machine, knead for 4-5 minutes. If kneading manually, spend 8-10 minutes stretching and folding the dough to develop gluten and create a smooth, springy texture.
Step 5: First Rising Period
Place the dough in a greased bowl, cover with a clean kitchen towel. Let it rest in a warm spot until the volume doubles, which typically takes about an hour.
Step 6: Shape the Loaves
Punch down the risen dough and divide it into two portions. Gently shape each portion into a loaf and place them in greased bread pans.
Step 7: Second Rising Stage
Allow the shaped loaves to rise again, waiting until the dough rises above the pan edges, creating a beautiful dome-like appearance.
Step 8: Bake to Golden Perfection
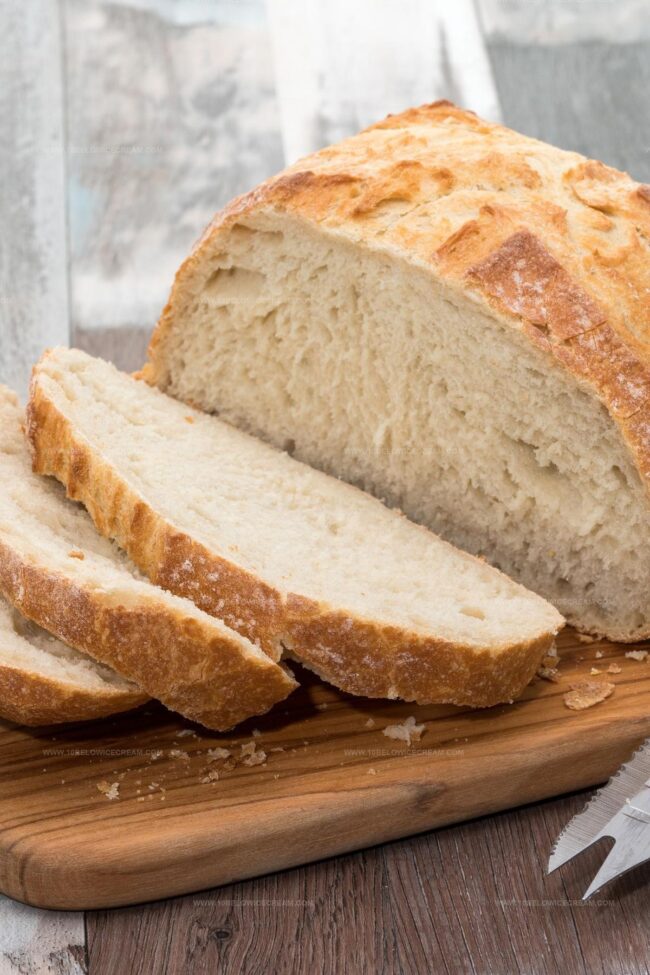
Preheat the oven to 350°F. Bake the loaves for 30-33 minutes until they turn a deep golden brown and sound hollow when tapped on the bottom.
Step 9: Cool and Finish
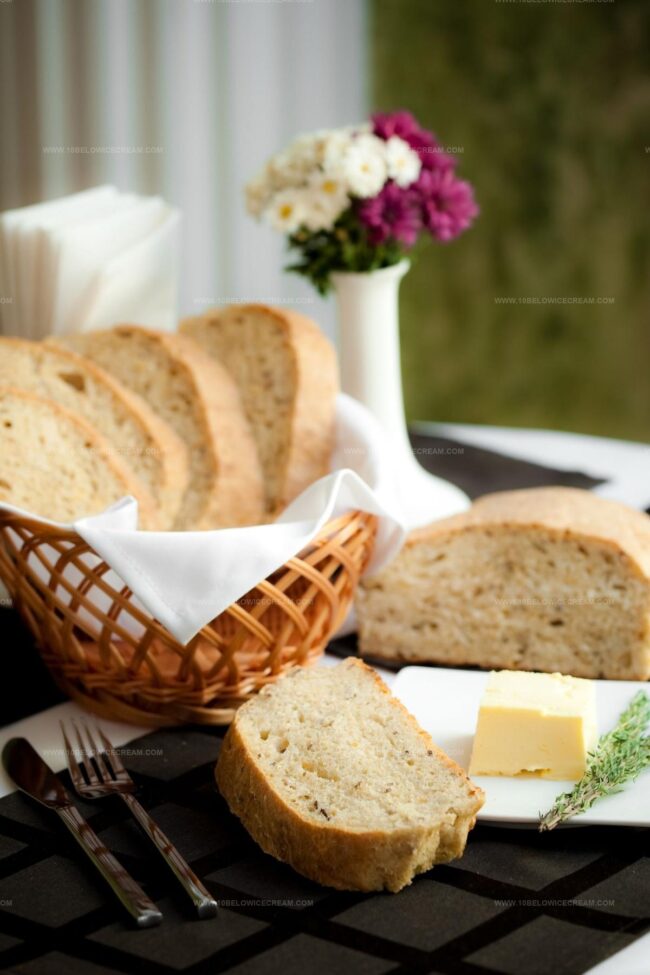
Transfer the baked bread to wire racks. Optional: Brush the warm loaves with melted butter for an extra rich flavor and soft crust.
Helpful Notes For Mary Berry White Bread Recipe
Easy Twists For Mary Berry White Bread Recipe
What Goes Well With Mary Berry White Bread Recipe
How To Store Mary Berry White Bread Recipe Safely
Common Questions About Mary Berry White Bread Recipe
Dissolve yeast in warm water (110-115°F). If it becomes foamy and bubbly within 5-10 minutes, your yeast is alive and ready to use.
Likely reasons include not kneading enough, using cold ingredients, or not allowing proper rising time. Ensure warm environment and full kneading process.
Yes, but replace only 50% of white flour initially. Whole wheat requires more liquid and can make bread heavier, so start with a mix.
Print
White Bread Recipe
- Total Time: 50-58 minutes
- Yield: 8 1x
Description
Homemade white bread brings comfort and warmth to kitchen tables across generations. Simple ingredients blend into a golden loaf that fills homes with irresistible aromas you’ll savor slice by slice.
Ingredients
Main Ingredients:
- 4 5 1/2 cups all-purpose flour or bread flour
- 2 cups warm water (105–115 degrees)
Leavening and Sweetening:
- 1 tablespoon active dry yeast
- 1/4 cup honey or sugar
Seasoning and Binding:
- 2 teaspoons salt
- 2 tablespoons canola or vegetable oil
Instructions
- Activate the yeast by combining it with lukewarm water and a touch of sweetener, allowing it to bloom and become frothy for about 5-10 minutes.
- Incorporate salt and oil into the yeast mixture, then gradually fold in most of the flour to create a shaggy dough.
- Continue adding flour incrementally, mixing until the dough begins to pull away from the sides of the bowl and forms a cohesive mass.
- Transfer the dough to a clean surface and knead thoroughly, developing gluten by pushing, folding, and turning the dough for 8-10 minutes until smooth and elastic.
- Place the kneaded dough in a lightly oiled bowl, cover with a damp cloth, and let rise in a warm, draft-free area until it doubles in volume, approximately 1-1.5 hours.
- Punch down the risen dough to release air bubbles, then divide and shape into two symmetrical loaves.
- Settle the shaped loaves into greased bread pans, cover, and allow for a second rise until the dough crests slightly above the pan edges, about 45-60 minutes.
- Preheat the oven to 350°F and bake the loaves for 30-33 minutes, achieving a golden-brown crust and hollow sound when tapped.
- Remove from oven, immediately transfer to wire cooling racks, and optionally brush the warm crust with melted butter for added richness and shine.
Notes
- Activate dry yeast in precisely warm water between 100-110°F to ensure proper fermentation without killing the microorganisms.
- Use bread flour for higher protein content, creating better gluten development and a more structured, chewy texture.
- Allow sufficient resting time during rises to develop deep, complex flavor profiles and improve bread’s overall texture.
- Consider replacing some all-purpose flour with whole wheat or rye flour for added nutritional value and nutty undertones.
- Prep Time: 20-25 minutes
- Cook Time: 30-33 minutes
- Category: Breakfast, Lunch, Dinner, Snacks
- Method: Baking
- Cuisine: Western
Nutrition
- Serving Size: 8
- Calories: 150
- Sugar: 3 g
- Sodium: 150 mg
- Fat: 2 g
- Saturated Fat: 0.3 g
- Unsaturated Fat: 1.7 g
- Trans Fat: 0 g
- Carbohydrates: 29 g
- Fiber: 1 g
- Protein: 4 g
- Cholesterol: 0 mg
Jackson Reid
Founder & Recipe Developer
Expertise
Education
Holyoke Community College – HCC-MGM Culinary Arts Institute
Certificate in Culinary Arts
Focus: Farm-to-table cuisine, sustainable cooking practices, and hands-on kitchen training
Jackson’s love for cooking began one dish at a time. After earning his Culinary Arts Certificate from Holyoke Community College’s HCC-MGM Culinary Arts Institute, he focused on what mattered most: creating recipes that are simple to follow and full of flavor.
At 10 Below Ice Cream, Jackson brings together global influences and a less-is-more approach. His recipes reflect his belief that good food doesn’t need to be complicated; it just needs to make sense, taste great, and feel right.
When he’s not testing ingredients or adjusting seasonings, you’ll find him hiking near Asheville, exploring local markets, or chasing the best light for food photos.