
Best Wendy’s Chili Recipe: Cozy Comfort in a Bowl
Warm, hearty wendy’s chili recipes bring comfort straight to your kitchen table.
Memories of classic fast-food flavors dance through every spoonful of this homemade version.
Authentic ingredients combine in a simple cooking process that feels like culinary magic.
Meat lovers and budget-conscious cooks appreciate how easily this dish comes together.
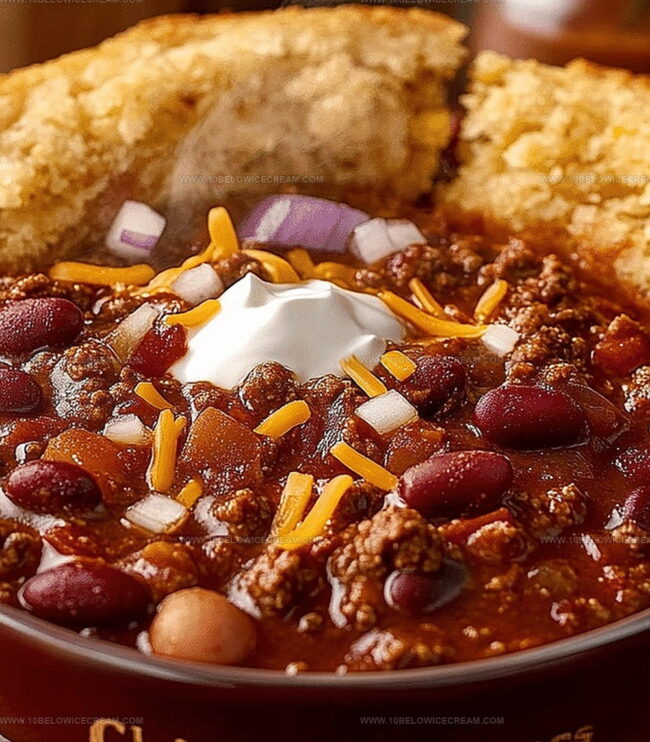
Kidney beans and ground beef create a robust foundation for deep, satisfying flavors.
Subtle spices whisper promises of deliciousness waiting to be discovered.
You might want to double the batch because everyone will ask for seconds.
Why Wendy’s Chili Recipe Is A Comfort Classic

Ingredients For Wendy’s Chili Recipe
For the Meat Base:For the Vegetables:For the Beans and Tomatoes:For the Liquid:For the Seasonings:Optional Garnishes:How To Cook Wendy’s Chili Recipe
Step 1: Sizzle and Crumble Ground Meat
Heat a large skillet over medium-high and cook ground beef until it breaks into tiny pieces with no pink visible. This process takes about 8-10 minutes, creating a delicious meaty base for your chili.
Step 2: Drain and Transfer Meat
Remove excess fat from the cooked meat and transfer it into a large cooking pot, preparing for the next flavor-packed steps.
Step 3: Prep Veggie Trio
Chop these vegetables with care:Dice everything into small, uniform pieces to ensure even cooking and distribution.
Step 4: Sauté Vegetable Medley
Use the same skillet from the meat to sauté the chopped vegetables. Let them soften and release their incredible aromas for about 5 minutes, creating a flavor foundation.
Step 5: Combine Meat and Vegetables
Add the sautéed vegetables to the pot with the browned meat, building layers of deliciousness.
Step 6: Create Chili Base
Pour these ingredients into the pot:Stir everything thoroughly to create a harmonious mixture.
Step 7: Spice It Up
Sprinkle these seasonings over the chili:Mix well to distribute flavors evenly throughout the pot.
Step 8: Simmer and Develop Flavors
Bring the chili to a gentle boil, then reduce heat. Let it simmer uncovered for 2-3 hours, stirring occasionally. This slow cooking process allows flavors to meld and intensify.
Step 9: Taste and Perfect
Sample the chili and adjust seasonings as needed. The goal is a rich, balanced flavor that makes taste buds dance.
Step 10: Serve and Garnish
Ladle the hot chili into bowls. Optional toppings include:Enjoy your hearty, homemade chili!
Helpful Tips For Wendy’s Chili Recipe
Tasty Ideas For Wendy’s Chili Recipe
What Goes Well With Wendy’s Chili Recipe
How To Store Wendy’s Chili Recipe
Common Questions About Wendy’s Chili Recipe
Ground beef and ground chuck each bring unique textures and fat content, creating a richer, more complex flavor profile in the chili that enhances overall taste and mouthfeel.
Reduce or eliminate the cayenne pepper, and use mild chili powder. You can also add a dollop of sour cream or some shredded cheese to help cool down the heat.
Long simmering allows the flavors to develop and intensify, breaking down the meat and creating a more tender, deeply seasoned dish. If short on time, you can simmer for at least 45-60 minutes.
Print
Wendys Chili Recipe
- Total Time: 3 hours 15 minutes
- Yield: 8 1x
Description
Wendy’s chili recipe brings hearty comfort straight from fast-food kitchens to home cooking. Home chefs can recreate this classic American comfort dish with ground beef, beans, and signature spices that deliver warm, satisfying flavors you’ll crave.
Ingredients
Meat:
- 2 lbs ground beef
- 1 lb ground chuck
Vegetables:
- 1 large onion
- 2 green bell peppers
- 3 celery stalks
- 2 cloves garlic
Liquid and Seasoning:
- 1 can (15 oz/425 g) kidney beans
- 1 can (15 oz/425 g) pinto beans
- 1 can (14.5 oz/411 g) diced tomatoes
- 2 cups (480 ml) tomato sauce
- 1 cup (240 ml) water
- 2 tbsp chili powder
- 1 tbsp ground cumin
- 1 tsp salt
- 1/2 tsp black pepper
- 1/4 tsp cayenne pepper
Instructions
- Brown the ground beef and ground chuck in a large skillet over medium-high heat, breaking the meat into small crumbles until no pink remains, approximately 8-10 minutes.
- Drain excess fat from the meat and transfer to a large cooking pot.
- Finely dice the onion, green bell peppers, and celery, then mince the garlic cloves.
- Sauté the chopped vegetables in the same skillet used for the meat, allowing them to soften and release their aromatic flavors for about 5 minutes.
- Add the sautéed vegetables to the pot with the browned meat.
- Pour in the kidney beans, pinto beans, diced tomatoes, tomato sauce, and water, stirring to combine all ingredients thoroughly.
- Sprinkle chili powder, ground cumin, salt, black pepper, and cayenne pepper over the mixture, mixing well to distribute the seasonings evenly.
- Bring the chili to a gentle boil, then reduce heat and simmer uncovered for 2-3 hours, stirring occasionally to prevent sticking and allow flavors to meld together.
- Taste and adjust seasonings if needed, ensuring a rich and balanced flavor profile.
- Serve hot, optionally garnishing with shredded cheese, sour cream, or chopped green onions.
Notes
- Opt for lean ground beef to reduce excess fat and create a healthier chili version.
- Toast spices briefly in the skillet before adding to enhance their deep, complex flavors and aromatic intensity.
- Let the chili rest overnight in the refrigerator for even more developed and concentrated taste profiles.
- Customize heat levels by adjusting cayenne pepper or adding diced jalapeños for those who enjoy spicier dishes.
- Prep Time: 15 minutes
- Cook Time: 2-3 hours
- Category: Lunch, Dinner, Appetizer, Snacks
- Method: Simmering
- Cuisine: American
Nutrition
- Serving Size: 8
- Calories: 380
- Sugar: 6 g
- Sodium: 800 mg
- Fat: 20 g
- Saturated Fat: 8 g
- Unsaturated Fat: 10 g
- Trans Fat: 0 g
- Carbohydrates: 30 g
- Fiber: 8 g
- Protein: 24 g
- Cholesterol: 70 mg
Olivia Brooks
Contributing Writer
Expertise
Education
Culinary Institute of America
Accelerated Culinary Arts Certificate Program
Focus: Culinary fundamentals, nutrition, and healthy cooking technique
Olivia believes good food should feed both the body and the soul. She earned her Accelerated Culinary Arts Certificate from the Culinary Institute of America, where she focused on nutrition and practical cooking techniques that make healthy eating easy.
At 10 Below Ice Cream, Olivia shares single-serving recipes that are fresh, plant-forward, and full of heart. She loves helping people eat better, without stress, strict rules, or sacrificing flavor.
Beyond the kitchen, Olivia spends her time tending her backyard garden, practicing yoga, and discovering hidden gems in Portland’s food scene.