
Homemade Tiffin Recipe: Simple Joy in Every Tasty Bite
A delightful tiffin recipe can turn an ordinary afternoon into a sweet adventure of pure indulgence.
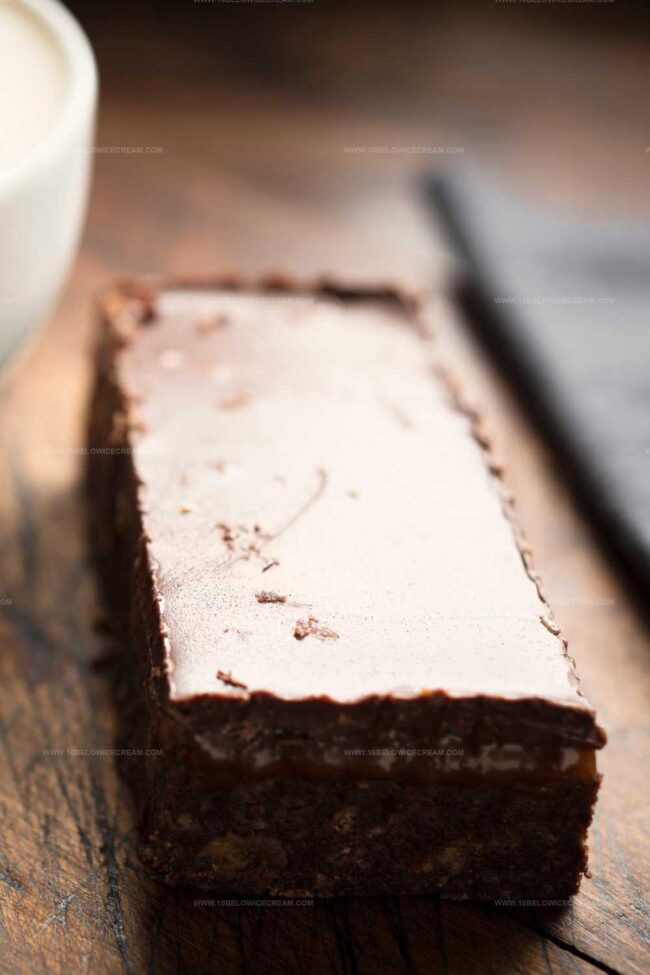
Chocolate and biscuit lovers unite around this classic treat that promises irresistible crunch and rich flavors.
Layers of decadent ingredients come together effortlessly, creating a dessert that feels both nostalgic and exciting.
No complicated techniques or fancy equipment stand between you and this simple delight.
Kids and adults alike will fall in love with the perfect blend of textures and tastes.
Each bite tells a story of comfort and joy, promising to make snack time something special.
Whip up this tempting creation and watch smiles light up the room.
Your FAQ Guide On Mary Berry Tiffin Recipe
Raisins add natural sweetness, chewy texture, and extra flavor to the dessert, making the tiffin more interesting and nutritious.
Yes, you can mix milk and dark chocolate or use white chocolate for a unique flavor combination and personalized touch.
Digestive biscuits or graham crackers are traditional choices, but you can use any crisp, plain cookie that breaks easily and complements the chocolate.
Absolutely! The tiffin is no-bake, requires minimal ingredients, and has simple steps, making it perfect for those new to baking or wanting an easy dessert.
Why Mary Berry Tiffin Recipe Is Worth Trying
What You’ll Need For Mary Berry Tiffin Recipe
Base Ingredients:Cookie Ingredients:Topping Ingredients:Additional Ingredients:Simple Steps For Mary Berry Tiffin Recipe
Step 1: Prepare Baking Dish
Line a medium-sized baking dish with parchment paper, ensuring the paper covers the bottom and sides completely for easy removal later.
Step 2: Create Chocolate Base
Gather ingredients for the base:Combine all ingredients in a large saucepan over low heat. Stir gently until everything melts smoothly and blends into a rich, glossy mixture.
Step 3: Add Crunchy Elements
Mix in cookie pieces and raisins into the melted chocolate base. Stir thoroughly to ensure even distribution of ingredients throughout the mixture.
Step 4: Transfer to Baking Dish
Pour the chocolate mixture into the prepared baking dish. Use a spatula to spread it evenly and create a smooth, flat surface.
Step 5: Prepare Chocolate Topping
Combine milk and dark chocolate in a microwave-safe bowl. Heat in short 15-20 second intervals, stirring between each heating session to prevent burning.
Step 6: Create Smooth Chocolate Topping
Continue microwaving and stirring the chocolate until it becomes completely smooth and glossy. Ensure no lumps remain in the mixture.
Step 7: Cover Base with Chocolate Topping
Carefully pour the melted chocolate over the base, using a spatula to spread it evenly across the entire surface.
Step 8: Chill and Set
Place the baking dish in the refrigerator. Allow the tiffin to set completely, which typically takes 2-3 hours or overnight for best results.
Step 9: Slice and Serve
Once fully set, remove from refrigerator and slice into neat square pieces using a sharp knife. Serve chilled and enjoy your delicious tiffin.
Tips That Help With Mary Berry Tiffin Recipe
Easy Ways To Switch Mary Berry Tiffin Recipe
Pairing Suggestions For Mary Berry Tiffin Recipe
How To Store Mary Berry Tiffin Recipe Safely
Print
Tiffin Recipe
- Total Time: 2 hours 15 minutes
- Yield: 8 1x
Description
Delightful Mumbai-style Tiffin brings street-smart Indian flavors straight to your kitchen. Spicy potato-filled pastries, crisp textures, and aromatic spices combine in this compact meal that promises comfort and excitement with each delicious bite.
Ingredients
Chocolate and Main Ingredients:
- 110g milk chocolate
- 110g dark chocolate
- 225g biscuits, crushed
- 150g butter, cubed, plus extra for the tin
- 6 teaspoons cocoa powder
Sweeteners:
- 3 tablespoons caster sugar
- 3 tablespoons golden syrup
Additional Ingredients:
- 1 handful raisins
Instructions
- Prepare a 15-20 cm baking dish by lining it with parchment paper, ensuring complete coverage of the base and sides.
- In a large saucepan, combine chocolate, butter, sugar, and water over low heat, stirring continuously until completely melted and smooth.
- Remove the chocolate mixture from heat and fold in raisins and broken cookies, ensuring even distribution throughout the mixture.
- Transfer the combined mixture into the prepared baking dish, pressing down gently to create an even layer.
- For the topping, place milk and dark chocolate in a microwave-safe bowl, heating in 15-20 second intervals and stirring between each session.
- Continue microwaving and stirring the chocolate until it reaches a completely smooth, glossy consistency with no lumps.
- Pour the melted chocolate topping evenly over the cookie base, using a spatula to spread it to the edges.
- Refrigerate the tiffin for a minimum of 2 hours or preferably overnight until the chocolate sets completely firm.
- Once fully chilled and hardened, remove from the refrigerator and slice into neat squares using a sharp knife.
Notes
- Choose a non-stick baking dish to prevent sticking and make removal easier.
- Crush cookies into varied sizes for interesting texture and more crumbly mouthfeel.
- Swap traditional cookies with gluten-free alternatives for a celiac-friendly version.
- Experiment with different chocolate types like white or ruby chocolate for unique flavor profiles.
- Prep Time: 10 minutes
- Cook Time: 5 minutes
- Category: Breakfast, Lunch, Snacks
- Method: Baking
- Cuisine: Indian
Nutrition
- Serving Size: 8
- Calories: 379
- Sugar: 25g
- Sodium: 50mg
- Fat: 26g
- Saturated Fat: 16g
- Unsaturated Fat: 8g
- Trans Fat: 0.5g
- Carbohydrates: 34g
- Fiber: 2g
- Protein: 3g
- Cholesterol: 45mg
Jackson Reid
Founder & Recipe Developer
Expertise
Education
Holyoke Community College – HCC-MGM Culinary Arts Institute
Certificate in Culinary Arts
Focus: Farm-to-table cuisine, sustainable cooking practices, and hands-on kitchen training
Jackson’s love for cooking began one dish at a time. After earning his Culinary Arts Certificate from Holyoke Community College’s HCC-MGM Culinary Arts Institute, he focused on what mattered most: creating recipes that are simple to follow and full of flavor.
At 10 Below Ice Cream, Jackson brings together global influences and a less-is-more approach. His recipes reflect his belief that good food doesn’t need to be complicated; it just needs to make sense, taste great, and feel right.
When he’s not testing ingredients or adjusting seasonings, you’ll find him hiking near Asheville, exploring local markets, or chasing the best light for food photos.