Fluffiest Easter Bunny Buns Recipe: A Sweet Spring Treat
Crafting adorable soft and sweet easter bunny buns brings pure delight to your kitchen adventure.
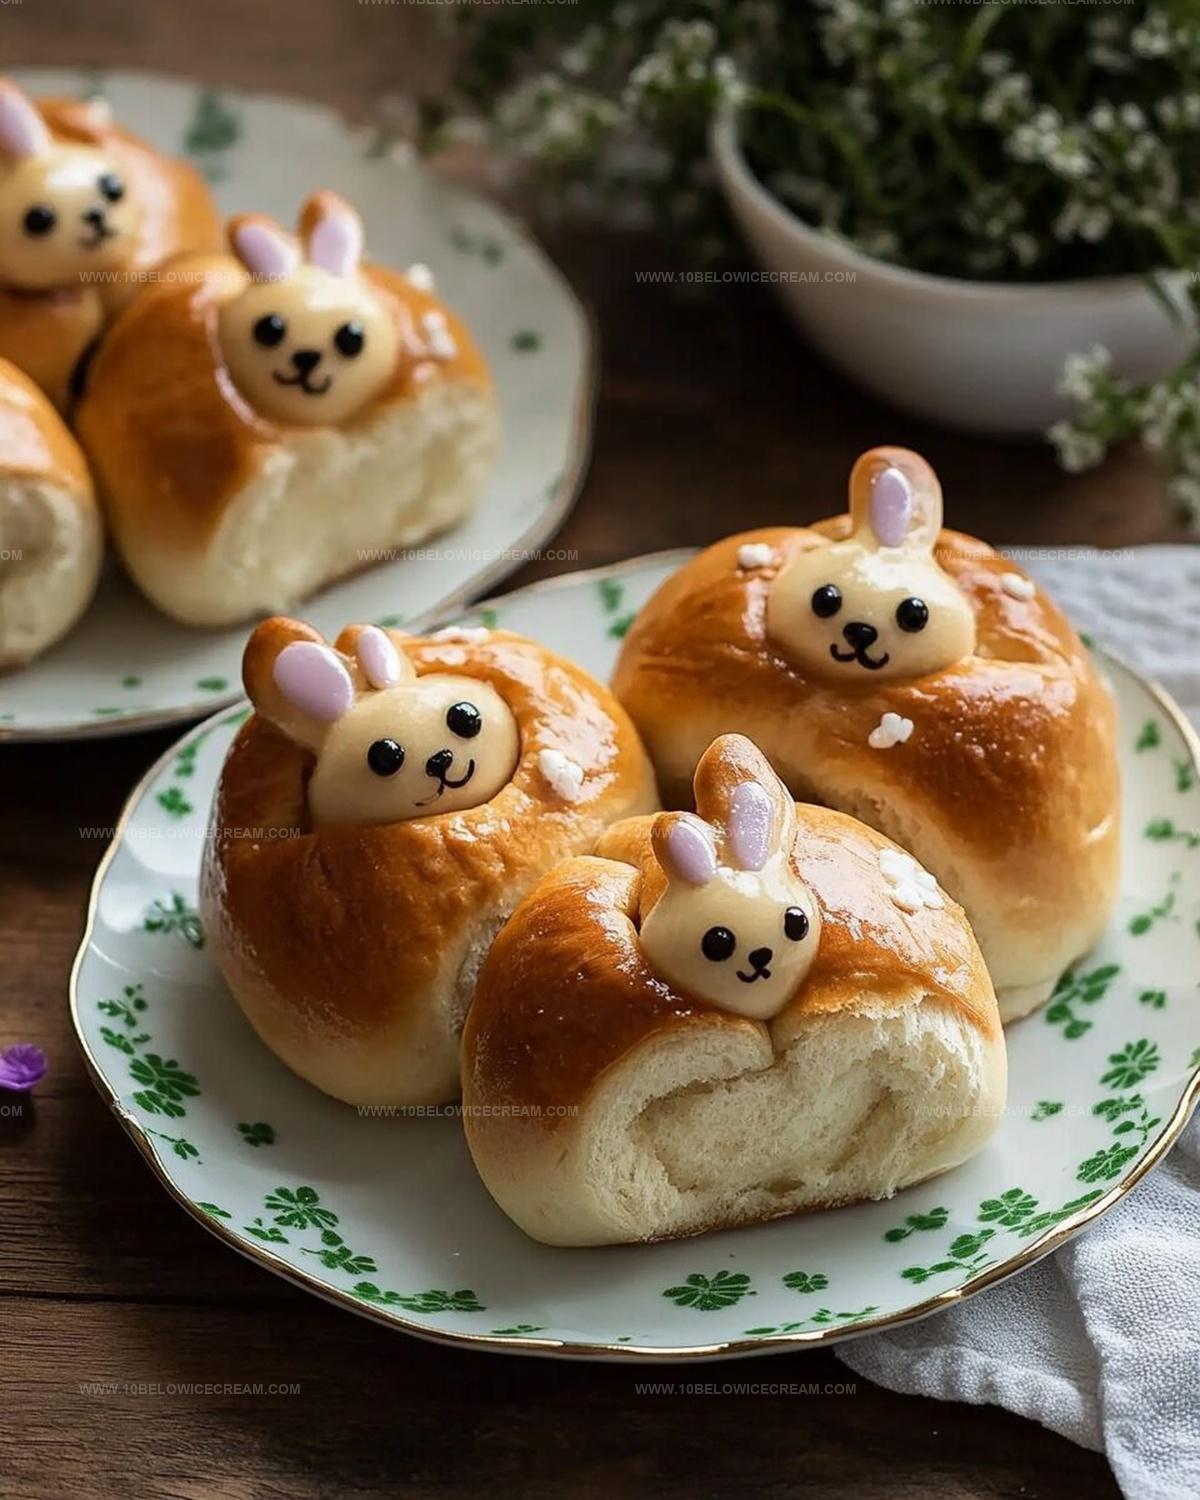
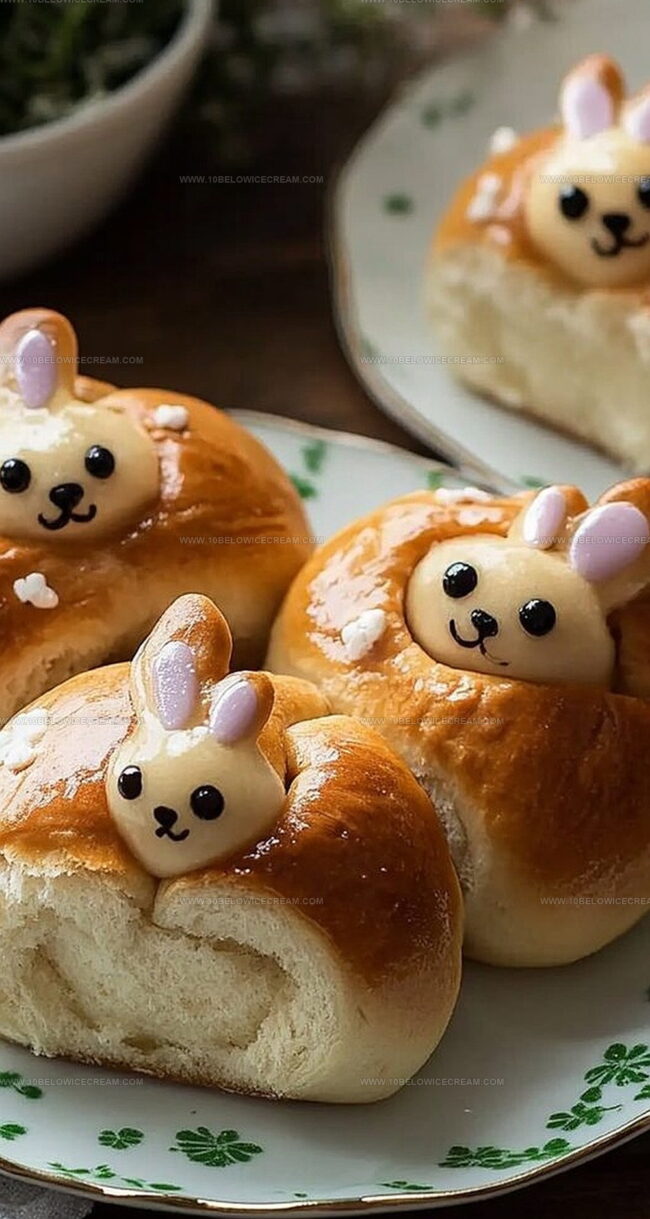
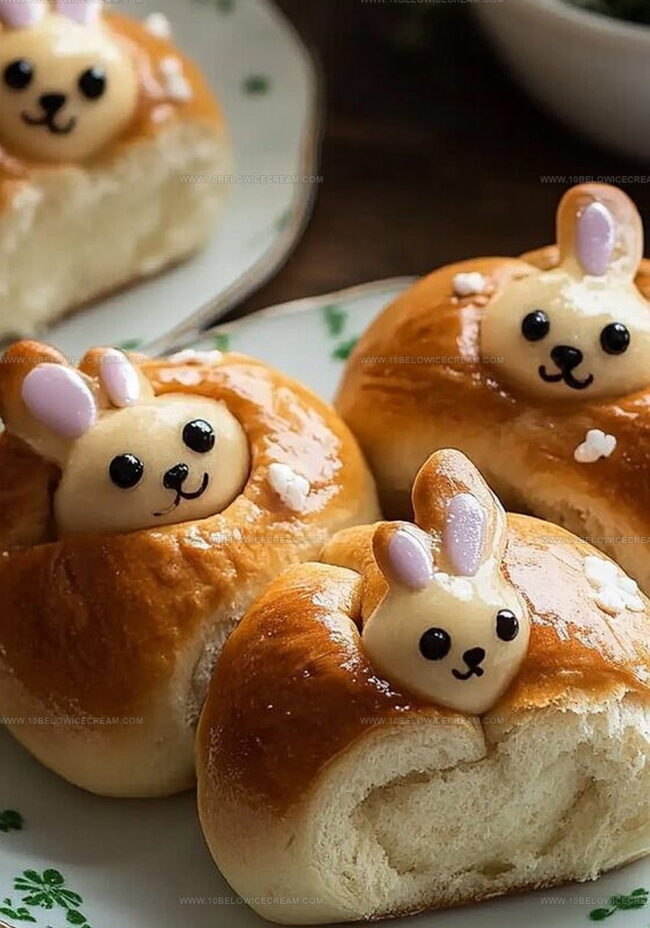
Cute little pastry creatures hop right onto your baking sheet with minimal effort.
Warm memories of childhood celebrations dance through these delicate, flour-dusted creations.
Families adore these playful bread treats that spark joy and imagination.
Delightful bunny shapes emerge from simple dough, inviting everyone to smile.
Baking becomes a magical experience when you transform humble ingredients into charming edible art.
One bite promises to transport you to springtime celebrations filled with wonder and happiness.
Why These Bunny Buns Are a Sweet Spring Favorite
What You’ll Need to Make Bunny Buns
Main Ingredients:Sweeteners and Flavor Enhancers:Finishing and Decoration:Binding and Seasoning:How to Shape and Bake Soft Easter Bunny Buns
Step 1: Activate Yeast Mixture
Grab a small bowl and combine warm milk, sugar, and yeast. Let this magical concoction sit quietly for about 5 minutes until it becomes delightfully bubbly and frothy.
Step 2: Create Dough Base
In a spacious mixing bowl, blend flour and salt. Pour in the activated yeast mixture along with softened butter, a cracked egg, and a splash of vanilla extract.
Stir everything together until a soft, cohesive dough emerges.
Step 3: Knead and Rise
Transfer the dough to a lightly floured surface.
Knead with gentle, rhythmic motions for 5-7 minutes until the dough feels smooth and elastic. Place the dough in a greased bowl, cover with a clean kitchen towel, and let it rise in a warm spot for one hour or until it doubles in size.
Step 4: Shape Bunny Bunnies
Preheat the oven to 350°F. Gently deflate the risen dough and divide it into 6 equal portions.
Roll each piece into an oval shape, then skillfully craft bunny heads and ears by cutting and shaping the dough with playful precision.
Step 5: Prepare for Baking
Arrange the bunny-shaped dough on a parchment-lined baking sheet.
Allow them to rise for an additional 20 minutes, giving them time to become puffy and adorable.
Step 6: Add Finishing Touches
Lovingly brush each bunny with egg yolk to create a gorgeous golden sheen.
Carefully place raisins to form sweet little eyes and a cute nose on each bunny.
Step 7: Bake to Perfection
Slide the baking sheet into the preheated oven.
Bake for 18-20 minutes until the bunnies turn a beautiful golden brown. Remove and let them cool slightly before serving these charming Easter treats.
Bunny Bun Tips for Fluffy and Cute Results
Fun Easter Bunny Bun Styles to Bake
Great Pairings for These Soft Bunny Buns
How to Store Easter Bunny Buns with Care
Bunny Bun FAQs for the Holiday Table
This Easter bunny bun recipe is beginner-friendly and requires basic baking skills. Even novice bakers can successfully create these cute bunny-shaped bread rolls with some patience and careful shaping.
Yes, you can substitute active dry yeast with instant yeast. Just reduce the rising time slightly and add the instant yeast directly to the dry ingredients instead of activating it first in warm milk.
No special tools are required. You can use your hands to shape the dough and a sharp knife or kitchen scissors to cut the ears. Simple techniques and a bit of creativity will help you create adorable bunny shapes.
Print
Soft and Sweet Easter Bunny Buns Recipe
- Total Time: 1 hour 45 minutes
- Yield: 12 1x
Description
Delightful Easter Bunny Buns bring whimsical charm to spring celebrations, combining delicate pastry with playful bunny shapes. Families will adore these adorable treats that blend traditional baking skills with festive creativity, making holiday mornings extra special.
Ingredients
Flour and Bread Ingredients:
- 2 cups (480 milliliters) all-purpose flour
- 1 package (2 1/4 teaspoons / 7 grams) active dry yeast
Dairy and Sweeteners:
- 1/2 cup (120 milliliters) warm milk
- 1/4 cup (50 grams) sugar
- 1/4 cup (57 grams) unsalted butter, softened
- 1 large egg
- 1 egg yolk
Additional Ingredients:
- 1/4 teaspoon salt
- 1/2 teaspoon vanilla extract
- 1/4 cup (40 grams) raisins
Instructions
- Activate yeast by dissolving it in warm milk with sugar, allowing the mixture to become frothy for approximately 5 minutes.
- Create a soft dough by combining flour and salt with the activated yeast, incorporating butter, egg, and vanilla extract until a cohesive mixture forms.
- Knead the dough thoroughly on a lightly dusted surface for 5-7 minutes, achieving a smooth and elastic consistency.
- Transfer the dough to a greased container, cover, and allow it to rise in a warm environment until its volume doubles, roughly 1 hour.
- Prepare the oven by heating to 350°F and gently deflate the risen dough, dividing it into 6 equal segments.
- Transform each dough portion into an oval shape, carefully crafting bunny silhouettes by strategically cutting and shaping ears and facial features.
- Arrange the bunny-shaped dough on a parchment-lined baking sheet, permitting an additional 20-minute proofing period.
- Enhance the bunnies’ appearance by gently brushing with egg yolk and placing raisins to represent eyes and nose.
- Bake for 18-20 minutes until the bunnies achieve a rich golden-brown color, then allow a brief cooling period before serving.
Notes
- Activate yeast properly by ensuring milk temperature is warm (110-115°F), not hot, to prevent killing the active cultures.
- Knead dough thoroughly to develop gluten, creating soft and stretchy bunny buns with perfect texture.
- Use room temperature ingredients for consistent mixing and better dough development.
- Shape bunnies gently to maintain air pockets, ensuring light and fluffy Easter treats.
- Prep Time: 1 hour 25 minutes
- Cook Time: 18-20 minutes
- Category: Breakfast, Snacks, Desserts
- Method: Baking
- Cuisine: American
Nutrition
- Serving Size: 12
- Calories: 159
- Sugar: 6 g
- Sodium: 62 mg
- Fat: 5 g
- Saturated Fat: 3 g
- Unsaturated Fat: 2 g
- Trans Fat: 0 g
- Carbohydrates: 25 g
- Fiber: 1 g
- Protein: 3 g
- Cholesterol: 32 mg
Olivia Brooks
Contributing Writer
Expertise
Education
Culinary Institute of America
Accelerated Culinary Arts Certificate Program
Focus: Culinary fundamentals, nutrition, and healthy cooking technique
Olivia believes good food should feed both the body and the soul. She earned her Accelerated Culinary Arts Certificate from the Culinary Institute of America, where she focused on nutrition and practical cooking techniques that make healthy eating easy.
At 10 Below Ice Cream, Olivia shares single-serving recipes that are fresh, plant-forward, and full of heart. She loves helping people eat better, without stress, strict rules, or sacrificing flavor.
Beyond the kitchen, Olivia spends her time tending her backyard garden, practicing yoga, and discovering hidden gems in Portland’s food scene.