Zesty Pepperoni & Cheese Rice Balls Recipe That Kids Adore
Crafting delectable rice balls with cheese and pepperoni brings pure culinary joy to your kitchen adventure.
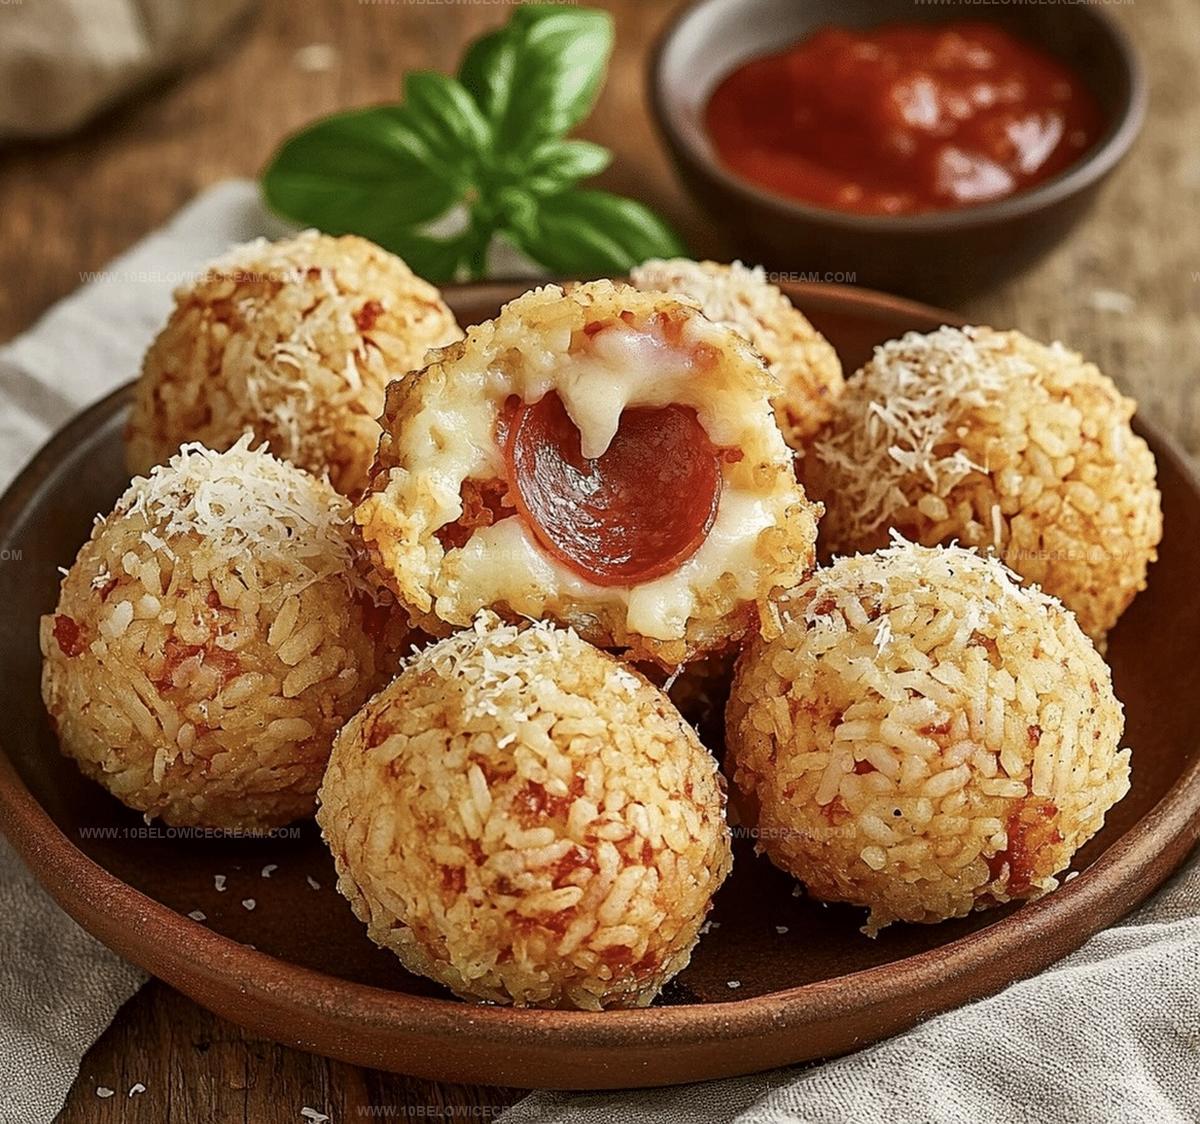
Crispy exteriors hide molten centers bursting with savory flavors that dance across taste buds.
Comfort meets creativity in these bite-sized delights that promise to surprise and satisfy.
Perfectly golden-brown spheres emerge from hot oil, revealing melted cheese and spicy pepperoni within their tender embrace.
Home cooks can master this simple yet impressive appetizer with just a few basic ingredients and some playful technique.
Mediterranean and Italian influences merge seamlessly in these irresistible morsels that spark conversation and delight.
You’ll want to gather friends around and watch their faces light up as they bite into these crispy, cheesy treasures.
Why Rice Balls with Cheese & Pepperoni Are So Fun
Everything You Need For Rice Balls with Cheese & Pepperoni
For the Base:For the Binding:For the Seasoning and Cooking:How To Make Rice Balls with Cheese & Pepperoni
Step 1: Prepare Cooled Rice Base
Cook rice following package directions. Spread rice on a large tray, allowing it to reach room temperature. Gently separate grains to prevent clumping.
Step 2: Mix Rice With Savory Elements
In a large mixing bowl, combine:Fold ingredients gently to ensure even distribution.
Step 3: Create Binding Mixture
In a separate bowl, whisk eggs. Add:Mix thoroughly to form a cohesive binding mixture.
Step 4: Blend Rice and Egg Mixtures
Pour egg mixture into rice combination. Blend completely until ingredients stick together and can be easily shaped.
Step 5: Form Rice Balls
Use damp hands to create compact, golf ball-sized spheres. Press firmly to maintain structural integrity.
Step 6: Heat Cooking Oil
Pour olive oil into a deep skillet. Heat over medium-high temperature, targeting around 350°F for optimal frying.
Step 7: Fry Rice Balls
Carefully lower rice balls into hot oil. Rotate periodically to achieve uniform golden-brown coloration. Cook for 3-4 minutes.
Step 8: Drain Excess Oil
Remove rice balls using a slotted spoon. Place on paper towels to drain excess oil and maintain crispiness.
Step 9: Serve and Enjoy
Present rice balls immediately with warm marinara sauce for dipping. Perfect as an appetizer or delightful snack.
Tips For Cooking Rice Balls with Cheese & Pepperoni
Tasty Variations For Rice Balls with Cheese & Pepperoni
What Goes Well With Rice Balls with Cheese & Pepperoni
How To Keep Rice Balls with Cheese & Pepperoni Fresh
Common Questions About Rice Balls with Cheese & Pepperoni
No, they’re straightforward with basic cooking skills. Follow the steps carefully, and you’ll create delicious rice balls easily.
Absolutely! Mozzarella works great, but you can experiment with cheddar, provolone, or fontina for unique flavor profiles.
Ensure rice is cooled completely and mixture is well-combined. Press balls firmly when shaping and use cold rice to maintain structure.
Use a kitchen thermometer to check 350°F, or drop a breadcrumb into oil – if it sizzles immediately, the oil is ready for frying.
Print
Rice Balls With Cheese & Pepperoni Recipe
- Total Time: 30 minutes
- Yield: 4 1x
Description
Savory rice balls with cheese & pepperoni bring Italian street food magic straight to your kitchen. Classic comfort meets portable pleasure, offering crispy exterior and melty interior that hungry crowds will absolutely adore.
Ingredients
Main Ingredients:
- 2 cups rice
- 1 cup mozzarella cheese
- 1/2 cup pepperoni, chopped
Binding Ingredients:
- 2 eggs
- 1/4 cup breadcrumbs
- 2 tbsp parmesan cheese
Seasoning & Coating:
- 1 tsp salt
- 1/2 tsp black pepper
- 1/4 cup olive oil (for frying)
- 1/2 cup marinara sauce (for dipping)
Instructions
- Cook rice according to package instructions, then spread on a large tray to cool and reach room temperature, ensuring grains are separated and not clumpy.
- In a spacious mixing bowl, combine cooled rice, shredded mozzarella, and finely diced pepperoni, gently folding ingredients to create an even distribution.
- Whisk eggs in a separate bowl, then incorporate breadcrumbs, parmesan cheese, salt, and black pepper, creating a cohesive binding mixture.
- Pour egg mixture into rice combination, thoroughly blending until ingredients adhere and can be easily shaped.
- Using damp hands, form compact golf ball-sized spheres, pressing firmly to ensure they maintain structural integrity.
- Heat olive oil in a deep skillet over medium-high heat (approximately 350°F), preparing for frying.
- Carefully lower rice balls into hot oil, rotating periodically to achieve a uniform golden-brown exterior, cooking for 3-4 minutes.
- Remove rice balls with a slotted spoon, placing on paper towels to drain excess oil and maintain crispiness.
- Serve immediately alongside warm marinara sauce for dipping, presenting as a delectable appetizer or snack.
Notes
- Use short-grain rice for better binding and a more cohesive texture that holds together perfectly when forming balls.
- Ensure rice is completely cooled to room temperature before mixing to prevent soggy or mushy rice balls.
- Pat hands with water while shaping to prevent rice from sticking and create smooth, uniform spheres that won’t fall apart during frying.
- Experiment with alternative cheese options like sharp cheddar or provolone to customize flavor profiles and suit different taste preferences.
- For a lighter version, bake rice balls in a preheated oven at 425°F for 20-25 minutes, turning halfway through for even browning.
- Create a gluten-free variation by substituting breadcrumbs with ground almonds or gluten-free panko for those with dietary restrictions.
- Prep Time: 20 minutes
- Cook Time: 10 minutes
- Category: Appetizer, Snacks
- Method: Frying
- Cuisine: Italian
Nutrition
- Serving Size: 4
- Calories: 450
- Sugar: 2 g
- Sodium: 500 mg
- Fat: 25 g
- Saturated Fat: 8 g
- Unsaturated Fat: 15 g
- Trans Fat: 0 g
- Carbohydrates: 40 g
- Fiber: 1 g
- Protein: 12 g
- Cholesterol: 90 mg
Olivia Brooks
Contributing Writer
Expertise
Education
Culinary Institute of America
Accelerated Culinary Arts Certificate Program
Focus: Culinary fundamentals, nutrition, and healthy cooking technique
Olivia believes good food should feed both the body and the soul. She earned her Accelerated Culinary Arts Certificate from the Culinary Institute of America, where she focused on nutrition and practical cooking techniques that make healthy eating easy.
At 10 Below Ice Cream, Olivia shares single-serving recipes that are fresh, plant-forward, and full of heart. She loves helping people eat better, without stress, strict rules, or sacrificing flavor.
Beyond the kitchen, Olivia spends her time tending her backyard garden, practicing yoga, and discovering hidden gems in Portland’s food scene.