
The Perfect Red Velvet Cupcakes Recipe for Sweet Cravings
Baking red velvet cupcakes can transport you into a world of delightful crimson sweetness.
Soft cocoa notes dance through each tender crumb, creating magic in your kitchen.
Passionate bakers understand these treats go beyond mere desserts.
Elegant yet simple, these cupcakes blend rich chocolate undertones with a velvety texture that melts perfectly.
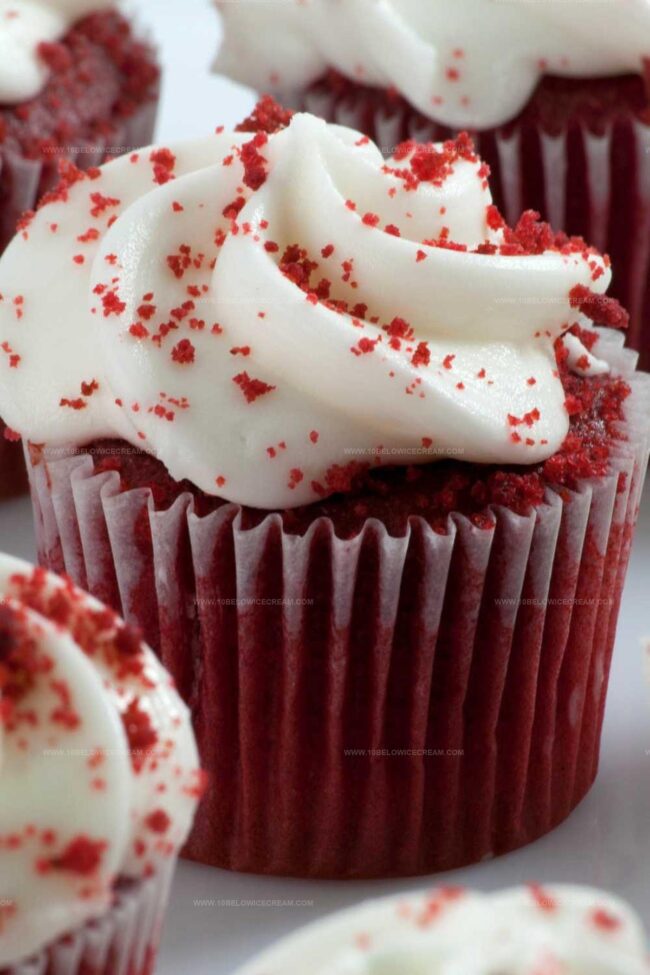
Cream cheese frosting adds a luxurious contrast to the subtle cake base.
Small details make massive differences in achieving that signature scarlet hue and silky consistency.
You’ll adore how quickly these cupcakes come together with minimal fuss.
Dive into this recipe and watch pure deliciousness unfold before your eyes.
What You’ll Need For Mary Berry Red Velvet Cupcakes
Core Ingredients:Liquid and Flavoring Ingredients:Dry and Leavening Ingredients:Frosting Ingredients:Step By Step For Mary Berry Red Velvet Cupcakes

Step 1: Warm Up the Oven
Adjust your oven to 200°C (180°C fan). Prepare a 12-hole muffin tin by lining it with cupcake cases.
Step 2: Whip Butter and Sugar
Use an electric mixer to blend butter and sugar until the mixture becomes light, airy, and creamy.
Step 3: Mix Wet Ingredients
Incorporate eggs into the butter mixture. Then add:Blend until everything is well combined.
Step 4: Combine Dry Ingredients
In a separate bowl, whisk together:Step 5: Create Liquid Mixture
In a measuring jug, mix:Step 6: Combine All Ingredients
Gradually fold dry ingredients and liquid mixture into the batter. Mix gently to keep the batter light and fluffy.
Step 7: Prepare for Baking
Fill each cupcake case about three-quarters full with batter.
Step 8: Bake the Cupcakes
Place in the preheated oven and bake for 20-25 minutes. Check doneness with a toothpick.
Step 9: Cool and Rest
Remove from oven and let cupcakes cool completely on a wire rack.
Step 10: Create Creamy Frosting
Beat butter and cream cheese until smooth. Gradually add powdered sugar and vanilla extract.
Step 11: Decorate and Serve
Frost each cupcake generously and serve to delighted guests.
Tips To Help With Mary Berry Red Velvet Cupcakes
Fun Twists On Mary Berry Red Velvet Cupcakes
What Goes Well With Mary Berry Red Velvet Cupcakes
Best Way To Store Mary Berry Red Velvet Cupcakes
Questions Answered About Mary Berry Red Velvet Cupcakes
The vibrant red color comes from food coloring, traditionally combined with cocoa powder which helps enhance the deep red shade.
These acidic ingredients react with baking soda, creating a tender, light texture and helping the cupcakes rise beautifully.
Yes, you can use less food coloring or natural alternatives like beetroot powder, though this might slightly change the intensity of the red color.
No, red velvet has a unique flavor profile with a hint of cocoa, tanginess from buttermilk/yoghurt, and a softer, more delicate crumb compared to traditional chocolate cake.
Why Mary Berry Red Velvet Cupcakes Are A Classic Treat

Red Velvet Cupcakes Recipe
- Total Time: 35-40 minutes
- Yield: 12 1x
Description
Irresistible red velvet cupcakes blend Southern charm with rich cocoa and cream cheese frosting. Delicate crimson layers promise pure indulgence for dessert enthusiasts craving a classic American treat you can savor with pure delight.
Ingredients
Cake Ingredients:
- 260 grams (9.14 ounces) granulated sugar
- 250 grams (9 ounces) plain flour
- 120 milliliters (4 fluid ounces) natural yoghurt
- 100 grams (3.5 ounces) unsalted butter, softened
- 2 free-range eggs
- 2 tablespoons cocoa powder
- 2 tablespoons vegetable oil
- 2 teaspoons red food coloring gel
- 1 teaspoon vanilla extract
- 1 teaspoon bicarbonate of soda
- 1 teaspoon apple cider vinegar
- 1/2 teaspoon fine salt
- 1/2 teaspoon baking powder
Frosting Ingredients:
- 250 grams (9 ounces) cream cheese, room temperature
- 150 grams (5.5 ounces) icing sugar
- 55 grams (2 ounces) unsalted butter, softened
- 1 teaspoon vanilla extract
Instructions
- Set oven to 350°F. Position rack in middle. Prepare muffin tin with paper liners.
- Cream softened butter and sugar until light and airy, approximately 3-4 minutes.
- Incorporate eggs one at a time, mixing thoroughly after each addition.
- Blend in vanilla extract, cocoa powder, vegetable oil, red food coloring, and salt until evenly distributed.
- Sift together flour, baking powder, and baking soda in a separate mixing bowl.
- Whisk yogurt, white vinegar, and water in a measuring cup until combined.
- Gradually alternate adding dry ingredients and liquid mixture to butter mixture, folding gently to maintain airiness.
- Fill cupcake liners approximately two-thirds full with batter.
- Bake for 18-22 minutes until a toothpick inserted comes out clean.
- Allow cupcakes to cool completely on a wire rack for 45-60 minutes.
- Prepare frosting by beating cream cheese and butter until smooth and creamy.
- Gradually incorporate powdered sugar and vanilla, mixing until silky and spreadable.
- Generously frost cooled cupcakes using an offset spatula or piping bag.
Notes
- Cocoa Quality Matters: Use high-quality unsweetened cocoa powder for a rich, deep chocolate flavor that elevates the entire cupcake.
- Color Control: Adjust food coloring amount carefully to achieve the perfect vibrant red without an artificial taste.
- Temperature Precision: Ensure ingredients are at room temperature for smoother mixing and better cupcake texture.
- Gentle Mixing Magic: Fold ingredients gently to keep the cupcakes light and fluffy, avoiding overmixing which can create dense, tough cakes.
- Prep Time: 15 minutes
- Cook Time: 20-25 minutes
- Category: Desserts
- Method: Baking
- Cuisine: American
Nutrition
- Serving Size: 12
- Calories: 270 kcal
- Sugar: 23 g
- Sodium: 500 mg
- Fat: 15 g
- Saturated Fat: 7 g
- Unsaturated Fat: 6 g
- Trans Fat: 0.2 g
- Carbohydrates: 30 g
- Fiber: 1 g
- Protein: 3 g
- Cholesterol: 45 mg
Jackson Reid
Founder & Recipe Developer
Expertise
Education
Holyoke Community College – HCC-MGM Culinary Arts Institute
Certificate in Culinary Arts
Focus: Farm-to-table cuisine, sustainable cooking practices, and hands-on kitchen training
Jackson’s love for cooking began one dish at a time. After earning his Culinary Arts Certificate from Holyoke Community College’s HCC-MGM Culinary Arts Institute, he focused on what mattered most: creating recipes that are simple to follow and full of flavor.
At 10 Below Ice Cream, Jackson brings together global influences and a less-is-more approach. His recipes reflect his belief that good food doesn’t need to be complicated; it just needs to make sense, taste great, and feel right.
When he’s not testing ingredients or adjusting seasonings, you’ll find him hiking near Asheville, exploring local markets, or chasing the best light for food photos.