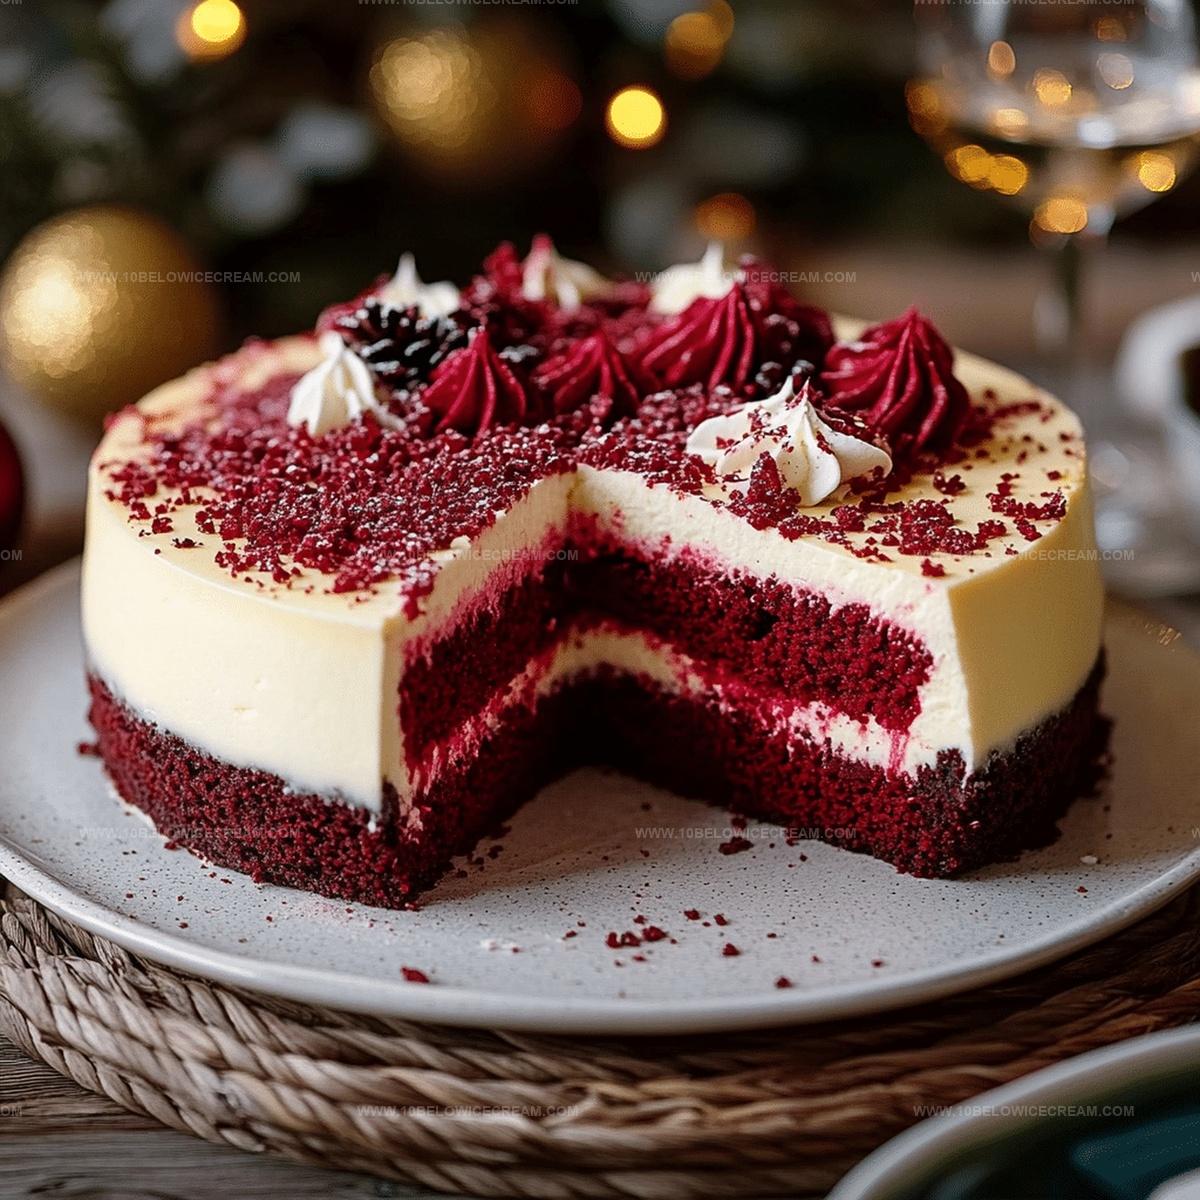
The Dreamiest Red Velvet Cheesecake Recipe for Sweet Lovers
Creamy swirls of decadent red velvet cheesecake dance across my favorite dessert plate, promising pure indulgence.
Velvety textures merge classic comfort with elegant sophistication.
Rich cream cheese blends seamlessly with subtle cocoa undertones.
Passionate bakers understand how complex layers create magical moments at the table.
Unexpected hints of vanilla whisper through each delightful bite.
Smooth and luxurious, this dessert invites you to savor every delectable spoonful.
Let’s make something spectacular that will leave everyone craving another slice.
Why Red Velvet Cheesecake Is A Classic
What You’ll Need For Red Velvet Cheesecake
For the Crust:For the Cheesecake Filling:For the Topping:Red Velvet Cheesecake Step-By-Step Guide
Step 1: Prepare Oven and Pan
Warm your oven to a cozy 325°F. Grab a 9-inch springform pan and line its bottom with parchment paper for a smooth release.
Step 2: Create Crumbly Crust
Smash graham crackers into fine dust. Mix with melted butter and sugar until the mixture feels like soft sand. Press this delightful base firmly into the pan’s bottom, creating a smooth foundation.
Step 3: Whip Cream Cheese Base
In a spacious mixing bowl, beat cream cheese until silky smooth. Eliminate any stubborn lumps for a perfect texture.
Step 4: Add Sweet Goodness
Gradually sprinkle sugar into the cream cheese. Mix until the mixture becomes light and fluffy like a cloud.
Step 5: Incorporate Creamy Elements
Stir in sour cream with gentle movements. Add eggs one by one, mixing thoroughly after each addition to create a luxurious batter.
Step 6: Create Chocolate Magic
Sift cocoa powder into the mixture. Stir until the batter transforms into a rich, deep color that promises deliciousness.
Step 7: Add Vibrant Red Color
Pour buttermilk and food coloring into the batter. Stir until the mixture becomes a stunning, vibrant red.
Step 8: Fill and Smooth
Carefully pour the batter over the chilled crust. Use a spatula to create a perfectly smooth surface.
Step 9: Bake with Precision
Slide the pan into the oven. Bake for 55-60 minutes until the center is almost set but still slightly wobbly. The edges should start pulling away from the pan.
Step 10: Cool Carefully
Turn off the oven and crack the door open. Let the cheesecake rest inside for one hour to prevent unwanted cracks.
Step 11: Chill and Rest
Remove from oven and let cool completely at room temperature. Refrigerate for at least 4 hours or overnight.
Step 12: Create Dreamy Frosting
Beat cream cheese until velvety smooth. Gradually mix in:Whip until the frosting becomes light and spreadable.
Step 13: Finish and Serve
Carefully remove cheesecake from the pan. Spread the frosting evenly across the top. Refrigerate for 30 more minutes to let the topping set perfectly. Slice and enjoy your masterpiece!
Helpful Tips For Red Velvet Cheesecake
Red Velvet Cheesecake Flavor Twists
Perfect Pairings For Red Velvet Cheesecake
Best Way To Store Red Velvet Cheesecake
Red Velvet Cheesecake Common Questions
Red food coloring and cocoa powder give this cheesecake its signature red color and subtle chocolate flavor, distinguishing it from traditional plain cheesecake.
Low temperature (325°F) helps prevent cracks and ensures even, gentle cooking, creating a smooth and creamy texture without burning the delicate cheesecake.
The center should be almost set but slightly jiggly, and the edges should be pulling away from the pan sides. This indicates the cheesecake is done without being overcooked.
Print
Red Velvet Cheesecake Recipe
- Total Time: 5 hours 30 minutes
- Yield: 8 1x
Description
Red velvet cheesecake brings luxurious Southern charm to dessert tables with its rich, velvety layers of crimson cake and creamy cheesecake filling. Chocolate undertones and cream cheese frosting create an irresistible finale that promises pure indulgence for sweet enthusiasts.
Ingredients
Main Ingredients:
- 500 g / 2 cups cream cheese
- 250 g / 1 cup sour cream
- 3 large eggs
- 200 g / 1 cup granulated sugar
- 50 g / 1/2 cup unsweetened cocoa powder
- 60 ml / 1/4 cup buttermilk
- 30 ml / 2 tbsp red food coloring
Crust Ingredients:
- 200 g / 1.5 cups graham cracker crumbs
- 100 g / 1/2 cup unsalted butter
- 50 g / 1/4 cup granulated sugar
Topping Ingredients:
- 200 g / 1 cup cream cheese (for frosting)
- 100 g / 1/2 cup powdered sugar
- 5 ml / 1 tsp vanilla extract
- 30 ml / 2 tbsp heavy cream
Instructions
- Preheat the oven to 325°F (165°C). Prepare a 9-inch springform pan by lining the bottom with parchment paper.
- Crush graham crackers into fine crumbs, then mix with melted butter and sugar until thoroughly combined and slightly compact.
- Press the cracker mixture firmly into the bottom of the prepared pan, creating an even, smooth base. Refrigerate while preparing the cheesecake filling.
- In a large mixing bowl, beat cream cheese until smooth and creamy, ensuring no lumps remain.
- Gradually incorporate sugar, mixing until fully integrated and the mixture becomes light and fluffy.
- Whisk in sour cream, then add eggs one at a time, mixing thoroughly after each addition.
- Sift cocoa powder into the batter, stirring until completely blended and achieving a rich, uniform color.
- Pour buttermilk and red food coloring into the mixture, stirring until the batter transforms into a vibrant red hue.
- Gently pour the cheesecake batter over the chilled crust, smoothing the top with a spatula to ensure an even surface.
- Bake for 55-60 minutes, or until the center is almost set but still slightly jiggly. The edges should be slightly pulling away from the pan sides.
- Turn off the oven, crack the door open, and allow the cheesecake to cool inside for 1 hour to prevent cracking.
- Remove from oven and cool completely at room temperature, then refrigerate for at least 4 hours or overnight.
- For the topping, beat cream cheese until smooth, then gradually mix in powdered sugar and vanilla extract.
- Slowly add heavy cream, whipping until the frosting becomes light and spreadable.
- Once the cheesecake is fully chilled, carefully remove from springform pan and spread the cream cheese frosting evenly across the top.
- Refrigerate for an additional 30 minutes before serving to allow the topping to set.
Notes
- Prevent cracking by baking the cheesecake in a water bath, which helps distribute heat evenly and creates a moist environment.
- Soften cream cheese at room temperature before mixing to ensure a smooth, lump-free batter and achieve the perfect creamy texture.
- Avoid overmixing the batter after adding eggs to prevent incorporating too much air, which can cause cracks and a dense texture.
- For a gluten-free version, substitute graham crackers with gluten-free cookie crumbs or almond flour to create an equally delicious crust.
- Prep Time: 30 minutes
- Cook Time: 60 minutes
- Category: Desserts
- Method: Baking
- Cuisine: American
Nutrition
- Serving Size: 8
- Calories: 484
- Sugar: 36 g
- Sodium: 295 mg
- Fat: 32 g
- Saturated Fat: 19 g
- Unsaturated Fat: 10 g
- Trans Fat: 1 g
- Carbohydrates: 43 g
- Fiber: 1 g
- Protein: 6 g
- Cholesterol: 98 mg
Jackson Reid
Founder & Recipe Developer
Expertise
Education
Holyoke Community College – HCC-MGM Culinary Arts Institute
Certificate in Culinary Arts
Focus: Farm-to-table cuisine, sustainable cooking practices, and hands-on kitchen training
Jackson’s love for cooking began one dish at a time. After earning his Culinary Arts Certificate from Holyoke Community College’s HCC-MGM Culinary Arts Institute, he focused on what mattered most: creating recipes that are simple to follow and full of flavor.
At 10 Below Ice Cream, Jackson brings together global influences and a less-is-more approach. His recipes reflect his belief that good food doesn’t need to be complicated; it just needs to make sense, taste great, and feel right.
When he’s not testing ingredients or adjusting seasonings, you’ll find him hiking near Asheville, exploring local markets, or chasing the best light for food photos.