
Sweet Raspberry Thumbprint Cookies with Glaze Recipe To Make
Sweet raspberry thumbprint cookies dance with zesty lemon glaze, promising a delightful twist on classic treats.
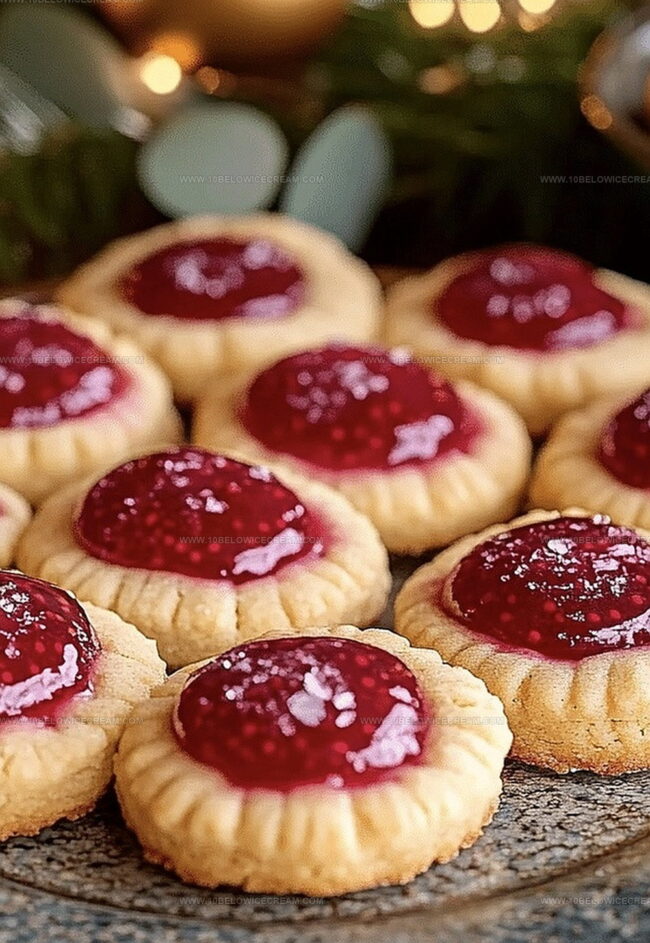
Buttery shortbread cradles vibrant fruit preserves in each delicate bite.
Crumbly edges give way to soft, jammy centers that melt on your tongue.
Sunshine-bright glaze adds a tangy finish to these irresistible morsels.
Baking these cookies fills the kitchen with warm, inviting aromas that draw everyone closer.
Simple ingredients create magic when mixed with love and a pinch of creativity.
You’ll want to savor every crumb of these elegant, playful cookies that bring joy to any gathering.
Why Raspberry Thumbprint Cookies With Lemon Glaze Are So Loved
What Goes Into Raspberry Thumbprint Cookies With Lemon Glaze
For the Base:For the Dry Ingredients:For the Filling and Topping:For the Glaze:How To Bake Raspberry Thumbprint Cookies With Lemon Glaze

Step 1: Warm Up The Oven
Crank your oven to 350°F and grab a baking sheet. Cover it with parchment paper, creating a smooth landing spot for your delightful cookies.
Step 2: Whip Up The Base
Grab a big mixing bowl and blend softened butter with granulated sugar. Beat them together until they transform into a fluffy, cloud-like mixture that looks pale and dreamy.
Step 3: Add Liquid Magic
Drop in the egg and vanilla extract. Stir everything until the mixture looks completely smooth and well-blended.
Step 4: Create The Dough
Gently fold in:Mix until a soft dough forms, but don’t overwork the mixture.
Step 5: Chill The Dough
Pop the dough in the refrigerator for 15 minutes. This helps the dough become more manageable and easier to shape.
Step 6: Shape The Cookies
Roll the chilled dough into small, even balls. Place them carefully on the baking sheet, giving each cookie some breathing room.
Step 7: Make Cookie Wells
Use your thumb or a small spoon to press a gentle indent into the center of each cookie. This creates a perfect little pocket for delicious filling.
Step 8: Fill With Fruity Goodness
Spoon raspberry jam into each cookie’s center. Be gentle and avoid overfilling.
Step 9: Add Extra Flair
Sprinkle fresh raspberries and lemon zest over the cookies for a burst of flavor and beautiful appearance.
Step 10: Bake To Perfection
Slide the baking sheet into the oven. Bake for 12-15 minutes until the edges turn a beautiful golden brown.
Step 11: Cool Down
Transfer cookies to a wire rack and let them cool completely.
Step 12: Craft The Glaze
Whisk powdered sugar with fresh lemon juice until you get a smooth, drizzle-ready consistency.
Step 13: Zest It Up
Sprinkle additional lemon zest over the glaze for an aromatic finishing touch.
Step 14: Drizzle With Delight
Pour the lemon glaze over the cooled cookies, letting it cascade beautifully down the sides.
Step 15: Let It Set
Give the glaze 10 minutes to set, allowing the flavors to mingle and the glaze to slightly harden before serving.
Tips To Get Raspberry Thumbprint Cookies With Lemon Glaze Just Right
Different Ways To Make Raspberry Thumbprint Cookies With Lemon Glaze
Perfect Pairings For Raspberry Thumbprint Cookies With Lemon Glaze
Keep Raspberry Thumbprint Cookies With Lemon Glaze Fresh And Crisp
Your Raspberry Thumbprint Cookies With Lemon Glaze FAQ
Yes, you can swap raspberry jam with strawberry, apricot, or any favorite jam that complements the lemon flavor.
Chilling the dough for 15 minutes before baking helps maintain the cookie’s shape and prevents excessive spreading.
Fresh raspberries are optional. You can skip them or use dried raspberries as a decorative and flavorful alternative.
Yes, you can prepare the dough in advance and refrigerate it for up to 2 days before baking, making it convenient for planning.
Print
Raspberry Thumbprint Cookies With Lemon Glaze Recipe
- Total Time: 40 minutes
- Yield: 12 1x
Description
Sweet raspberry thumbprint cookies dance with zesty lemon glaze, creating a delightful harmony of fruity flavors. Crumbly, buttery shortbread serves as the perfect canvas for these irresistible treats you’ll savor with each delectable bite.
Ingredients
Cookies Base:
- 2 cups all-purpose flour
- 1/2 cup granulated sugar
- 1/2 cup unsalted butter
- 1 large egg
- 1 tsp vanilla extract
- 1/4 tsp salt
Filling and Topping:
- 1/2 cup raspberry jam
- 2 tbsp fresh raspberries
- 1 tbsp lemon zest
Lemon Glaze:
- 1 cup powdered sugar
- 2–3 tbsp fresh lemon juice
- 1 tsp lemon zest
Instructions
- Preheat the oven to 350°F and line a baking sheet with parchment paper, creating a smooth, even surface for your cookies.
- In a large mixing bowl, cream together softened butter and granulated sugar until the mixture becomes light and fluffy, achieving a pale, creamy consistency.
- Incorporate the egg and vanilla extract into the butter mixture, stirring until completely integrated and smooth.
- Gradually fold in the flour and salt, mixing until a soft, cohesive dough forms without overmixing.
- Chill the dough for 15 minutes to firm up, making it easier to handle and shape.
- Roll the chilled dough into small, uniform balls, placing them evenly on the prepared baking sheet.
- Use your thumb or the back of a small spoon to create a gentle indentation in the center of each cookie, forming a perfect well for the filling.
- Spoon raspberry jam into each thumbprint, being careful not to overfill the centers.
- Scatter fresh raspberries and lemon zest over the cookies for an extra burst of flavor and visual appeal.
- Bake for 12-15 minutes, or until the edges turn a delicate golden brown and the cookies appear set.
- Remove from the oven and allow cookies to cool completely on a wire rack.
- Prepare the lemon glaze by whisking powdered sugar with fresh lemon juice until smooth and drizzling consistency is achieved.
- Sprinkle additional lemon zest over the glaze for an aromatic finishing touch.
- Drizzle the lemon glaze generously over the cooled cookies, allowing it to cascade down the sides.
- Let the glaze set for 10 minutes before serving, allowing the flavors to meld and the glaze to slightly harden.
Notes
- Butter Temperature Matters: Ensure butter is softened at room temperature for easier creaming and a smoother cookie texture.
- Chill Dough for Success: Refrigerating the dough helps prevent spreading and maintains the cookie’s shape during baking.
- Gentle Thumbprint Technique: Create shallow indentations carefully to prevent cookie cracks and ensure even jam distribution.
- Gluten-Free Adaptation: Swap all-purpose flour with a gluten-free blend for those with wheat sensitivities, maintaining the cookie’s delicate structure.
- Prep Time: 25 minutes
- Cook Time: 12-15 minutes
- Category: Desserts, Snacks
- Method: Baking
- Cuisine: American
Nutrition
- Serving Size: 12
- Calories: 180
- Sugar: 13 g
- Sodium: 45 mg
- Fat: 8 g
- Saturated Fat: 5 g
- Unsaturated Fat: 3 g
- Trans Fat: 0 g
- Carbohydrates: 25 g
- Fiber: 1 g
- Protein: 2 g
- Cholesterol: 20 mg
Olivia Brooks
Contributing Writer
Expertise
Education
Culinary Institute of America
Accelerated Culinary Arts Certificate Program
Focus: Culinary fundamentals, nutrition, and healthy cooking technique
Olivia believes good food should feed both the body and the soul. She earned her Accelerated Culinary Arts Certificate from the Culinary Institute of America, where she focused on nutrition and practical cooking techniques that make healthy eating easy.
At 10 Below Ice Cream, Olivia shares single-serving recipes that are fresh, plant-forward, and full of heart. She loves helping people eat better, without stress, strict rules, or sacrificing flavor.
Beyond the kitchen, Olivia spends her time tending her backyard garden, practicing yoga, and discovering hidden gems in Portland’s food scene.