
Quick & Cozy Pumpkin Pie Crisp Recipe for Fall Sweetness
My grandmother’s secret pumpkin pie crisp recipe brings autumn’s warmth right to your kitchen table.
Cozy memories flood back with each delectable spoonful of this nostalgic dessert.
Layers of crumbly, golden topping promise a delightful contrast to the silky smooth pumpkin filling.
Rustic and comforting, this dish feels like a warm embrace on a chilly evening.
Seasonal spices dance through each bite, telling stories of harvest celebrations.
Dessert lovers will adore how simple ingredients combine into something truly magical.
You won’t be able to resist making this crowd-pleasing treat again and again.
Tips and Tricks for Amazing Pumpkin Pie Crisp
Delicious Variations of Pumpkin Pie Crisp to Try
Perfect Pairings to Enjoy with Pumpkin Pie Crisp
Storage Advice for Pumpkin Pie Crisp That Stays Fresh
FAQs About Pumpkin Pie Crisp Covered
Unlike traditional pumpkin pie with a pastry crust, pumpkin pie crisp has a crumbly oat-based topping that adds extra texture and a crunchy element to the classic pumpkin dessert.
Yes, you can use fresh pumpkin puree. Simply roast and puree a sugar pumpkin, ensuring it’s smooth and has a similar consistency to canned pumpkin puree for best results.
The dessert is done when the topping turns golden brown and the pumpkin filling looks set and slightly firm, typically after 40-45 minutes of baking.
Why Pumpkin Pie Crisp Is the Ultimate Fall Comfort Food
Key Ingredients for Pumpkin Pie Crisp
Pumpkin Base:Spice Blend:Crisp Topping:How to Bake a Perfectly Crispy Pumpkin Pie Crisp
Step 1: Fire Up the Oven
Crank your oven to a toasty 350F (175C). Grab a 9×13-inch baking dish and give it a generous butter or cooking spray coating to prevent sticking.
Step 2: Whip Up the Pumpkin Magic
In a spacious mixing bowl, transform your ingredients into a silky smooth sensation:Whisk everything together until the mixture looks like a creamy autumn dream. Pour this golden goodness into your prepared baking dish.
Step 3: Create the Crispy Crown
In another bowl, craft your irresistible topping:Drizzle melted butter over the dry ingredients and mix until you have a delightful crumbly texture that looks like fallen autumn leaves.
Step 4: Bake to Perfection
Scatter the crispy topping evenly across the pumpkin filling. Slide the dish into the preheated oven and bake for 40-45 minutes. You’ll know it’s ready when the top turns a gorgeous golden brown and the filling sets like a delicious autumn sunset.
Step 5: Serve and Savor
Let the pie crisp cool just a bit, then dive in while it’s warm. Each spoonful promises a heavenly blend of creamy pumpkin and crunchy, buttery topping that screams comfort and joy.
Print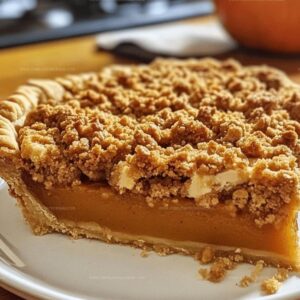
Pumpkin Pie Crisp Recipe
- Total Time: 55-60 minutes
- Yield: 8 1x
Description
Irresistible pumpkin pie crisp delivers classic autumn comfort with a delightful twist on traditional desserts. Crispy streusel topping and creamy pumpkin filling combine for a memorable sweet experience you’ll crave all season long.
Ingredients
Pumpkin:
- 1 (15 ounces / 425 grams) can pumpkin puree
Spices and Sweeteners:
- 1/2 cup (100 grams) granulated sugar
- 1/2 cup (110 grams) brown sugar
- 1 teaspoon ground cinnamon
- 1/2 teaspoon ground nutmeg
- 1/2 teaspoon ground cloves
- 1/2 teaspoon ground ginger
Binding and Dairy:
- 2 large eggs
- 1 (12 ounces / 354 milliliters) can evaporated milk
Instructions
- Prepare the oven by heating to 350F (175C) and generously coat a 9×13-inch baking dish with cooking spray or butter.
- Create the pumpkin base by whisking pumpkin puree, granulated sugar, brown sugar, warming spices (cinnamon, nutmeg, cloves, ginger), eggs, and evaporated milk in a large mixing bowl until the mixture achieves a silky, uniform consistency.
- Transfer the pumpkin mixture into the prepared baking dish, spreading it evenly across the surface.
- Craft the crisp topping by combining flour, rolled oats, brown sugar, and ground cinnamon in a separate bowl, ensuring thorough mixing.
- Drizzle melted butter over the dry ingredients, using a fork to transform the mixture into a crumbly, textured topping.
- Distribute the crisp topping uniformly across the pumpkin foundation, covering the entire surface with a generous layer.
- Slide the baking dish into the preheated oven and bake for 40-45 minutes, watching for a golden-brown crisp top and a set pumpkin filling.
- Remove from the oven and allow the dessert to cool slightly, enabling the filling to stabilize and the topping to crisp further.
- Serve warm, optionally garnishing with a dollop of whipped cream or a sprinkle of additional cinnamon for an extra touch of indulgence.
Notes
- Swap regular flour with gluten-free flour blend to make this dessert celiac-friendly and accommodate wheat sensitivities.
- Reduce sugar content by using monk fruit sweetener or stevia for a lower-calorie, diabetic-friendly version of the pumpkin crisp.
- Create dairy-free alternatives by substituting evaporated milk with coconut milk and using plant-based butter for the topping.
- Enhance nutrition by adding chopped pecans or walnuts to the crisp topping for extra protein and healthy fats.
- Prep Time: 15 minutes
- Cook Time: 40-45 minutes
- Category: Desserts
- Method: Baking
- Cuisine: American
Nutrition
- Serving Size: 8
- Calories: 164 kcal
- Sugar: 20 g
- Sodium: 110 mg
- Fat: 5 g
- Saturated Fat: 2 g
- Unsaturated Fat: 3 g
- Trans Fat: 0 g
- Carbohydrates: 27 g
- Fiber: 2 g
- Protein: 6 g
- Cholesterol: 70 mg
Olivia Brooks
Contributing Writer
Expertise
Education
Culinary Institute of America
Accelerated Culinary Arts Certificate Program
Focus: Culinary fundamentals, nutrition, and healthy cooking technique
Olivia believes good food should feed both the body and the soul. She earned her Accelerated Culinary Arts Certificate from the Culinary Institute of America, where she focused on nutrition and practical cooking techniques that make healthy eating easy.
At 10 Below Ice Cream, Olivia shares single-serving recipes that are fresh, plant-forward, and full of heart. She loves helping people eat better, without stress, strict rules, or sacrificing flavor.
Beyond the kitchen, Olivia spends her time tending her backyard garden, practicing yoga, and discovering hidden gems in Portland’s food scene.