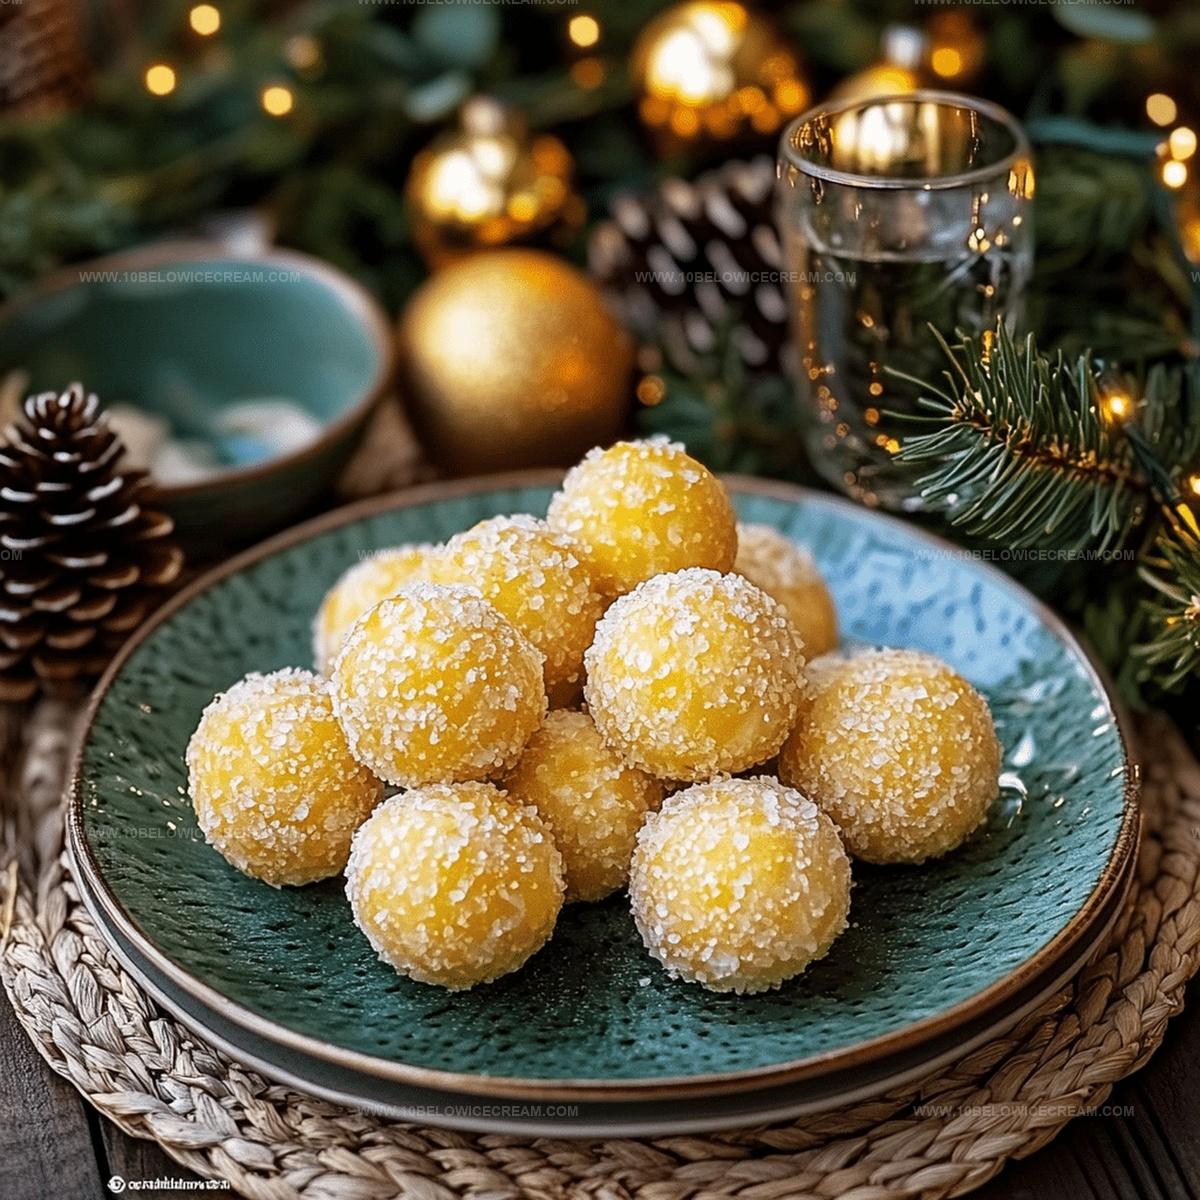
Festive Pineapple Christmas Balls Recipe: Holiday Joy in Every Bite
Sweet memories often come alive when crafting delightful pineapple christmas balls during festive seasons.
Tropical flavors merge with holiday cheer in this simple treat.
Relatives gather around, anticipating each delectable bite of these delicate confections.
Homemade desserts sparkle with warmth and nostalgia, connecting generations through shared culinary traditions.
Minimal ingredients create maximum happiness in these bite-sized delights.
Rich textures and unexpected pineapple sweetness promise a memorable experience.
You’ll want to savor every moment of making and sharing these magical treats.
Ingredients To Make Pineapple Christmas Balls
For the Base:For the Sweeteners:For the Flavor and Texture:For the Coating:How To Assemble Pineapple Christmas Balls
Step 1: Drain Pineapple
Grab a fine-mesh strainer and empty the crushed pineapple into it. Press gently to remove excess liquid, ensuring your mixture stays perfectly balanced and not too soggy.
Step 2: Create Creamy Base
Grab a large mixing bowl and combine cream cheese with butter. Whip these ingredients together until they transform into a silky, smooth mixture that looks irresistibly creamy.
Step 3: Sweeten the Mixture
Pour powdered sugar into the cream cheese blend. Stir thoroughly until the sugar completely dissolves and creates a uniform, velvety texture throughout the mixture.
Step 4: Fold in Tropical Goodness
Gently introduce the ingredients to create magical flavor:Fold everything together, making sure each ingredient is evenly distributed for a perfect bite.
Step 5: Chill and Firm
Place the mixture in the refrigerator for 30 minutes. This cooling period helps the mixture become firm and easier to shape into delightful little balls.
Step 6: Prepare Coating Stations
Set up two shallow dishes:Step 7: Shape Delicate Balls
Using clean hands, roll the chilled mixture into small, uniform balls about 1 inch in diameter. Work gently to maintain their perfect round shape.
Step 8: Add Luxurious Coating
Roll each ball through two delightful layers:Ensure complete and even coverage for a stunning final look.
Step 9: Final Chill
Place the finished pineapple Christmas balls on a parchment-lined tray. Return to the refrigerator for an additional 15 minutes to set perfectly.
Step 10: Store and Enjoy
Transfer the balls to an airtight container and keep refrigerated. These tropical treats will stay fresh and delicious for up to 5 days – if they last that long!
Tips For Perfect Pineapple Christmas Balls
Pineapple Christmas Balls Flavor Variations
What To Serve With Pineapple Christmas Balls
Storing Pineapple Christmas Balls Correctly
Pineapple Christmas Balls Common Questions
Yes, they’re super simple! With just a few basic ingredients and straightforward steps, even beginner bakers can create these delicious treats quickly.
Not at all! You’ll only need a mixing bowl, fine-mesh strainer, and your hands to roll the balls. Standard kitchen tools work perfectly.
Absolutely! These pineapple Christmas balls can be prepared up to 3 days in advance and stored in the refrigerator, making them ideal for holiday planning and party prep.
Chilling the mixture for 30 minutes before shaping helps significantly. Cold mixture is much easier to handle and creates neater, more uniform balls.
What Makes Pineapple Christmas Balls A Favorite
Print
Pineapple Christmas Balls Recipe
- Total Time: 45 minutes
- Yield: 8 1x
Description
Sweet pineapple christmas balls deliver festive cheer with tropical flair. Delicate coconut-rolled treats promise holiday magic and delightful bites for festive gatherings.
Ingredients
Main Ingredients:
- 2 cups crushed pineapple
- 1 cup powdered sugar
- 1 cup shredded coconut
Binding Ingredients:
- 1/2 cup cream cheese
- 1/4 cup butter
Coating/Garnish:
- 1/2 cup additional shredded coconut
- 1/4 cup powdered sugar for rolling
Instructions
- Thoroughly drain crushed pineapple in a fine-mesh strainer, pressing gently to remove excess moisture, ensuring the mixture won’t become too wet.
- In a spacious mixing bowl, blend cream cheese and butter until smooth and creamy, creating a uniform base for the confection.
- Incorporate powdered sugar into the cream cheese mixture, stirring until fully integrated and achieving a consistent texture.
- Fold in the drained pineapple and shredded coconut, gently mixing until all ingredients are evenly distributed throughout the mixture.
- Refrigerate the mixture for 30 minutes to firm up, making it easier to handle and shape into perfect spheres.
- Prepare two separate shallow dishes: one with additional shredded coconut and another with powdered sugar for coating.
- Using clean hands, roll the chilled mixture into small, uniform balls, approximately 1-inch in diameter.
- Delicately roll each ball first in shredded coconut, then dust with powdered sugar, ensuring complete and even coverage.
- Place the finished pineapple Christmas balls on a parchment-lined tray, allowing them to set in the refrigerator for an additional 15 minutes before serving.
- Store in an airtight container in the refrigerator, where they will maintain their delightful texture for up to 5 days.
Notes
- Squeeze out maximum moisture from pineapple to prevent soggy texture and ensure firm, well-structured Christmas balls.
- Use room temperature cream cheese and butter for smoother blending and easier mixing without lumps.
- Consider toasting coconut beforehand to enhance nutty flavor and add delightful crunch to the coating.
- For gluten-free option, verify all ingredients are certified gluten-free, especially powdered sugar which sometimes contains wheat starch.
- Prep Time: 10 minutes
- Cook Time: 0 minutes
- Category: Snacks, Desserts
- Method: Rolling
- Cuisine: American
Nutrition
- Serving Size: 8
- Calories: 150
- Sugar: 17 g
- Sodium: 50 mg
- Fat: 8 g
- Saturated Fat: 5 g
- Unsaturated Fat: 2 g
- Trans Fat: 0 g
- Carbohydrates: 20 g
- Fiber: 1 g
- Protein: 1 g
- Cholesterol: 15 mg
Olivia Brooks
Contributing Writer
Expertise
Education
Culinary Institute of America
Accelerated Culinary Arts Certificate Program
Focus: Culinary fundamentals, nutrition, and healthy cooking technique
Olivia believes good food should feed both the body and the soul. She earned her Accelerated Culinary Arts Certificate from the Culinary Institute of America, where she focused on nutrition and practical cooking techniques that make healthy eating easy.
At 10 Below Ice Cream, Olivia shares single-serving recipes that are fresh, plant-forward, and full of heart. She loves helping people eat better, without stress, strict rules, or sacrificing flavor.
Beyond the kitchen, Olivia spends her time tending her backyard garden, practicing yoga, and discovering hidden gems in Portland’s food scene.