Zesty Pickled Garlic In Olive Oil Recipe: Homemade Magic
Discovering pickled garlic in olive oil might just revolutionize your kitchen adventures.
Mediterranean cooks have long treasured this simple preservation technique.
Briny, sharp flavors mingle with smooth olive oil notes.
Crushed garlic cloves absorb delicate herbs and spices during pickling.
Sharp tanginess emerges as the cloves marinate gently.
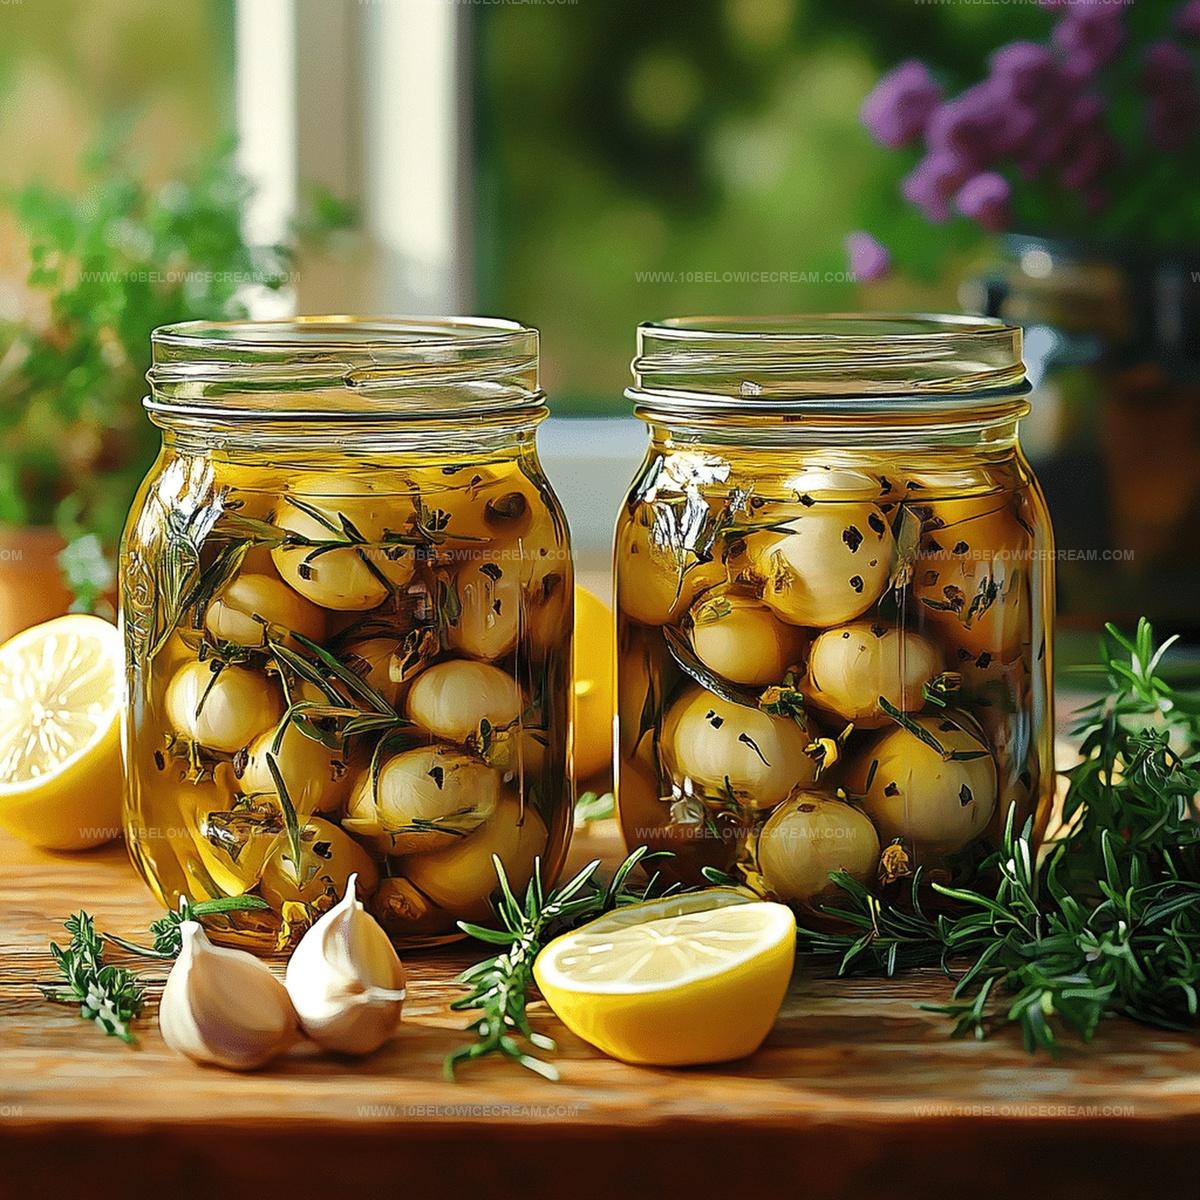
Crisp and pungent, these preserved gems complement sandwiches, salads, and charcuterie boards.
You’ll want to create jars of this delectable condiment for every meal.
Why Pickled Garlic in Olive Oil Is A Bold Kitchen Staple
What You Need For Pickled Garlic in Olive Oil
Main Ingredients:
For the Garlic:For the Pickling Liquid:Herbs and Seasonings:Oil and Storage:How To Prepare Pickled Garlic in Olive Oil
Step 1: Prepare Garlic for Pickling
Separate and peel fresh garlic cloves from two heads, carefully removing any imperfections or damaged sections.
Step 2: Craft Flavorful Pickling Liquid
Blend white vinegar, water, salt, and sugar in a non-reactive saucepan. Whisk ingredients until completely dissolved, creating a harmonious base for pickling.
Step 3: Boil and Simmer Pickling Mixture
Heat the liquid to a rolling boil over high heat. Reduce temperature to medium and let simmer for 3-4 minutes, allowing flavors to mingle and intensify.
Step 4: Infuse Garlic with Pickling Liquid
Immerse peeled garlic cloves in the hot pickling solution. Remove from heat and let steep for 10 minutes, softening the garlic and introducing subtle flavors.
Step 5: Dry Garlic Cloves
Drain garlic cloves completely. Use clean paper towels to pat dry, removing excess moisture to ensure perfect pickling consistency.
Step 6: Layer Herbs and Spices
Arrange a clean glass jar with a vibrant mix of seasonings:Step 7: Drench with Olive Oil
Gently pour extra virgin olive oil over the garlic and seasonings. Ensure complete coverage, eliminating any potential air pockets.
Step 8: Seal and Rest
Tightly seal the jar and refrigerate for 48 hours. Gently shake the jar once daily to distribute flavors evenly.
Step 9: Develop Maximum Flavor
Allow pickled garlic to rest in the refrigerator for 1-2 weeks. This waiting period intensifies the herbal and tangy characteristics.
Step 10: Store and Serve
Keep pickled garlic refrigerated for up to 4 weeks. Always use clean utensils when serving to maintain freshness and prevent bacterial growth.
Tips For Pickled Garlic in Olive Oil
Ways To Flavor Pickled Garlic in Olive Oil
What To Pair With Pickled Garlic in Olive Oil
How To Store Pickled Garlic in Olive Oil
FAQs About Pickled Garlic in Olive Oil
Pickling garlic in olive oil helps preserve the cloves, softens their sharp flavor, and infuses them with herbal aromatics like thyme and oregano, creating a more mellow and complex taste profile.
Yes, when prepared correctly with proper sterilization, vinegar, and refrigeration, pickled garlic is safe. The acidity from vinegar and salt helps prevent bacterial growth and extends shelf life.
Pickled garlic is versatile – chop and add to salad dressings, blend into spreads, use as a pizza topping, mix into pasta sauces, or serve as a tangy condiment alongside charcuterie boards.
Print
Pickled Garlic In Olive Oil Recipe
- Total Time: 25 minutes
- Yield: 4 1x
Description
Pickled garlic in olive oil brings Mediterranean magic to kitchen counters, infusing robust flavors into simple ingredients. Garlicky goodness awaits with this easy preservation method that you can savor on salads, sandwiches, or straight from the jar.
Ingredients
Garlic:
- 2 heads fresh garlic
- 4 cloves garlic, peeled
Pickling Ingredients:
- 1 cup white vinegar (240 ml)
- 1/2 cup water (120 ml)
- 2 tbsp salt (30 g)
- 1 tsp sugar (5 g)
Olive Oil and Seasonings:
- 1 cup extra virgin olive oil (240 ml)
- 1 tsp dried oregano (2 g)
- 1/2 tsp black peppercorns (1 g)
- 2 bay leaves
- 1 sprig fresh thyme
- 1 small red chili pepper (optional)
Instructions
- Carefully separate and peel the garlic cloves from two fresh heads, ensuring each clove is clean and free from blemishes.
- Prepare the pickling liquid by combining white vinegar, water, salt, and sugar in a non-reactive saucepan, whisking until the salt and sugar completely dissolve.
- Bring the pickling mixture to a rolling boil over high heat, then reduce to medium and simmer for 3-4 minutes to blend the flavors.
- Submerge the peeled garlic cloves in the hot pickling liquid and remove from heat, allowing them to steep for 10 minutes to soften and infuse.
- Drain the garlic cloves thoroughly, patting them dry with clean paper towels to remove excess moisture.
- In a clean glass jar, layer the dried garlic cloves with dried oregano, black peppercorns, bay leaves, fresh thyme, and optional red chili pepper.
- Slowly pour the extra virgin olive oil over the garlic and seasonings, ensuring all ingredients are completely covered and no air pockets remain.
- Seal the jar tightly and refrigerate for at least 48 hours to allow the flavors to meld and develop, gently shaking the jar once daily.
- For optimal taste, let the pickled garlic rest in the refrigerator for 1-2 weeks before consuming, which will intensify the herbal and tangy notes.
- Store the pickled garlic in the refrigerator for up to 4 weeks, always using clean utensils when serving to maintain freshness and prevent contamination.
Notes
- Select super fresh, firm garlic heads without soft spots or green sprouts for the best flavor and texture.
- Remove any green center stems from garlic cloves to prevent potential bitterness and ensure a milder taste profile.
- Use high-quality extra virgin olive oil to enhance the overall richness and create a more gourmet preserved garlic experience.
- Sterilize glass jars thoroughly with boiling water before storing to prevent bacterial growth and extend shelf life safely.
- Prep Time: 15 minutes
- Cook Time: 10 minutes
- Category: Appetizer, Snacks
- Method: Pickling
- Cuisine: Mediterranean
Nutrition
- Serving Size: 4
- Calories: 350
- Sugar: 1.25 g
- Sodium: 750 mg
- Fat: 38 g
- Saturated Fat: 5.5 g
- Unsaturated Fat: 32.5 g
- Trans Fat: 0 g
- Carbohydrates: 4 g
- Fiber: 0 g
- Protein: 0.5 g
- Cholesterol: 0 mg
Olivia Brooks
Contributing Writer
Expertise
Education
Culinary Institute of America
Accelerated Culinary Arts Certificate Program
Focus: Culinary fundamentals, nutrition, and healthy cooking technique
Olivia believes good food should feed both the body and the soul. She earned her Accelerated Culinary Arts Certificate from the Culinary Institute of America, where she focused on nutrition and practical cooking techniques that make healthy eating easy.
At 10 Below Ice Cream, Olivia shares single-serving recipes that are fresh, plant-forward, and full of heart. She loves helping people eat better, without stress, strict rules, or sacrificing flavor.
Beyond the kitchen, Olivia spends her time tending her backyard garden, practicing yoga, and discovering hidden gems in Portland’s food scene.