Fluffy Peanut Butter Snowballs Recipe: Winter Magic in Bites
Crafting delightful peanut butter snowballs brings pure winter magic right into your kitchen.
Sweet clusters of creamy goodness promise a delectable treat.
Soft chocolate and powdery sugar combine in these irresistible bite-sized delights.
Cool winter afternoons call for something special that sparkles with simple joy.
Kids and adults alike cannot resist these charming little confections.
Small hands love rolling these sweet spheres into perfect little rounds.
Indulge your sweet tooth and create memories with this playful, easy recipe.
What Makes These Snowballs So Peanut-Buttery and Fun
Everything You’ll Need to Roll Up These Bites
For the Base:For the Sweetener and Flavor Enhancers:For the Coating and Decoration:No-Bake Magic – Instructions for Peanut Butter Snowballs
Step 1: Whip Up the Creamy Base
In a large mixing bowl, blend peanut butter and softened butter until completely smooth. Use a hand mixer or wooden spoon to create a uniform consistency that’s light and fluffy.
Step 2: Create the Sweet Mixture
Add powdered sugar to the butter mixture. Mix thoroughly until the ingredients come together:Stir until the mixture becomes a moldable dough that holds its shape.
Step 3: Chill the Dough
Place the mixture in the refrigerator for 15-20 minutes. This cooling period helps firm up the dough, making it easier to shape into perfect little balls.
Step 4: Form Delightful Spheres
Using clean hands, roll the chilled mixture into small, consistent balls. Place each ball on a parchment-lined baking sheet, ensuring they’re evenly spaced.
Step 5: Prepare for Coating
Return the formed balls to the refrigerator for another 15 minutes. This extra chilling helps them maintain their shape during the chocolate dipping process.
Step 6: Melt the Chocolate
Carefully melt white chocolate using a double boiler or microwave. Stir frequently to prevent burning and create a smooth, glossy coating.
Step 7: Dip and Coat
Gently dip each chilled peanut butter ball into the melted white chocolate. Ensure complete coverage by carefully rotating each ball. Tap off excess chocolate and place back on the parchment-lined sheet.
Step 8: Let Them Set
Allow the chocolate-coated treats to set at room temperature for 10-15 minutes. The coating will gradually harden, creating a beautiful, smooth finish.
Step 9: Add the Finishing Touch
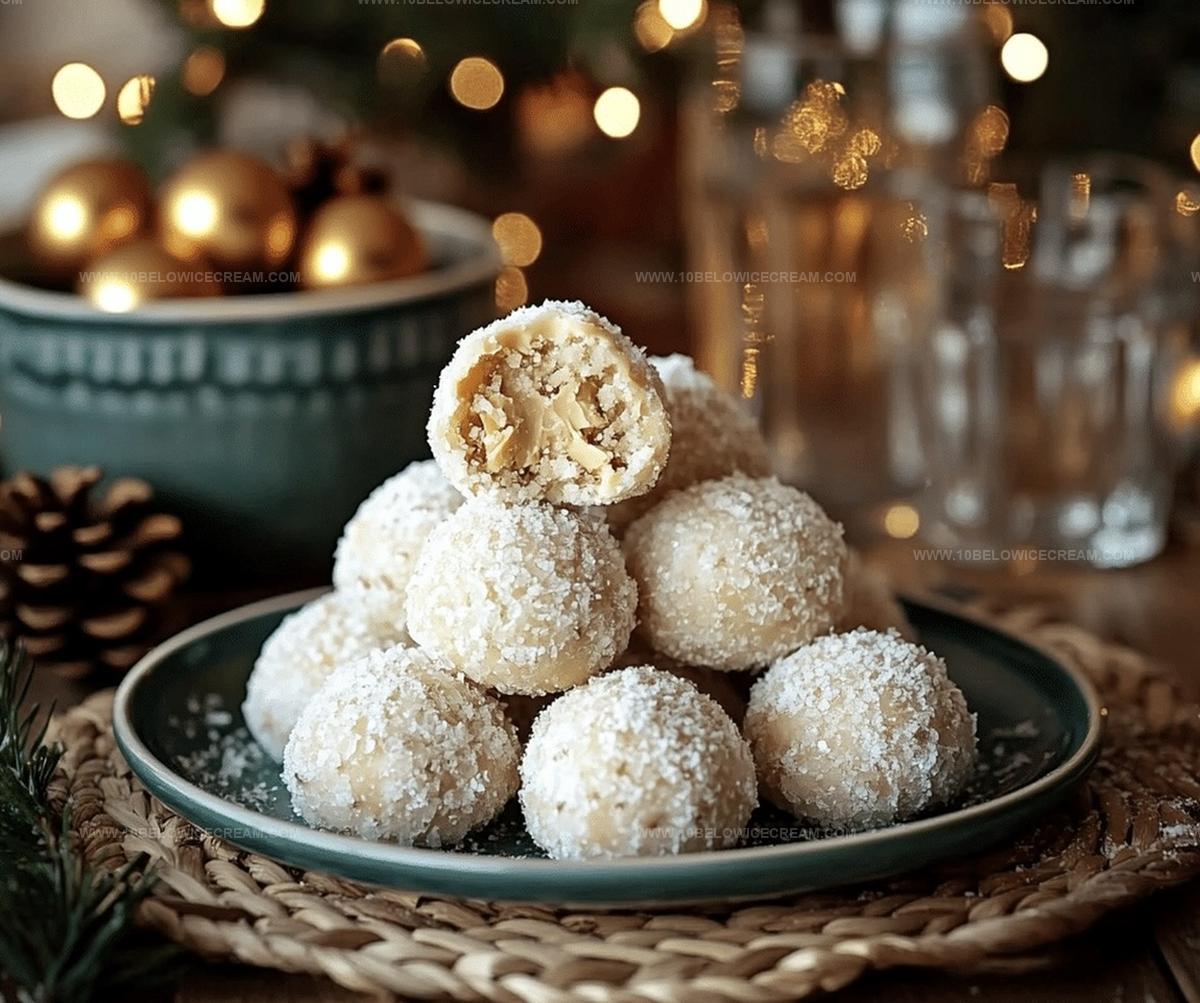
Dust the cooled treats with a light sprinkle of powdered sugar. This creates a festive, snow-like appearance that makes them look extra special.
Step 10: Store and Enjoy
Transfer the completed treats to an airtight container. Separate layers with parchment paper to prevent sticking. Store in the refrigerator for up to one week, ready to delight whenever you want a sweet treat.
Shape, Chill, Repeat – Tips for Snowball Success
Flavor Mashups to Try With These Little Treats
What Sips or Sweets to Pair With Snowballs
Snowballs That Stay Fresh – Here’s How
Peanut Butter Snowball Questions? Let’s Get to It
No, these snowballs are surprisingly easy to prepare. The recipe requires basic ingredients and simple techniques like mixing, chilling, and dipping. Even novice bakers can successfully create these delightful treats.
Not at all. You’ll only need basic kitchen tools like a mixing bowl, baking sheet, parchment paper, and either a microwave or double boiler for melting chocolate. Standard measuring cups and spoons will suffice.
Absolutely. You can use creamy or crunchy peanut butter, swap white chocolate for milk or dark chocolate, and adjust vanilla extract quantity. Just maintain similar ingredient proportions for best results.
Print
Peanut Butter Snowballs Recipe
- Total Time: 35-40 minutes
- Yield: 12 1x
Description
Delightful peanut butter snowballs melt winter’s chill with creamy, nutty goodness wrapped in sweet coconut magic. Guests will savor these bite-sized delights that dance between comfort and indulgence.
Ingredients
Base Ingredients:
- 1 cup creamy peanut butter
- 1/2 cup unsalted butter
- 2 cups powdered sugar
Coating Ingredients:
- 2 cups white chocolate chips
- 1/4 cup powdered sugar (for dusting)
Optional Add-ins:
- 1 tsp vanilla extract
- 1/4 tsp salt
Instructions
- In a spacious mixing bowl, thoroughly combine creamy peanut butter and softened unsalted butter until smooth and uniformly blended.
- Gradually incorporate powdered sugar, stirring continuously to create a cohesive, moldable mixture. If using, mix in vanilla extract and salt for enhanced flavor depth.
- Refrigerate the mixture for 15-20 minutes to firm up, making it easier to handle and shape.
- Using clean hands, roll the chilled mixture into small, uniform spheres approximately 1-inch in diameter, placing them on a parchment-lined baking sheet.
- Return the formed balls to the refrigerator for an additional 15 minutes to maintain their shape during coating.
- Melt white chocolate chips using a double boiler or microwave, stirring intermittently until completely smooth and glossy.
- Carefully dip each chilled peanut butter ball into the melted white chocolate, ensuring complete coverage. Gently tap off excess chocolate and return to the parchment-lined sheet.
- Allow chocolate-coated snowballs to set at room temperature for 10-15 minutes until the coating hardens.
- Once set, lightly dust the snowballs with additional powdered sugar for a festive, snow-like appearance.
- Store the finished snowballs in an airtight container in the refrigerator for up to one week, separating layers with parchment paper to prevent sticking.
Notes
- Chill the mixture thoroughly to achieve easier handling and more precise ball-shaping without crumbling or falling apart.
- Use a small cookie scoop or melon baller for consistent, perfectly round snowballs that look professionally crafted.
- Ensure white chocolate is smoothly melted at low temperature to prevent seizing and maintain a glossy, even coating.
- For gluten-free variation, verify all ingredients like powdered sugar are certified gluten-free before preparing the recipe.
- Prep Time: 35-40 minutes
- Cook Time: 0 minutes
- Category: Snacks, Desserts
- Method: Rolling
- Cuisine: American
Nutrition
- Serving Size: 12
- Calories: 199
- Sugar: 15 g
- Sodium: 46 mg
- Fat: 12 g
- Saturated Fat: 5 g
- Unsaturated Fat: 7 g
- Trans Fat: 0 g
- Carbohydrates: 20 g
- Fiber: 1 g
- Protein: 3 g
- Cholesterol: 10 mg
Jackson Reid
Founder & Recipe Developer
Expertise
Education
Holyoke Community College – HCC-MGM Culinary Arts Institute
Certificate in Culinary Arts
Focus: Farm-to-table cuisine, sustainable cooking practices, and hands-on kitchen training
Jackson’s love for cooking began one dish at a time. After earning his Culinary Arts Certificate from Holyoke Community College’s HCC-MGM Culinary Arts Institute, he focused on what mattered most: creating recipes that are simple to follow and full of flavor.
At 10 Below Ice Cream, Jackson brings together global influences and a less-is-more approach. His recipes reflect his belief that good food doesn’t need to be complicated; it just needs to make sense, taste great, and feel right.
When he’s not testing ingredients or adjusting seasonings, you’ll find him hiking near Asheville, exploring local markets, or chasing the best light for food photos.