Irresistible Peanut Butter Blossom Bars Recipe for Sweet Smiles
Soft, chewy peanut butter blossom bars have become my ultimate comfort dessert.
Memories of childhood baking adventures flood back with each delightful bite.
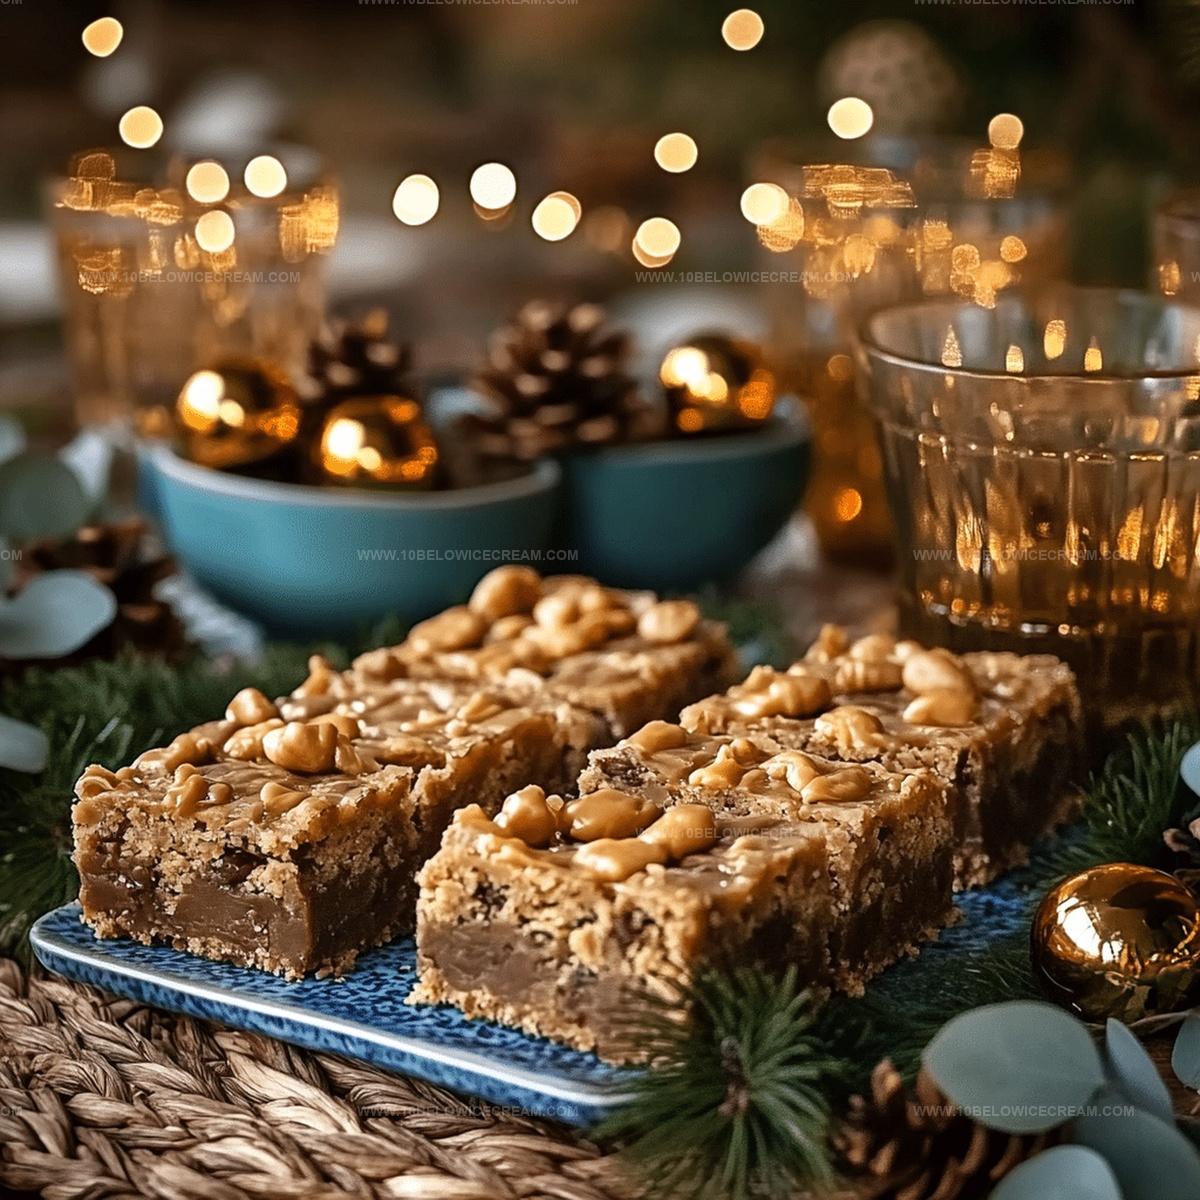
Chocolate kisses nestled perfectly atop rich, buttery squares create pure magic.
Sweet crumbs melt seamlessly, promising a nostalgic treat that feels like home.
Nobody can resist these delectable bars with their perfect balance of chocolate and peanut butter.
We crave something that speaks directly to our inner child’s love of simple pleasures.
Go ahead and indulge in this irresistible recipe that turns a classic cookie into an easy-to-share bar sensation.
Why Peanut Butter Blossom Bars Are A Sweet Hit
What You’ll Need For Peanut Butter Blossom Bars
For the Base and Wet Ingredients:For the Dry Ingredients:For the Mix-Ins and Toppings:How To Make Peanut Butter Blossom Bars At Home
Step 1: Prepare Baking Setup
Warm up the oven to 350°F. Line a 9×13-inch baking pan with parchment paper, letting edges hang slightly over the sides for easy bar removal.
Step 2: Create Creamy Base
In a large mixing bowl, blend together:Whip these ingredients until they become light, fluffy, and perfectly combined.
Step 3: Add Moisture Ingredients
Mix in egg and vanilla extract thoroughly, ensuring a smooth and consistent texture develops in the mixture.
Step 4: Incorporate Peanut Butter
Fold in creamy peanut butter, stirring carefully to distribute the nutty flavor evenly throughout the mixture.
Step 5: Combine Dry Ingredients
In a separate bowl, combine flour and baking soda. Gradually add this dry mixture to the wet ingredients, stirring until a cohesive dough forms.
Step 6: Add Peanut Butter Chips
Gently fold peanut butter chips into the dough, spreading them evenly to create delightful pockets of extra flavor.
Step 7: Spread Dough
Transfer the dough to the prepared baking pan. Press down firmly to create an even, smooth layer across the entire pan.
Step 8: Bake to Perfection
Bake for 20-25 minutes. Look for golden brown edges and a center that appears set but still slightly soft.
Step 9: Top with Chocolate Kisses
Immediately after removing from the oven, press Hershey’s Kisses chocolates into the warm surface. Space them evenly across the bars.
Step 10: Cool Completely
Let the bars cool at room temperature for about 1 hour, allowing them to set fully.
Step 11: Prepare for Serving
Use the parchment paper edges to lift the bars out of the pan. Transfer to a cutting board.
Step 12: Final Touch
Dust the top with a light sprinkle of powdered sugar for an elegant finish.
Step 13: Slice and Serve
Cut into squares, ensuring each piece contains a chocolate kiss. Serve and enjoy these delectable treats!
Helpful Tips For Peanut Butter Blossom Bars
Fun Twists On Peanut Butter Blossom Bars
What To Pair With Peanut Butter Blossom Bars
Storage Tips For Peanut Butter Blossom Bars
FAQs About Peanut Butter Blossom Bars
Yes, you can substitute almond butter or cashew butter for a different flavor profile while maintaining a similar texture.
While they add a chocolate accent, you can replace them with chocolate chips or another chocolate topping if preferred.
Don’t overbake the bars. Remove them from the oven when the edges are golden but the center is still slightly soft to maintain a tender texture.
Yes, simply replace the all-purpose flour with a gluten-free flour blend that includes xanthan gum for the best results.
Print
Peanut Butter Blossom Bars Recipe
- Total Time: 1 hour 40 minutes
- Yield: 12 1x
Description
Irresistible peanut butter blossom bars combine classic cookie charm with nostalgic comfort. Sweet chocolate kisses nestle atop rich, crumbly peanut butter base, inviting you to savor each delectable bite of this simple, crowd-pleasing dessert.
Ingredients
Baking Essentials:
- 2 cups all-purpose flour
- 1 cup unsalted butter
- 1/2 cup granulated sugar
- 1/2 cup brown sugar
Peanut Butter Component:
- 1 cup creamy peanut butter
- 1/2 cup peanut butter chips
- 1 large egg
- 1 tsp vanilla extract
- 1/2 tsp baking soda
Chocolate Topping:
- 24 Hershey’s Kisses chocolates
- 2 tbsp powdered sugar (for dusting)
Instructions
- Preheat the oven to 350°F and line a 9×13-inch baking pan with parchment paper, allowing slight overhang for easy removal.
- In a large mixing bowl, cream together softened butter, granulated sugar, and brown sugar until light and fluffy, creating a smooth base for the bars.
- Incorporate the egg and vanilla extract into the butter mixture, mixing until fully combined and creating a uniform texture.
- Gradually fold in the creamy peanut butter, ensuring a complete and even integration of the nutty element.
- In a separate bowl, whisk together flour and baking soda, then slowly add this dry mixture to the wet ingredients, stirring until a cohesive dough forms.
- Gently fold in the peanut butter chips, distributing them evenly throughout the dough for bursts of additional peanut flavor.
- Transfer the dough to the prepared baking pan, pressing it down evenly and creating a smooth, compact layer.
- Bake for 20-25 minutes, or until the edges turn golden brown and the center appears set but slightly soft.
- Remove from the oven and immediately press Hershey’s Kisses chocolates into the warm surface, spacing them evenly across the bar.
- Allow the bars to cool completely in the pan for about 1 hour at room temperature.
- Once cooled, lift the bars out using the parchment paper overhang and transfer to a cutting board.
- Dust the top with powdered sugar, creating a delicate, sweet finish.
- Slice into squares, ensuring each piece contains a chocolate kiss, and serve.
Notes
- Customize the peanut butter base by using almond or sunflower seed butter for nut-free variations, perfect for allergy-sensitive diners.
- Ensure butter is at room temperature for smoother creaming, which creates a more tender and even bar texture.
- Chill the dough for 15-20 minutes before baking to prevent excessive spreading and maintain a more compact bar shape.
- Press Hershey’s Kisses gently into the warm bars to prevent cracking, allowing the residual heat to slightly melt the chocolate for a glossy finish.
- Prep Time: 15 minutes
- Cook Time: 25 minutes
- Category: Snacks, Desserts
- Method: Baking
- Cuisine: American
Nutrition
- Serving Size: 12
- Calories: 250
- Sugar: 14 g
- Sodium: 150 mg
- Fat: 15 g
- Saturated Fat: 7 g
- Unsaturated Fat: 8 g
- Trans Fat: 0 g
- Carbohydrates: 28 g
- Fiber: 1 g
- Protein: 5 g
- Cholesterol: 25 mg
Jackson Reid
Founder & Recipe Developer
Expertise
Education
Holyoke Community College – HCC-MGM Culinary Arts Institute
Certificate in Culinary Arts
Focus: Farm-to-table cuisine, sustainable cooking practices, and hands-on kitchen training
Jackson’s love for cooking began one dish at a time. After earning his Culinary Arts Certificate from Holyoke Community College’s HCC-MGM Culinary Arts Institute, he focused on what mattered most: creating recipes that are simple to follow and full of flavor.
At 10 Below Ice Cream, Jackson brings together global influences and a less-is-more approach. His recipes reflect his belief that good food doesn’t need to be complicated; it just needs to make sense, taste great, and feel right.
When he’s not testing ingredients or adjusting seasonings, you’ll find him hiking near Asheville, exploring local markets, or chasing the best light for food photos.