
Crispy Oven Baked Shotgun Shells Recipe: A Delightful Pasta Twist
Tucking savory fillings into these oven baked shotgun shells creates a mouthwatering pasta adventure that’ll make dinner feel like a culinary celebration.
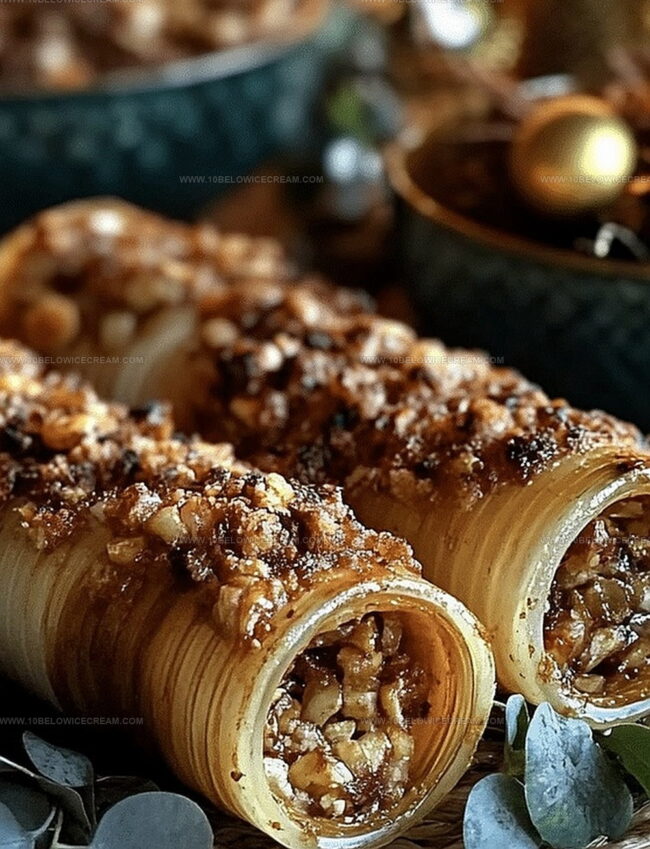
Pasta tubes become golden vessels packed with rich ingredients and bold flavors.
Cheese melts into every delicious crevice, promising a comforting meal that satisfies deep hunger.
Italian-inspired comfort emerges from a simple baking dish, turning ordinary ingredients into something extraordinary.
Meat and herbs mingle inside each shell, creating layers of incredible taste.
Minimal effort delivers maximum deliciousness, making this recipe perfect for busy cooks seeking something special.
You’ll want to dive right into this delectable dish that transforms basic ingredients into a feast.
Why Oven Baked Shotgun Shells Are So Satisfying
Everything You’ll Need For Oven Baked Shotgun Shells
For the Pasta:For the Meat and Aromatics:For the Cheese and Seasoning:For the Sauce and Garnish:For the Cooking Basics:Steps To Make Oven Baked Shotgun Shells

Step 1: Fire Up the Oven
Crank the oven to a toasty 375°F and grab a large baking dish. Give it a quick olive oil massage to prevent sticking.
Step 2: Cook Pasta Shells
Boil jumbo pasta shells in salted water until they reach that perfect al dente texture. Drain and let them chill out for a moment.
Step 3: Sizzle Onions and Garlic
Heat up a skillet and toss in:Sauté until they’re fragrant and looking see-through.
Step 4: Brown the Beef
Dump ground beef into the skillet. Break it into tiny pieces and cook until it’s completely brown with zero pink remaining.
Step 5: Create Cheesy Beef Mixture
Pull the beef off the heat and mix in:Stir until everything plays nice together.
Step 6: Stuff Those Shells
Carefully fill each pasta shell with the beef and cheese mixture. Don’t be shy – pack them generously!
Step 7: Arrange in Baking Dish
Nestle the stuffed shells close together in the prepared baking dish.
Step 8: Sauce It Up
Pour marinara sauce all over the shells, making sure they’re completely covered.
Step 9: Cheese Topping
Sprinkle a generous layer of:over the shells and sauce.
Step 10: Initial Baking
Cover the dish with aluminum foil and bake for 25 minutes.
Step 11: Final Bake
Remove the foil and continue baking for 10-15 minutes until the cheese is melted and bubbling with excitement.
Step 12: Rest and Settle
Pull the dish out of the oven and let it rest for 5 minutes – patience is key!
Step 13: Garnish and Serve
Sprinkle some freshly chopped parsley on top. Serve piping hot and watch everyone’s eyes light up!
Tips That Help With Oven Baked Shotgun Shells
Tasty Twists For Oven Baked Shotgun Shells
What Goes Well With Oven Baked Shotgun Shells
How To Store Oven Baked Shotgun Shells Properly
Top Questions About Oven Baked Shotgun Shells
Yes, you can prepare these stuffed shells ahead of time. Assemble the dish, cover tightly with foil, and refrigerate for up to 24 hours before baking. Just add an extra 10 minutes to the baking time if cooking directly from the refrigerator.
Absolutely! Ground turkey is a lean alternative that works perfectly in this recipe. Just ensure the turkey is fully cooked and seasoned well to maintain great flavor.
Cook pasta shells just until al dente and handle them gently. Use a small spoon or piping bag to fill shells carefully, which helps prevent tearing and makes stuffing easier.
Print
Oven Baked Shotgun Shells Recipe
- Total Time: 1 hour
- Yield: 6 1x
Description
Hearty Mexican-inspired oven baked shotgun shells burst with zesty ground beef, melted cheese, and rich spices nestled in perfectly crisp pasta tubes. Robust flavors and cheesy comfort make this crowd-pleasing dish a guaranteed dinner winner you’ll crave again and again.
Ingredients
Pasta and Filling:
- 12 jumbo pasta shells
- 1 lb ground beef
- 1 cup ricotta cheese
- 1 cup mozzarella cheese
- 1/2 cup parmesan cheese
Sauce and Seasonings:
- 2 cups marinara sauce
- 2 cloves garlic
- 1 tsp italian seasoning
- 1/2 tsp salt
- 1/4 tsp black pepper
Garnish and Optional Additions:
- 1/4 cup fresh parsley
- 2 tbsp olive oil
- 1/4 cup chopped onions
Instructions
- Preheat the oven to 375°F and prepare a large baking dish by lightly coating with olive oil.
- Cook jumbo pasta shells in salted boiling water until al dente, then drain and set aside to cool slightly.
- In a skillet, sauté chopped onions and minced garlic until fragrant and translucent.
- Add ground beef to the skillet, breaking it into small crumbles and cooking until completely browned and no pink remains.
- Remove beef mixture from heat and mix in ricotta cheese, italian seasoning, salt, and black pepper until well combined.
- Carefully stuff each pasta shell with the beef and cheese mixture, ensuring they are generously filled.
- Arrange stuffed shells in the prepared baking dish, nestling them close together.
- Pour marinara sauce evenly over the shells, covering them completely.
- Sprinkle mozzarella and parmesan cheese over the top of the shells and sauce.
- Cover the baking dish with aluminum foil and bake for 25 minutes.
- Remove foil and continue baking for an additional 10-15 minutes until cheese is melted and bubbly.
- Remove from oven and let rest for 5 minutes before serving.
- Garnish with freshly chopped parsley and serve hot.
Notes
- Choose jumbo shells that are uniform in size to ensure even cooking and consistent filling.
- Pat pasta shells dry after draining to prevent excess moisture from making the dish watery.
- For a leaner option, substitute ground beef with ground turkey or plant-based meat alternative.
- Drain beef thoroughly after cooking to reduce excess grease and prevent a soggy texture.
- Experiment with different cheese combinations like adding ricotta with provolone for extra depth of flavor.
- Prep shells in advance and refrigerate for up to 24 hours before baking for convenient meal planning.
- Add red pepper flakes to the beef mixture for a subtle spicy kick if desired.
- Ensure shells are completely covered with marinara sauce to prevent drying out during baking.
- Prep Time: 20 minutes
- Cook Time: 35-40 minutes
- Category: Lunch, Dinner
- Method: Baking
- Cuisine: American
Nutrition
- Serving Size: 6
- Calories: 520
- Sugar: 6 g
- Sodium: 800 mg
- Fat: 30 g
- Saturated Fat: 12 g
- Unsaturated Fat: 15 g
- Trans Fat: 1 g
- Carbohydrates: 35 g
- Fiber: 3 g
- Protein: 28 g
- Cholesterol: 85 mg
Olivia Brooks
Contributing Writer
Expertise
Education
Culinary Institute of America
Accelerated Culinary Arts Certificate Program
Focus: Culinary fundamentals, nutrition, and healthy cooking technique
Olivia believes good food should feed both the body and the soul. She earned her Accelerated Culinary Arts Certificate from the Culinary Institute of America, where she focused on nutrition and practical cooking techniques that make healthy eating easy.
At 10 Below Ice Cream, Olivia shares single-serving recipes that are fresh, plant-forward, and full of heart. She loves helping people eat better, without stress, strict rules, or sacrificing flavor.
Beyond the kitchen, Olivia spends her time tending her backyard garden, practicing yoga, and discovering hidden gems in Portland’s food scene.