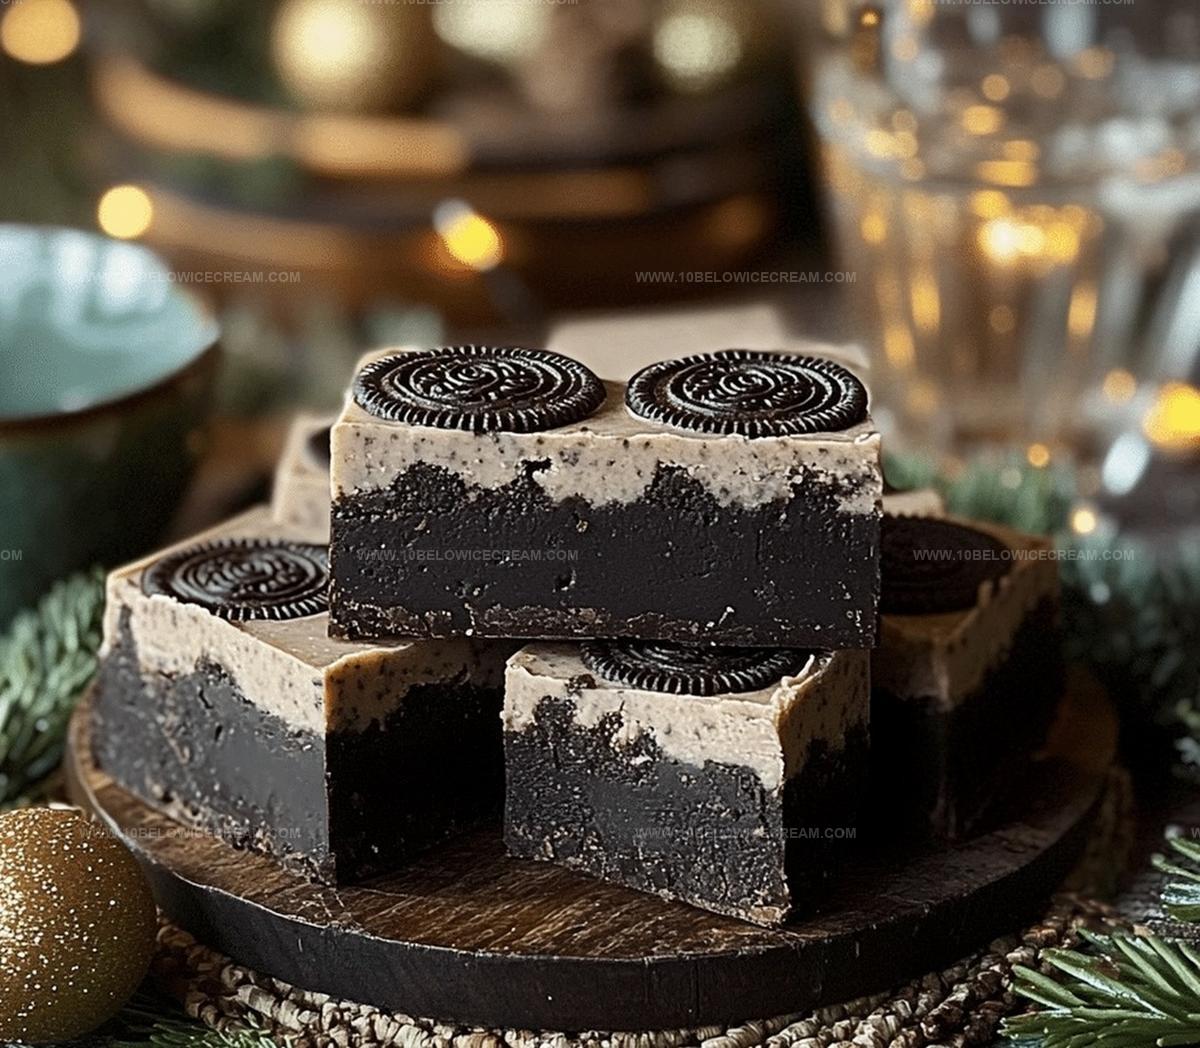
The Dreamiest Oreo Fudge Recipe: Chocolaty Bliss in Every Bite
Sweet dreams come true with this dreamy oreo fudge that melts hearts instantly.
Chocolate lovers will find pure bliss in every creamy bite.
Chunks of classic cookies create delightful surprises throughout the rich, smooth dessert.
Our simple method requires minimal ingredients and zero complicated techniques.
Decadent layers promise incredible texture and irresistible flavor combinations.
Each square delivers a nostalgic crunch with silky chocolate embrace.
You’ll want to share this magical treat – or maybe keep it all for yourself.
Questions About Oreo Fudge Answered
Yes, Oreo cookies are a key ingredient that provides texture and flavor to the fudge, creating a cookies and cream style dessert.
Dark, milk, or semi-sweet chocolate will work well. Just ensure it’s high-quality chocolate for the best flavor and smooth texture.
No, you can also use a double boiler or a heat-safe bowl over a pot of simmering water to melt chocolate safely and evenly.
Chop them into varied sizes – some chunks, some smaller pieces. This creates an interesting texture and ensures Oreo flavor in every bite of the fudge.
Why Oreo Fudge Is So Loved
What’s Needed For Oreo Fudge
For the Chocolate Base:For the Oreo Components:For the Preparation:Simple Steps To Make Oreo Fudge
Step 1: Line Baking Pan
Grab a 9×9-inch baking pan and cover the bottom and sides with parchment paper, letting a bit hang over the edges to make lifting easier later.
Step 2: Break Down Oreo Cookies
Roughly chop oreo cookies into uneven chunks, creating a mix of big and small pieces that will add awesome texture to your fudge.
Step 3: Melt Chocolate Base
In a microwave-safe bowl, combine chocolate and sweetened condensed milk. Zap in short 30-second bursts, stirring between each interval until the mixture transforms into a silky, glossy chocolate paradise.
Step 4: Enhance Chocolate Mixture
Add vanilla extract and salt to the melted chocolate, stirring until everything blends smoothly and creates a rich, decadent base.
Step 5: Incorporate Oreo Pieces
Mix about three-quarters of the chopped oreo cookies into the chocolate mixture, making sure the cookies are evenly distributed throughout.
Step 6: Create Fudge Layer
Transfer the chocolate-oreo mixture into the prepared pan, using a spatula to spread it evenly and create a perfectly smooth surface.
Step 7: Decorate Fudge Top
Scatter the remaining chopped oreo cookies and whole oreo cookies on top of the fudge, gently pressing them into the surface for a beautiful finish.
Step 8: Chill and Set
Place the fudge in the refrigerator for at least 2 hours, allowing it to firm up completely and develop its rich, creamy texture.
Step 9: Cut and Serve
Use the parchment paper overhang to lift the fudge from the pan. Slice into 1-inch squares using a sharp knife for perfect bite-sized treats.
Step 10: Store Fudge
Keep the oreo fudge in an airtight container in the refrigerator. Place parchment paper between layers to prevent sticking, and enjoy within one week.
Tips To Get Oreo Fudge Just Right
Fun Styles Of Oreo Fudge To Try
What Goes Great With Oreo Fudge
How To Keep Oreo Fudge Nice And Fresh
Print
Oreo Fudge Recipe
- Total Time: 2 hours 20 minutes
- Yield: 8 1x
Description
Indulgent Oreo Fudge delivers pure chocolate bliss with crushed cookie chunks nestled in creamy, rich layers. Sinful dessert perfection promises to satisfy sweet cravings and leave you craving another delectable bite.
Ingredients
Main Ingredients:
- 16 oz chocolate (dark or semi-sweet)
- 14 oz sweetened condensed milk
- 20 oreo cookies
Additional Ingredients:
- 1 tsp vanilla extract
- 1/4 tsp salt
Garnish/Optional:
- 5 additional oreo cookies (for topping)
Instructions
- Prepare a 9×9-inch baking pan by lining it with parchment paper, ensuring slight overhang for easy removal.
- Roughly chop the oreo cookies into chunky pieces, creating varied sizes for textural interest.
- In a large microwave-safe bowl, combine chocolate and sweetened condensed milk, heating in 30-second intervals and stirring between each interval until completely smooth and glossy.
- Gently fold vanilla extract and salt into the melted chocolate mixture, stirring until fully incorporated.
- Carefully mix three-quarters of the chopped oreo cookies into the chocolate base, distributing evenly throughout the mixture.
- Pour the fudge mixture into the prepared pan, using a spatula to spread it evenly and create a smooth surface.
- Sprinkle the remaining chopped oreo cookies and additional whole oreo cookies on top, pressing them lightly into the fudge.
- Refrigerate the fudge for at least 2 hours or until completely set and firm to the touch.
- Using the parchment paper overhang, lift the fudge from the pan and slice into 1-inch squares using a sharp knife.
- Store the oreo fudge in an airtight container in the refrigerator for up to one week, separating layers with parchment paper.
Notes
- Crush oreos differently for texture variation, mixing fine crumbs and larger chunks to create an exciting mouthfeel and visual appeal.
- Use high-quality chocolate for richer, more luxurious fudge that melts smoothly and provides deeper flavor complexity.
- Replace sweetened condensed milk with dairy-free alternatives like coconut condensed milk for vegan-friendly version, ensuring inclusivity for different dietary needs.
- Allow fudge to sit at room temperature for 10-15 minutes before serving to soften slightly, enhancing the creamy texture and making cutting easier.
- Prep Time: 15 minutes
- Cook Time: 5 minutes
- Category: Desserts, Snacks
- Method: Baking
- Cuisine: American
Nutrition
- Serving Size: 8
- Calories: 320
- Sugar: 24 g
- Sodium: 80 mg
- Fat: 15 g
- Saturated Fat: 9 g
- Unsaturated Fat: 6 g
- Trans Fat: 0 g
- Carbohydrates: 43 g
- Fiber: 1 g
- Protein: 3 g
- Cholesterol: 10 mg
Olivia Brooks
Contributing Writer
Expertise
Education
Culinary Institute of America
Accelerated Culinary Arts Certificate Program
Focus: Culinary fundamentals, nutrition, and healthy cooking technique
Olivia believes good food should feed both the body and the soul. She earned her Accelerated Culinary Arts Certificate from the Culinary Institute of America, where she focused on nutrition and practical cooking techniques that make healthy eating easy.
At 10 Below Ice Cream, Olivia shares single-serving recipes that are fresh, plant-forward, and full of heart. She loves helping people eat better, without stress, strict rules, or sacrificing flavor.
Beyond the kitchen, Olivia spends her time tending her backyard garden, practicing yoga, and discovering hidden gems in Portland’s food scene.