
Christmas Oreo Balls Recipe for Quick Holiday Treats
Sweet holiday magic happens when classic oreo balls meet festive cheer!
Creamy chocolate-coated treats bring delightful moments to your celebration.
Minimal ingredients blend into bite-sized deliciousness that everyone adores.
Cold kitchen counters become playgrounds for delectable dessert creativity.
Small hands can help roll these delightful spheres of joy.
Chocolate lovers will fall head over heels for this simple yet spectacular recipe.
These little wonders promise to spark smiles and create memorable Christmas memories.
What Makes Oreo Balls For Christmas So Addictive
Ingredients For Oreo Balls For Christmas
For the Base:For the Sweeteners and Flavoring:For the Coating and Decoration:For the Preparation Surface:Instructions For Oreo Balls For Christmas
Step 1: Crush Oreo Cookies
Grab your food processor and transform Oreo cookies into ultra-fine crumbs. Pulse until the texture is completely smooth with zero large chunks remaining.
Step 2: Mix Cream Cheese Blend
Combine softened cream cheese with the Oreo crumbs in a mixing bowl. Stir and fold until the mixture becomes perfectly uniform and moldable.
Step 3: Add Sweet Flavor Enhancers
Mix in these ingredients:Stir until the mixture looks silky smooth and develops a slight glossy sheen.
Step 4: Chill Initial Mixture
Place the mixture in the refrigerator for 15-20 minutes. This cooling period helps firm up the blend, making it easier to shape into perfect balls.
Step 5: Form Chocolate Spheres
Roll the chilled mixture into small, consistent spheres. Each ball should be about one inch in diameter. Arrange them carefully on a parchment-lined baking sheet.
Step 6: Freeze Oreo Balls
Transfer the baking sheet to the freezer. Let the Oreo balls chill for 30 minutes to maintain their shape during coating.
Step 7: Prepare White Chocolate Coating
Melt white chocolate wafers using a double boiler or microwave. Stir continuously until the chocolate becomes completely smooth and lump-free.
Step 8: Dip and Coat
Carefully submerge each frozen Oreo ball into the melted white chocolate. Ensure complete and even coverage on all sides.
Step 9: Remove Excess Chocolate
Gently tap each coated ball to remove surplus chocolate. Return the balls to the parchment-lined sheet.
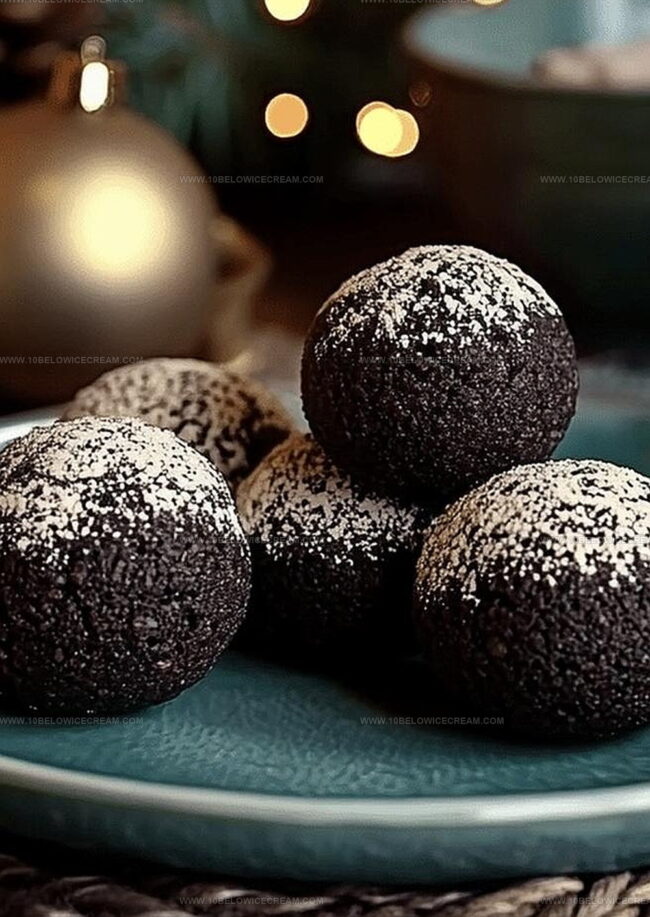
Step 10: Decorate with Festive Toppings
Immediately sprinkle these decorative elements over the wet chocolate:Step 11: Set the Chocolate
Refrigerate the decorated Oreo balls for 10-15 minutes. This helps set the chocolate and solidify the decorative toppings.
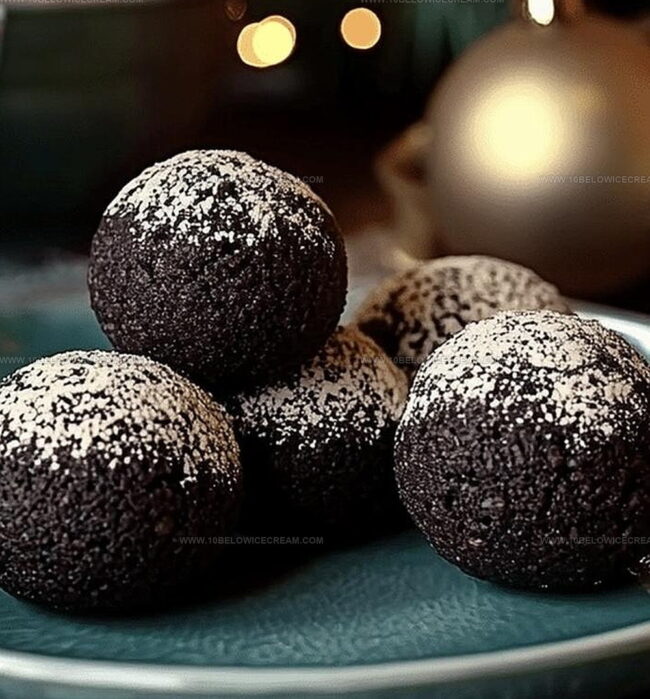
Step 12: Serve and Enjoy
Transfer the finished Oreo balls to a serving platter. Keep chilled until ready to serve. Enjoy within 5-7 days for maximum deliciousness.
Easy Tips For Christmas Oreo Ball Success
Festive Variations On Christmas Oreo Balls
Great Pairings For Christmas Oreo Balls
Best Storage For Christmas Oreo Balls
Oreo Balls For Christmas: Your Questions Answered
Yes, you can substitute Oreos with other chocolate sandwich cookies like Trader Joe’s Joe-Joes or generic chocolate cream cookies for similar results.
The crumbs should resemble a fine, sandy texture with no large chunks, which helps create a smooth and consistent mixture for the Oreo balls.
Microwave the cream cheese for 10-15 seconds or let it sit at room temperature for 30 minutes to achieve the right softness for easy mixing.
No special equipment is required – just a food processor or rolling pin for crushing cookies, a mixing bowl, and a baking sheet will work perfectly.
Print
Oreo Balls For Christmas Recipe
- Total Time: 55 minutes
- Yield: 24 1x
Description
Festive Oreo balls bring holiday cheer with their delightful chocolate coating and creamy center. Holiday gatherings sparkle when you serve these irresistible bite-sized treats that blend classic cookie crumbs with smooth cream cheese for a perfect seasonal indulgence.
Ingredients
Main Ingredients:
- 1 package (14.3 oz) Oreo cookies
- 8 oz cream cheese, softened
- 12 oz white chocolate melting wafers
Decorative Ingredients:
- 1/4 cup holiday sprinkles
- 2 tbsp crushed candy canes
Coating/Binding Ingredients:
- 1 tsp vanilla extract
- 1/4 cup powdered sugar
Instructions
- Pulverize Oreo cookies into fine crumbs using a food processor, ensuring a uniform texture without large chunks.
- In a mixing bowl, blend softened cream cheese with the Oreo crumbs until a cohesive, moldable mixture forms.
- Incorporate vanilla extract and powdered sugar, stirring until the mixture becomes smooth and slightly glossy.
- Refrigerate the mixture for 15-20 minutes to firm up, making it easier to shape into uniform balls.
- Roll the chilled mixture into small, consistent spheres approximately 1-inch in diameter, placing them on a parchment-lined baking sheet.
- Freeze the Oreo balls for 30 minutes to maintain their shape during the coating process.
- Melt white chocolate wafers using a double boiler or microwave, stirring until completely smooth and free of lumps.
- Carefully dip each frozen Oreo ball into the melted white chocolate, ensuring complete and even coverage.
- Gently tap off excess chocolate and place the coated balls back on the parchment-lined sheet.
- Immediately sprinkle holiday sprinkles and crushed candy canes over the wet chocolate coating for festive decoration.
- Refrigerate the Oreo balls for 10-15 minutes to set the chocolate and solidify the decorative elements.
- Transfer to a serving platter and keep chilled until ready to serve, enjoying within 5-7 days for optimal freshness.
Notes
- Crush Oreos completely to avoid large chunks that might disrupt the smooth texture of the balls.
- Use room temperature cream cheese for easier blending and a more uniform mixture.
- Add powdered sugar gradually to control sweetness and prevent a grainy consistency.
- Chill the mixture before shaping to make rolling easier and maintain ball shape.
- Use a small cookie scoop or melon baller for consistent Oreo ball sizes.
- Melt white chocolate slowly to prevent seizing and achieve a glossy coating.
- Work quickly when dipping to ensure even chocolate coverage before it sets.
- Store in an airtight container in the refrigerator to maintain freshness.
- For gluten-free version, substitute regular Oreos with gluten-free chocolate sandwich cookies.
- Experiment with different chocolate coatings like dark or milk chocolate for variety.
- Prep Time: 20-25 minutes
- Cook Time: 30 minutes
- Category: Snacks, Desserts
- Method: Rolling
- Cuisine: American
Nutrition
- Serving Size: 24
- Calories: 150
- Sugar: 12 g
- Sodium: 100 mg
- Fat: 8 g
- Saturated Fat: 4.5 g
- Unsaturated Fat: 3.5 g
- Trans Fat: 0 g
- Carbohydrates: 19 g
- Fiber: 1 g
- Protein: 2 g
- Cholesterol: 15 mg
Jackson Reid
Founder & Recipe Developer
Expertise
Education
Holyoke Community College – HCC-MGM Culinary Arts Institute
Certificate in Culinary Arts
Focus: Farm-to-table cuisine, sustainable cooking practices, and hands-on kitchen training
Jackson’s love for cooking began one dish at a time. After earning his Culinary Arts Certificate from Holyoke Community College’s HCC-MGM Culinary Arts Institute, he focused on what mattered most: creating recipes that are simple to follow and full of flavor.
At 10 Below Ice Cream, Jackson brings together global influences and a less-is-more approach. His recipes reflect his belief that good food doesn’t need to be complicated; it just needs to make sense, taste great, and feel right.
When he’s not testing ingredients or adjusting seasonings, you’ll find him hiking near Asheville, exploring local markets, or chasing the best light for food photos.