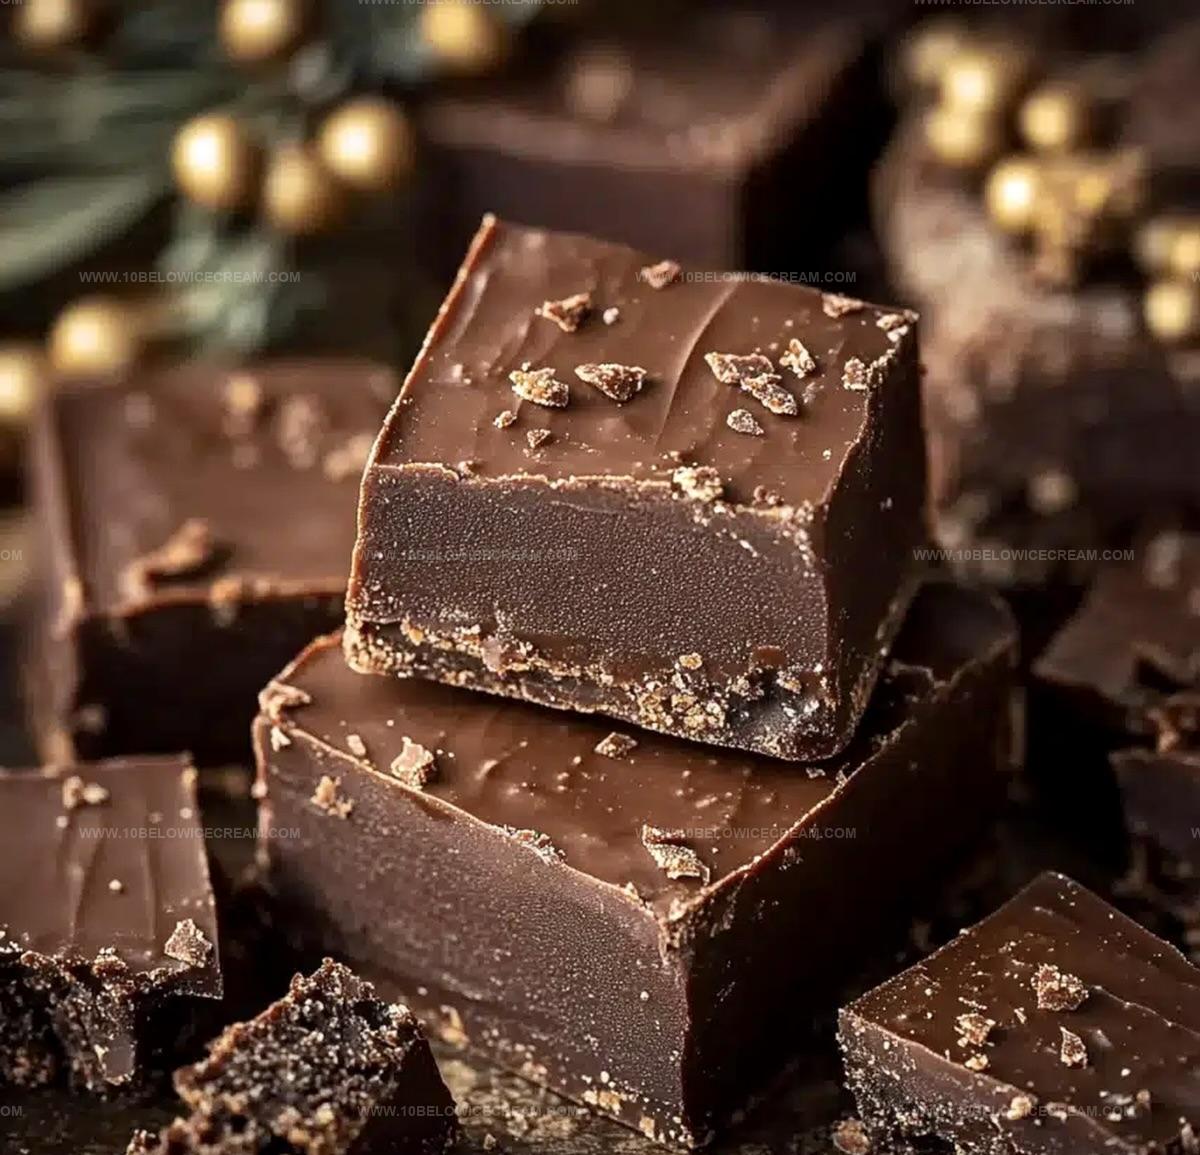
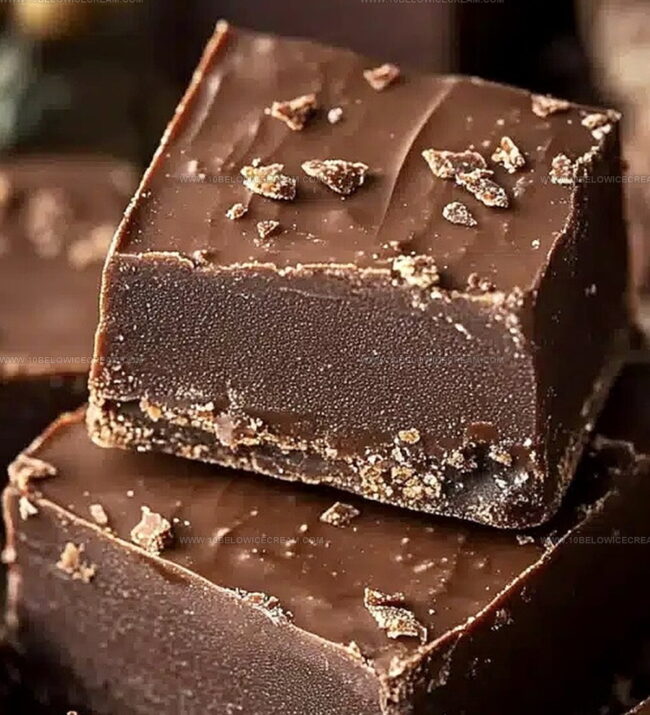
Grandma’s Old Fashioned Fudge Recipe to Savor
Creamy old fashioned fudge brings back memories of grandma’s kitchen and sweet childhood moments.
Chocolate lovers understand the magic behind this classic dessert that melts perfectly on your tongue.
Rich cocoa flavors dance with sugary goodness, creating a nostalgic treat.
Smooth textures invite you to savor each delectable bite of this traditional confection.
Generations have passed down secret techniques for achieving that perfect fudgy consistency.
Simple ingredients combine to produce something truly extraordinary.
You’ll fall in love with this timeless recipe that promises pure indulgence.
Prepare to experience a delightful journey through sweet, chocolatey memories.
Why Old Fashioned Fudge Brings Back Sweet Memories

Old Fashioned Fudge Ingredient List
For the Base:For the Binding and Flavor:For the Optional Addition:Preparation Essentials:How To Cook Old Fashioned Fudge
Step 1: Prepare Baking Pan
Line a 9×9-inch baking pan with parchment paper, allowing extra overhang for easy removal. Lightly grease the exposed sides of the pan to prevent sticking.
Step 2: Create Chocolate Base
In a large heavy-bottomed saucepan, combine:Stir the ingredients until they form a smooth, well-blended mixture.
Step 3: Monitor Temperature
Attach a candy thermometer to the pan. Heat the mixture over medium-high heat, stirring continuously to prevent burning and ensure even heating.
Step 4: Reach Precise Temperature
Cook the chocolate base until it reaches exactly 234°F (soft-ball stage). This process typically takes 10-12 minutes of careful attention and consistent stirring.
Step 5: Add Marshmallow Creme
Remove the pan from heat immediately. Quickly fold in marshmallow creme, stirring vigorously to create a uniform, glossy texture throughout the mixture.
Step 6: Enhance Flavor
Incorporate vanilla extract and salt, mixing thoroughly to distribute the flavors evenly across the fudge.
Step 7: Optional Nut Addition
If desired, gently fold nuts into the mixture, ensuring they are well-distributed throughout the fudge.
Step 8: Transfer to Pan
Pour the molten fudge into the prepared pan. Use a silicone spatula to spread it evenly and eliminate any air pockets.
Step 9: Cool and Set
Allow the fudge to cool at room temperature for 2-3 hours, or until it completely sets and becomes firm to the touch.
Step 10: Remove from Pan
Using the parchment paper overhang, carefully lift the fudge from the pan and transfer to a cutting board.
Step 11: Cut into Pieces
Slice the fudge into precise squares. Wipe the knife clean between cuts to create neat, professional-looking pieces.
Step 12: Store Properly
Store the fudge in an airtight container at room temperature. Place parchment paper between layers to prevent the pieces from sticking together.
Tips To Nail Old Fashioned Fudge
Flavor Twists For Old Fashioned Fudge
Tasty Pairings With Old Fashioned Fudge
Best Way To Store Old Fashioned Fudge
FAQs For Old Fashioned Fudge
Granulated white sugar works best for this recipe. Brown sugar or alternative sweeteners might alter the texture and consistency of the fudge.
A candy thermometer is crucial for achieving the perfect soft-ball stage. Without it, you risk under or overcooking the fudge, which can make it grainy or too hard.
The mixture should reach exactly 234°F (soft-ball stage). At this point, the mixture will form a soft, pliable ball when dropped into cold water, indicating it’s ready to be removed from heat.
Print
Old Fashioned Fudge Recipe
- Total Time: 27 minutes
- Yield: 12 1x
Description
Rich chocolate Old Fashioned Fudge melts smoothly on palates with nostalgic charm. Sweet memories swirl through each silky square, inviting you to savor classic dessert perfection.
Ingredients
Chocolate Base:
- 3 cups granulated sugar
- 3/4 cup unsalted butter
- 2/3 cup evaporated milk
- 1/2 cup unsweetened cocoa powder
Binding Agents:
- 1 jar (7 oz) marshmallow creme
- 1 tsp vanilla extract
Finishing Ingredients:
- 1 pinch salt
- 1 cup chopped nuts (optional)
Instructions
- Prepare a 9×9-inch baking pan by lining it with parchment paper, ensuring overhang for easy removal, and lightly grease the exposed sides.
- In a large heavy-bottomed saucepan, combine sugar, butter, evaporated milk, and cocoa powder, stirring to create a smooth mixture.
- Position a candy thermometer in the pan and heat the mixture over medium-high heat, continuously stirring to prevent scorching and ensure even heating.
- Cook the chocolate base until it reaches exactly 234°F (soft-ball stage), which typically takes 10-12 minutes of careful monitoring.
- Immediately remove the pan from heat and quickly fold in marshmallow creme, stirring vigorously to create a uniform, glossy texture.
- Incorporate vanilla extract and salt, mixing thoroughly to distribute the flavors evenly throughout the fudge.
- If using nuts, gently fold them into the mixture, ensuring they are well-distributed.
- Pour the molten fudge into the prepared pan, using a silicone spatula to spread it evenly and eliminate any air pockets.
- Allow the fudge to cool at room temperature for 2-3 hours, or until it sets completely and becomes firm to the touch.
- Using the parchment paper overhang, lift the fudge from the pan and transfer to a cutting board.
- Slice into precise squares, wiping the knife clean between cuts for neat, professional-looking pieces.
- Store the fudge in an airtight container at room temperature, separating layers with parchment paper to prevent sticking.
Notes
- Use a heavy-bottomed saucepan to distribute heat evenly and prevent burning, avoiding potential scorching during the cooking process.
- Monitor the temperature precisely with a reliable candy thermometer, as reaching exactly 234°F is crucial for achieving the perfect fudge consistency.
- Stir continuously while cooking to prevent sugar crystallization and ensure a smooth, creamy texture that melts in your mouth.
- For nut-free or alternative dietary needs, easily swap out nuts or omit them completely without compromising the fudge’s rich chocolate flavor.
- Prep Time: 15 minutes
- Cook Time: 12 minutes
- Category: Desserts, Snacks
- Method: Boiling
- Cuisine: American
Nutrition
- Serving Size: 12
- Calories: 205
- Sugar: 30 g
- Sodium: 20 mg
- Fat: 9 g
- Saturated Fat: 5 g
- Unsaturated Fat: 4 g
- Trans Fat: 0 g
- Carbohydrates: 31 g
- Fiber: 1 g
- Protein: 2 g
- Cholesterol: 15 mg
Olivia Brooks
Contributing Writer
Expertise
Education
Culinary Institute of America
Accelerated Culinary Arts Certificate Program
Focus: Culinary fundamentals, nutrition, and healthy cooking technique
Olivia believes good food should feed both the body and the soul. She earned her Accelerated Culinary Arts Certificate from the Culinary Institute of America, where she focused on nutrition and practical cooking techniques that make healthy eating easy.
At 10 Below Ice Cream, Olivia shares single-serving recipes that are fresh, plant-forward, and full of heart. She loves helping people eat better, without stress, strict rules, or sacrificing flavor.
Beyond the kitchen, Olivia spends her time tending her backyard garden, practicing yoga, and discovering hidden gems in Portland’s food scene.