Heavenly Old Fashioned Chocolate Pie Recipe for Sweet Comfort
Rich, creamy chocolate pie has been a cherished dessert in southern kitchens for generations.
Grandmothers carefully passed down their secret techniques through handwritten recipe cards.
Sweet memories of childhood gatherings often centered around this delectable treat.
Comfort and nostalgia blend perfectly in each silky chocolate-filled slice.
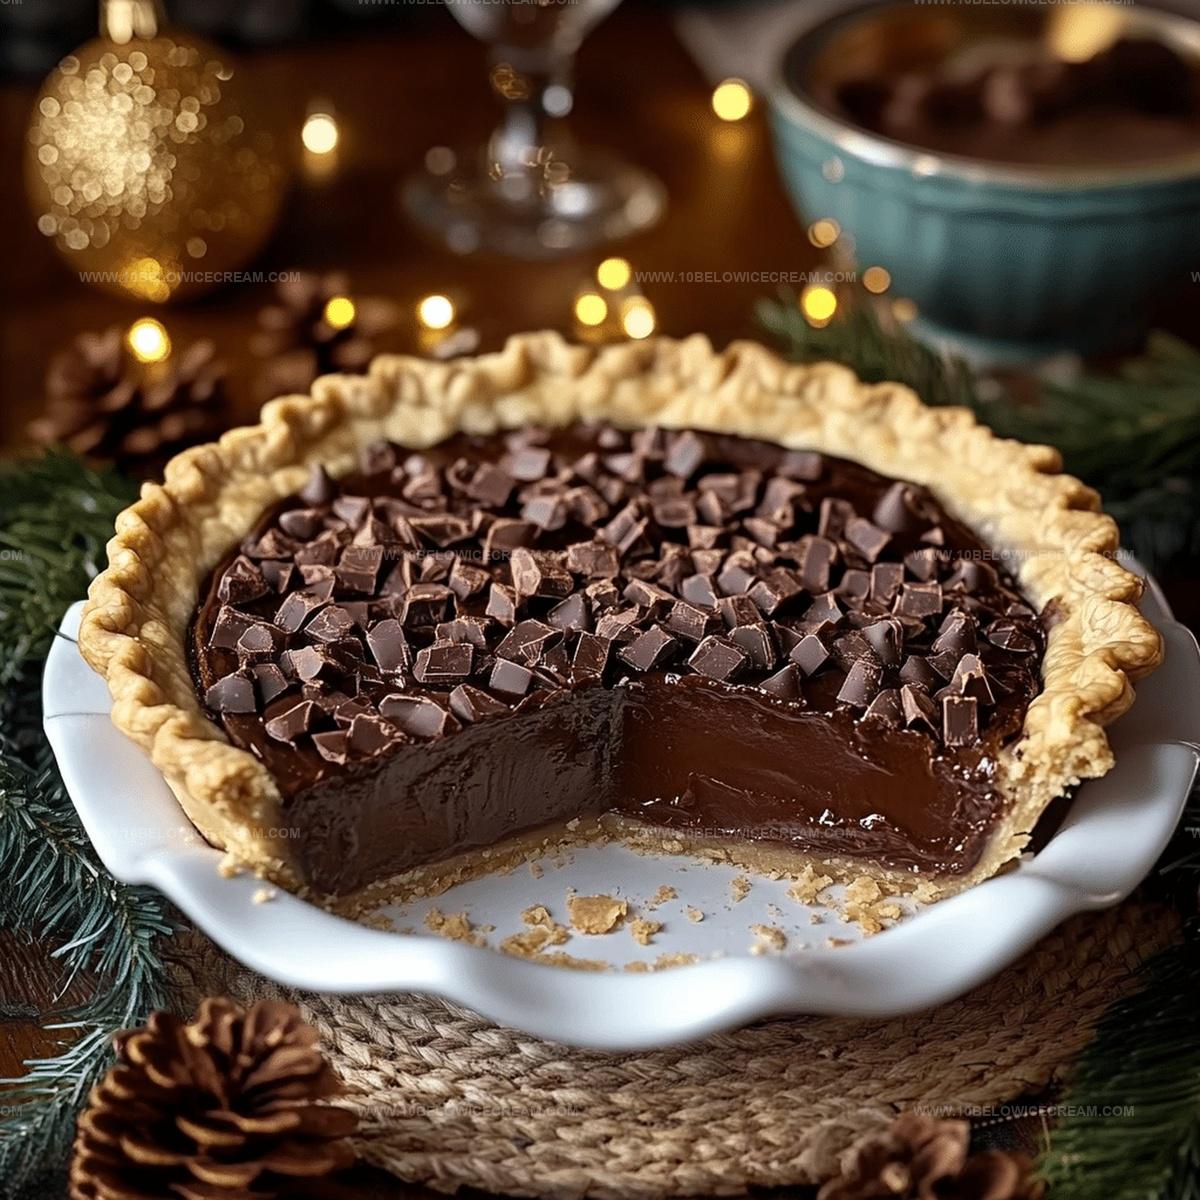
Delicate pastry crusts cradle smooth, decadent chocolate filling that melts on your tongue.
Every bite connects you to traditional baking methods and warm family traditions.
You’ll find this classic dessert irresistibly simple yet incredibly delicious.
Grab a fork and savor a slice of pure, homemade happiness.
Why Old Fashioned Chocolate Pie Feels Like Home
Everything Needed For Old Fashioned Chocolate Pie
For the Pie Crust:For the Chocolate Filling:For the Topping and Garnish:How To Bake Old Fashioned Chocolate Pie Perfectly
Step 1: Warm Up The Oven
Crank the oven to a toasty 375°F. Grab your pie dish and gently press the pie crust into it, giving the edges a fancy crimp. Dust the surface with a sprinkle of sugar and salt.
Step 2: Bake The Crust
Pop the crust into the oven for 10-12 minutes until it turns a gorgeous golden color. Rescue it from the heat and let it cool completely on a wire rack.
Step 3: Mix Dry Ingredients
In a sturdy saucepan, whisk together:Blend until the mixture looks smooth and free of any pesky lumps.
Step 4: Combine Wet Ingredients
Slowly blend in:Stir continuously to create a silky chocolate base that looks absolutely dreamy.
Step 5: Cook The Chocolate Base
Set the saucepan over medium heat. Keep stirring constantly to prevent any burning and ensure a creamy texture.
Step 6: Watch The Magic Happen
Cook for 7-9 minutes, keeping an eye out for the mixture to thicken. You’ll know it’s perfect when it coats the back of a spoon like a luxurious chocolate blanket.
Step 7: Add Finishing Touches
Pull the pan off the heat and stir in:Mix until the butter melts completely and blends smoothly into the chocolate.
Step 8: Fill The Crust
Pour the luscious chocolate filling into the pre-baked crust. Use a spatula to spread it evenly, eliminating any sneaky air bubbles.
Step 9: Chill And Set
Slide the pie into the refrigerator. Let it rest for 3-4 hours, or even better, overnight. This helps the filling set into a perfect, dreamy consistency.
Step 10: Whip Up The Topping
Whip heavy cream with powdered sugar and vanilla until it forms soft, billowy peaks.
Step 11: Crown The Pie
Spread the whipped cream over the chilled chocolate filling. Create elegant swirls and peaks that’ll make everyone’s mouth water.
Step 12: Add A Finishing Flourish
Sprinkle some delicate chocolate shavings on top for an extra touch of elegance.
Step 13: Serve And Enjoy
Slice the pie and serve it chilled. Watch as the rich, velvety chocolate interior makes everyone swoon with delight.
Pro Tips For Rich, Silky Old Fashioned Chocolate Pie
Sweet Twists On Old Fashioned Chocolate Pie
Perfect Pairings For Old Fashioned Chocolate Pie
How To Store Old Fashioned Chocolate Pie The Right Way
Old Fashioned Chocolate Pie FAQs Made Simple
The combination of cocoa powder, eggs, milk, and butter creates a rich, silky chocolate filling that’s smooth and luxurious, offering deep chocolate flavor without being overly sweet.
No, it’s surprisingly simple. With basic whisking and careful heating techniques, even novice bakers can create a professional-looking dessert by following step-by-step instructions carefully.
When the mixture thickens and coats the back of a spoon without dripping quickly, and becomes pudding-like in consistency, it’s perfectly cooked. This typically takes 7-9 minutes of constant stirring.
Print
Old Fashioned Chocolate Pie Recipe
- Total Time: 3-4 hours (plus refrigeration)
- Yield: 8 1x
Description
Silky smooth chocolate custard nestles in a flaky, buttery crust for this classic old fashioned chocolate pie that whispers comfort and nostalgia. Rich cocoa layers meld perfectly, promising a slice of pure, homemade happiness you’ll savor with each delightful bite.
Ingredients
Pie Crust:
- 1 pie crust (homemade or store-bought)
- 1 tbsp sugar
- 1/4 tsp salt
Chocolate Filling:
- 3/4 cup unsweetened cocoa powder
- 1 1/2 cups granulated sugar
- 1/4 cup cornstarch
- 1/2 tsp salt
- 3 large eggs
- 2 cups whole milk
- 1/4 cup unsalted butter
- 1 tsp vanilla extract
Whipped Topping:
- 1 1/2 cups heavy whipping cream
- 3 tbsp powdered sugar
- 1/2 tsp vanilla extract
- 2 tbsp chocolate shavings (optional)
Instructions
- Preheat the oven to 375°F and carefully position the pie crust into a 9-inch pie dish, crimping the edges decoratively while sprinkling sugar and salt across the surface.
- Bake the pie crust for 10-12 minutes until lightly golden, then remove and allow to cool completely on a wire rack.
- In a heavy-bottomed saucepan, whisk together cocoa powder, granulated sugar, cornstarch, and salt until thoroughly combined and lump-free.
- Gradually incorporate eggs and milk into the dry mixture, stirring continuously to create a smooth, silky chocolate base.
- Place the saucepan over medium heat, stirring constantly to prevent scorching and ensure a creamy consistency.
- Cook the chocolate mixture for 7-9 minutes, watching for a gradual thickening that coats the back of a spoon, indicating perfect pudding-like texture.
- Remove from heat and immediately fold in butter and vanilla extract, stirring until the butter melts completely and integrates smoothly.
- Pour the luxurious chocolate filling into the pre-baked pie crust, using a spatula to spread evenly and eliminate any air pockets.
- Refrigerate the pie for at least 3-4 hours, or preferably overnight, to allow the filling to set completely.
- Before serving, whip heavy cream with powdered sugar and vanilla until soft peaks form, creating a light and airy topping.
- Generously spread the whipped cream over the chilled chocolate filling, creating elegant swirls and peaks.
- Optionally garnish with delicate chocolate shavings for an elegant finishing touch.
- Slice and serve the pie chilled, revealing the rich, velvety chocolate interior.
Notes
- Ensure pie crust is completely cool before adding filling to prevent soggy bottom and maintain crisp texture.
- Use Dutch-processed cocoa for deeper, more intense chocolate flavor that elevates the entire dessert.
- Constant stirring is crucial during cooking to prevent lumps and achieve silky-smooth pudding-like consistency.
- Chilling overnight allows flavors to develop and filling to set perfectly, creating a more decadent dessert experience.
- Prep Time: 30 minutes
- Cook Time: 10-12 minutes
- Category: Desserts
- Method: Baking
- Cuisine: American
Nutrition
- Serving Size: 8
- Calories: 451
- Sugar: 40 g
- Sodium: 200 mg
- Fat: 27 g
- Saturated Fat: 16 g
- Unsaturated Fat: 9 g
- Trans Fat: 1 g
- Carbohydrates: 45 g
- Fiber: 2 g
- Protein: 6 g
- Cholesterol: 90 mg
Olivia Brooks
Contributing Writer
Expertise
Education
Culinary Institute of America
Accelerated Culinary Arts Certificate Program
Focus: Culinary fundamentals, nutrition, and healthy cooking technique
Olivia believes good food should feed both the body and the soul. She earned her Accelerated Culinary Arts Certificate from the Culinary Institute of America, where she focused on nutrition and practical cooking techniques that make healthy eating easy.
At 10 Below Ice Cream, Olivia shares single-serving recipes that are fresh, plant-forward, and full of heart. She loves helping people eat better, without stress, strict rules, or sacrificing flavor.
Beyond the kitchen, Olivia spends her time tending her backyard garden, practicing yoga, and discovering hidden gems in Portland’s food scene.