Dreamy No-Bake Chocolate Pink Cheesecake Recipe You’ll Adore
Creamy no-bake chocolate pink cheesecake brings a delightful twist to classic dessert lovers.
Sweet layers of rich chocolate meld perfectly with delicate pink hues.
Chilled and silky smooth, this recipe promises pure indulgence without firing up the oven.
Cool textures and decadent flavors dance together in each luxurious bite.
Minimal effort delivers maximum satisfaction with this stunning dessert.
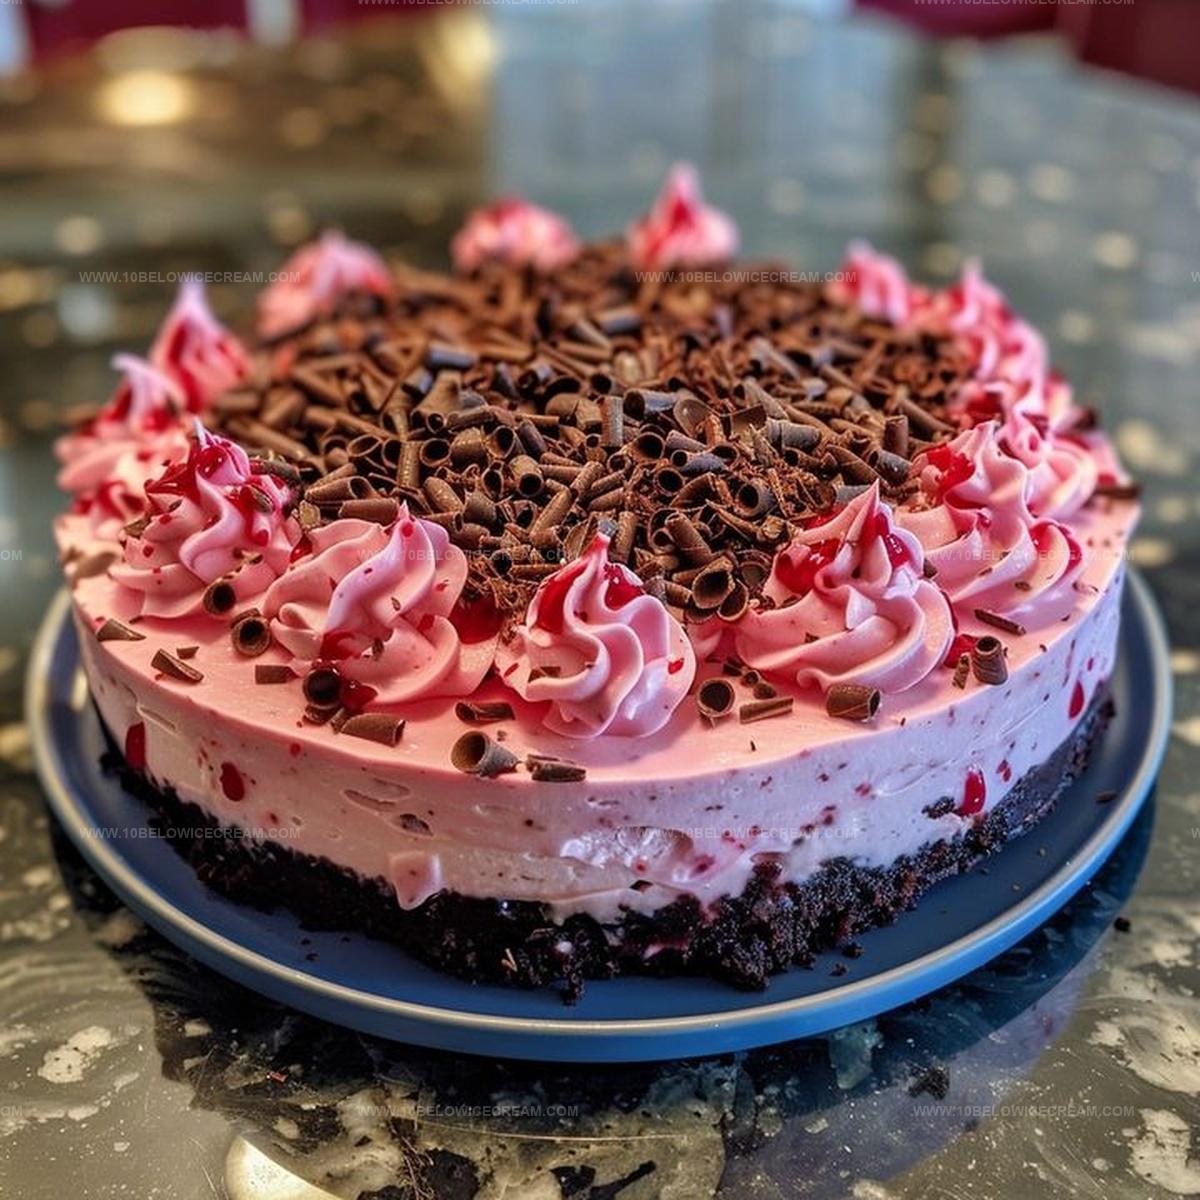
Chocolate and pink create a mesmerizing visual that will impress anyone at the table.
Ingredients for No-Bake Chocolate Pink Cheesecake
Base Ingredients:Cheesecake Filling Ingredients:Chocolate Topping Ingredients:Optional Garnish Ingredients:Instructions for No-Bake Chocolate Pink Cheesecake
Step 1: Create Chocolate Cookie Crust
Grab your medium bowl and combine chocolate cookie crumbs with melted butter. Press this delicious mixture firmly into the bottom of a 9-inch springform pan. Pop the pan into the refrigerator to chill while you prepare the magical filling.
Step 2: Whip Cream Cheese Base
Take your cream cheese and beat it until silky smooth and creamy. Add powdered sugar and vanilla extract, mixing until everything blends together perfectly.
Step 3: Fold Whipped Cream
In a separate bowl, whip heavy cream until it forms beautiful stiff peaks. Gently fold the whipped cream into the cream cheese mixture. Splash in some pink food coloring and mix until the color looks dreamy and even.
Step 4: Layer Pink Cheesecake Filling
Spread the pink cheesecake filling across the chocolate cookie crust. Use a spatula to create a smooth, gorgeous surface. Return to the refrigerator while preparing the decadent chocolate topping.
Step 5: Create Chocolate Ganache
Place dark chocolate chips in a heatproof bowl. Heat heavy cream in a small saucepan until it starts to simmer. Pour hot cream over chocolate chips and let sit for 2-3 minutes. Stir until the mixture becomes wonderfully smooth and glossy.
Step 6: Cover with Chocolate Ganache
Allow ganache to cool slightly, then pour over the chilled cheesecake. Use a spatula to spread it evenly across the top.
Step 7: Chill and Set
Refrigerate the cheesecake for at least 4 hours or overnight to ensure it sets perfectly.
Step 8: Decorate and Serve
Before serving, add a flourish of whipped cream, scatter fresh berries, and sprinkle chocolate shavings for an extra touch of elegance.
Pro Tips for No-Bake Chocolate Pink Cheesecake
Variation Ideas for No-Bake Chocolate Pink Cheesecake
Pairing Suggestions for No-Bake Chocolate Pink Cheesecake
Storage Guidelines for No-Bake Chocolate Pink Cheesecake
FAQs on No-Bake Chocolate Pink Cheesecake
Use room temperature cream cheese and avoid overmixing the filling. Gently fold ingredients and don’t incorporate too much air into the mixture.
Yes, this no-bake cheesecake can be prepared up to 2-3 days in advance and stored covered in the refrigerator. The flavors actually improve as it sits.
You can use a regular 9-inch cake pan lined with parchment paper, making sure to leave some overhang for easy removal. Alternatively, use individual serving glasses for a deconstructed version.
Why No-Bake Chocolate Pink Cheesecake Is a Delight
Print
No-Bake Chocolate Pink Cheesecake Recipe
- Total Time: 4 hours 25 minutes (including chilling and setting times)
- Yield: 8 1x
Description
Indulgent no-bake chocolate pink cheesecake blends rich cocoa with delicate raspberry swirls, creating a dreamy dessert that melts seamlessly on your palate. Creamy layers of chocolate and pink hues promise a luxurious treat perfect for elegant gatherings or quiet moments of sweet pleasure.
Ingredients
Main Ingredients:
- 24 ounces (680 grams) cream cheese, softened
- 1 cup (240 milliliters) heavy cream
- 1 cup (120 grams) powdered sugar
- 1 cup (170 grams) dark chocolate chips
Crust Ingredients:
- 1 1/2 cups (180 grams) chocolate cookie crumbs
- 1/4 cup (60 grams) unsalted butter, melted
Additional Ingredients:
- 1 teaspoon vanilla extract
- Pink food coloring
- Whipped cream (optional)
- Fresh berries (optional)
- Chocolate shavings (optional)
Instructions
- Crush chocolate cookies into fine crumbs and combine with melted butter. Press mixture firmly into the bottom of a 9-inch springform pan, creating a compact base. Chill in refrigerator for 15 minutes.
- Using an electric mixer, whip cream cheese until silky and uniform. Incorporate powdered sugar and vanilla extract, blending until completely smooth.
- Separately whip heavy cream until it forms sturdy peaks. Delicately fold whipped cream into cream cheese mixture, maintaining light texture. Add pink food coloring and gently blend until color appears uniform.
- Transfer pink cheesecake filling onto chilled crust, spreading evenly with an offset spatula. Ensure surface is completely level and smooth.
- Create chocolate ganache by placing dark chocolate chips in a heat-resistant bowl. Heat heavy cream until tiny bubbles form around edges, approximately 2-3 minutes. Pour hot cream over chocolate, allowing mixture to rest briefly before stirring until glossy and completely integrated.
- Allow ganache to cool for 5-7 minutes, then carefully pour over chilled cheesecake. Tilt pan to distribute chocolate layer uniformly.
- Refrigerate for 4-6 hours or overnight until filling sets completely and becomes firm.
- Before serving, optionally decorate with dollops of whipped cream, scattered fresh berries, and delicate chocolate shavings for elegant presentation.
Notes
- Ensure cookie crumbs are finely ground for a smooth, compact crust that holds together perfectly when sliced.
- Use room temperature cream cheese to prevent lumps and achieve a silky-smooth filling texture.
- Whip cream carefully to stiff peaks without overbeating, which can cause butter-like separation and ruin the light, airy consistency.
- For a gluten-free version, swap chocolate cookie crumbs with gluten-free graham crackers or almond flour-based cookies.
- Create flavor variations by substituting pink food coloring with raspberry puree for natural color and added fruity taste.
- Chill ganache briefly before pouring to prevent it from sliding off the cheesecake surface and ensuring a clean, glossy finish.
- Store leftovers in an airtight container in the refrigerator for up to 5 days to maintain optimal texture and flavor.
- Prep Time: 20 minutes
- Cook Time: 5 minutes
- Category: Desserts
- Method: Refrigerating
- Cuisine: American
Nutrition
- Serving Size: 8
- Calories: 505 kcal
- Sugar: 31 g
- Sodium: 180 mg
- Fat: 39 g
- Saturated Fat: 24 g
- Unsaturated Fat: 12 g
- Trans Fat: 0.5 g
- Carbohydrates: 36 g
- Fiber: 3 g
- Protein: 6 g
- Cholesterol: 115 mg
Olivia Brooks
Contributing Writer
Expertise
Education
Culinary Institute of America
Accelerated Culinary Arts Certificate Program
Focus: Culinary fundamentals, nutrition, and healthy cooking technique
Olivia believes good food should feed both the body and the soul. She earned her Accelerated Culinary Arts Certificate from the Culinary Institute of America, where she focused on nutrition and practical cooking techniques that make healthy eating easy.
At 10 Below Ice Cream, Olivia shares single-serving recipes that are fresh, plant-forward, and full of heart. She loves helping people eat better, without stress, strict rules, or sacrificing flavor.
Beyond the kitchen, Olivia spends her time tending her backyard garden, practicing yoga, and discovering hidden gems in Portland’s food scene.