
No Bake Eggnog Pie Recipe for a Holiday Dessert
Crafting a delightful no bake eggnog pie promises a festive dessert that celebrates winter’s most beloved flavors.
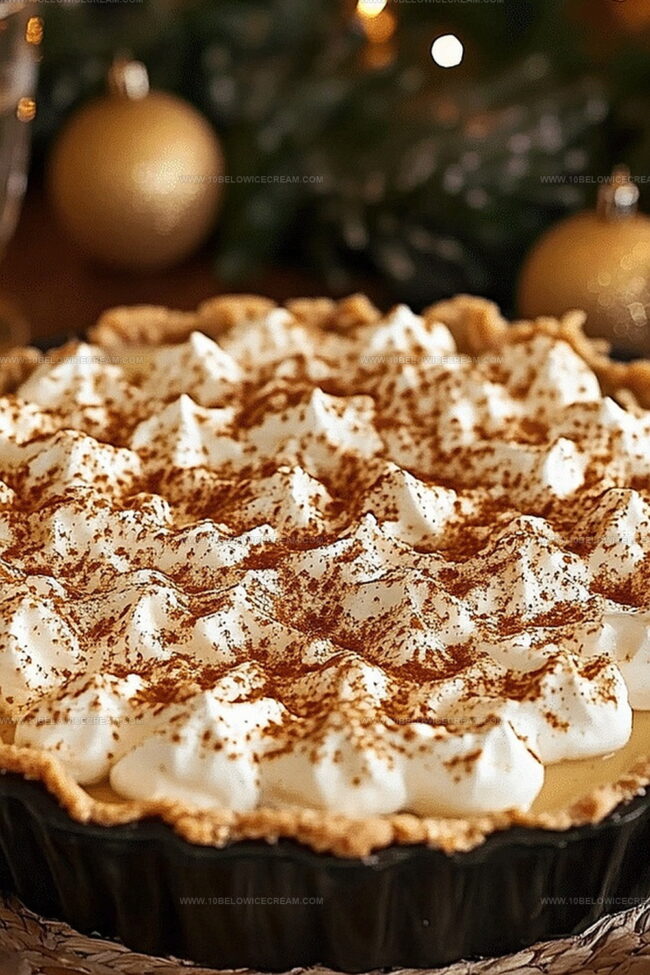
Creamy and smooth, this treat captures the essence of holiday cheer without requiring an oven.
Sweet notes of nutmeg and cinnamon dance through each silky layer, creating a memorable experience.
Minimal effort yields maximum satisfaction with this simple yet impressive dessert.
Chilled and rich, the pie delivers a luxurious texture that melts in you mouth.
Seasonal ingredients combine to produce a spectacular finale for any holiday gathering.
Whip up this delectable dessert and watch faces light up with pure delight.
No Bake Eggnog Pie: Why It’s A Holiday Favorite
Ingredients For No Bake Eggnog Pie
For the Crust:For the Filling:For the Flavoring and Garnish:How To Assemble No Bake Eggnog Pie
Step 1: Craft The Crumbly Crust
Melt butter and mix it with graham cracker crumbs and sugar in a bowl. Stir until the mixture looks like damp, coarse sand that clumps together easily.
Step 2: Press The Crust Perfectly
Pour the crumb mixture into a 9-inch pie dish. Use your fingers or the back of a spoon to press the mixture firmly across the bottom and up the sides, creating a solid foundation for your pie.
Step 3: Chill The Crust
Pop the prepared crust into the refrigerator for 15 minutes. This helps the crust set and become firm while you prepare the filling.
Step 4: Whip The Cream
In a large mixing bowl, whip heavy cream until it forms stiff, billowy peaks. This will create a light and airy base for your pie filling.
Step 5: Smooth The Cream Cheese
In a separate bowl, beat softened cream cheese until it becomes completely smooth and free of any lumps.
Step 6: Create The Flavor Base
Blend into the cream cheese:Mix until the ingredients are thoroughly combined and the mixture looks silky and glossy.
Step 7: Incorporate Eggnog
Gently fold the eggnog into the cream cheese mixture. Stir carefully to maintain the light, fluffy texture and ensure even flavor distribution.
Step 8: Combine Filling Components
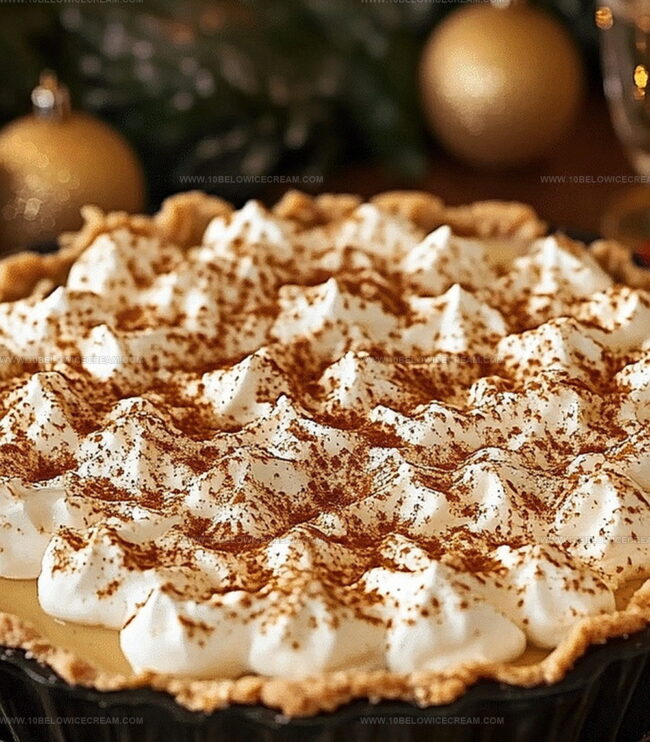
Delicately fold the whipped cream into the eggnog-cream cheese mixture. The goal is to create a luxurious, cloud-like filling.
Step 9: Fill The Crust
Pour the filling into the chilled graham cracker crust. Use a spatula to spread it evenly and smooth the top.
Step 10: Set And Chill
Refrigerate the pie for at least 4 hours or overnight. This allows the filling to set and the flavors to mingle and develop.
Step 11: Add Festive Finishing Touches
Before serving, top the pie with:Step 12: Serve And Enjoy
Slice the chilled pie directly from the refrigerator to maintain its perfect creamy texture and rich flavor.
Handy Tips For No Bake Eggnog Pie Success
Twists And Flavors For No Bake Eggnog Pie
What To Serve With No Bake Eggnog Pie
Best Ways To Store No Bake Eggnog Pie
FAQs About No Bake Eggnog Pie
Graham crackers provide a sweet, slightly nutty base that complements the rich eggnog flavor, creating a delicious contrast in texture and taste.
Yes, this no-bake pie is perfect for preparing in advance. You can make it up to 2 days before serving, which helps the flavors meld together beautifully.
You’ll just need basic kitchen tools like a mixing bowl, whisk, pie dish, and refrigerator. No baking or special equipment is required.
Print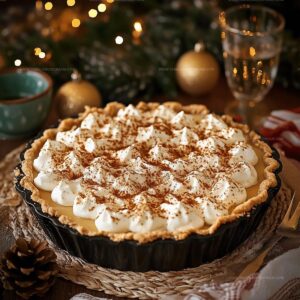
No Bake Eggnog Pie Recipe
- Total Time: 15 minutes
- Yield: 8 1x
Description
Creamy holiday magic comes alive in this no bake eggnog pie, blending seasonal cheer with silky smooth indulgence. Festive graham cracker crust and rich nutmeg-kissed filling create a delightful dessert you’ll savor with pure Christmas joy.
Ingredients
Pie Filling:
- 2 cups heavy cream
- 1 cup eggnog
- 1 package (8 oz) cream cheese, softened
- 1/2 cup powdered sugar
- 1 tsp vanilla extract
- 1/4 tsp ground nutmeg
Crust:
- 1.5 cups graham cracker crumbs
- 1/3 cup unsalted butter, melted
- 2 tbsp granulated sugar
Garnish:
- 1/4 cup whipped cream
- 1 pinch ground nutmeg
- 2 cinnamon sticks (optional)
Instructions
- Prepare the graham cracker crust by combining melted butter, graham cracker crumbs, and sugar in a mixing bowl, stirring until the mixture resembles coarse, moistened sand.
- Transfer the crumb mixture into a 9-inch pie dish, pressing firmly and evenly across the bottom and up the sides to create a compact crust foundation.
- Chill the prepared crust in the refrigerator for 15 minutes to help it set and firm up while preparing the filling.
- In a large mixing bowl, whip the heavy cream until stiff peaks form, creating a light and airy base for the pie filling.
- In a separate bowl, beat the softened cream cheese until smooth and creamy, ensuring no lumps remain.
- Gradually incorporate powdered sugar, vanilla extract, and ground nutmeg into the cream cheese, mixing until thoroughly combined and silky.
- Gently fold the eggnog into the cream cheese mixture, maintaining the light texture and ensuring even distribution of flavors.
- Carefully fold the whipped cream into the eggnog-cream cheese mixture, creating a luxurious and fluffy pie filling.
- Pour the filling into the chilled graham cracker crust, spreading evenly and smoothing the top with a spatula.
- Refrigerate the pie for at least 4 hours or overnight to allow the filling to set and flavors to meld.
- Before serving, garnish with a dollop of whipped cream, a sprinkle of ground nutmeg, and optional cinnamon sticks for a festive touch.
- Slice and serve the chilled, creamy no-bake eggnog pie directly from the refrigerator for the best texture and flavor.
Notes
- Crust Customization: Swap graham crackers with gingersnap or shortbread cookies for a unique flavor twist that complements the eggnog filling.
- Dairy-Free Adaptation: Replace cream cheese and heavy cream with coconut cream and vegan cream cheese alternatives to create a lactose-free version.
- Flavor Enhancement: Add a splash of rum or bourbon to the filling for an authentic eggnog taste and subtle adult kick.
- Make-Ahead Magic: Prepare the pie up to 2 days in advance, keeping it refrigerated and covered to maintain its creamy texture and fresh flavor.
- Prep Time: 15 minutes
- Cook Time: 0 minutes
- Category: Desserts
- Method: Chilling
- Cuisine: American
Nutrition
- Serving Size: 8
- Calories: 500
- Sugar: 32 g
- Sodium: 200 mg
- Fat: 36 g
- Saturated Fat: 22 g
- Unsaturated Fat: 10 g
- Trans Fat: 0 g
- Carbohydrates: 41 g
- Fiber: 1 g
- Protein: 4 g
- Cholesterol: 90 mg
Olivia Brooks
Contributing Writer
Expertise
Education
Culinary Institute of America
Accelerated Culinary Arts Certificate Program
Focus: Culinary fundamentals, nutrition, and healthy cooking technique
Olivia believes good food should feed both the body and the soul. She earned her Accelerated Culinary Arts Certificate from the Culinary Institute of America, where she focused on nutrition and practical cooking techniques that make healthy eating easy.
At 10 Below Ice Cream, Olivia shares single-serving recipes that are fresh, plant-forward, and full of heart. She loves helping people eat better, without stress, strict rules, or sacrificing flavor.
Beyond the kitchen, Olivia spends her time tending her backyard garden, practicing yoga, and discovering hidden gems in Portland’s food scene.