Sweet Lemon Bar Cookie Cups Recipe to Make Today
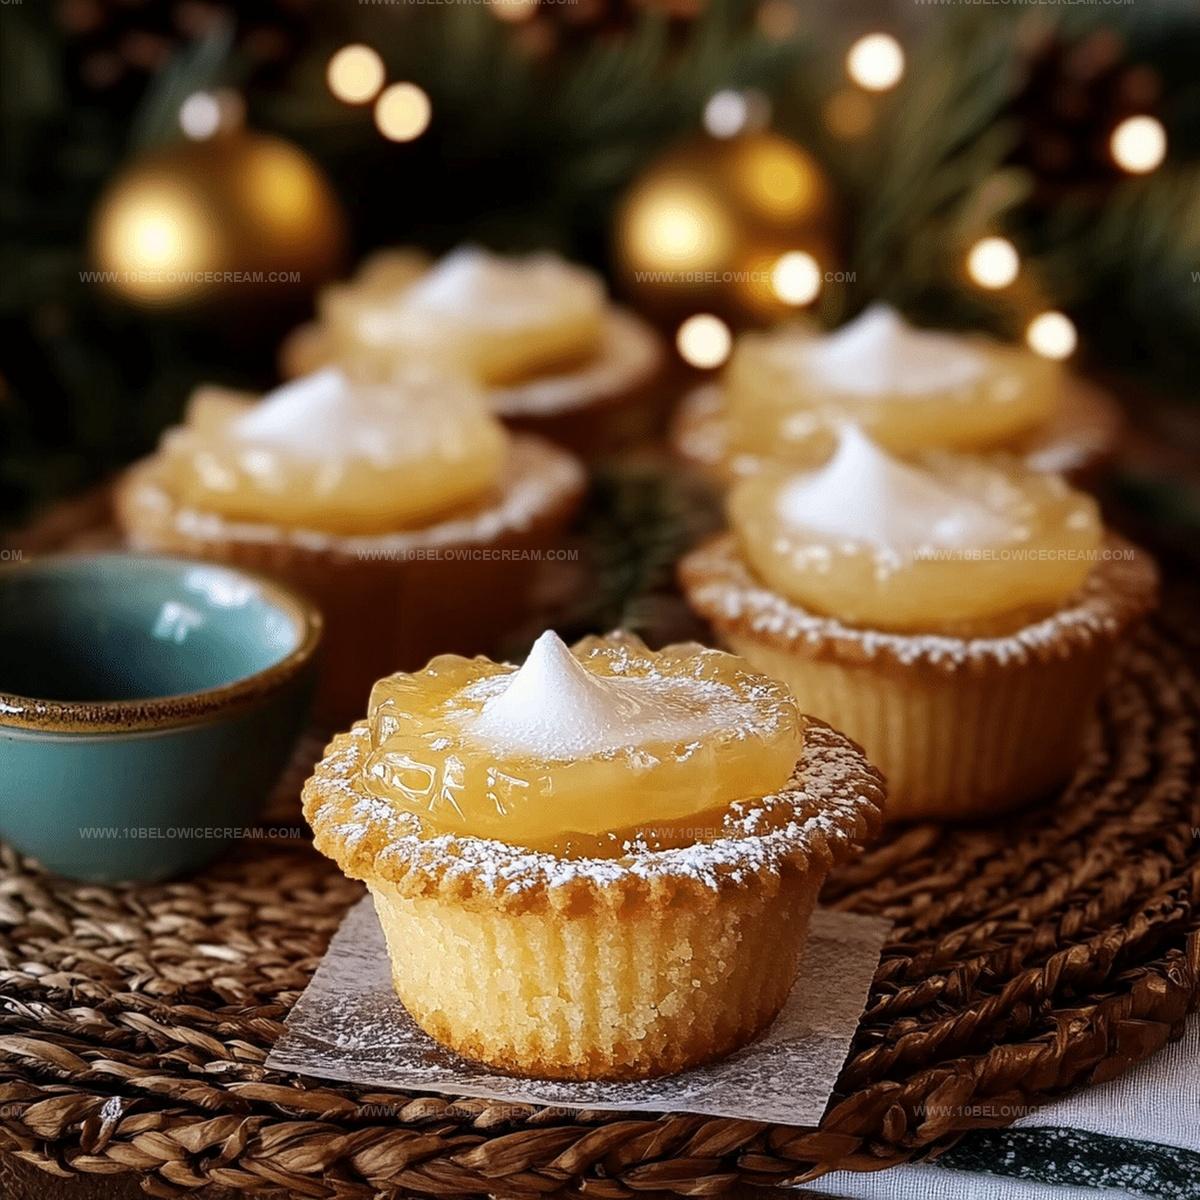
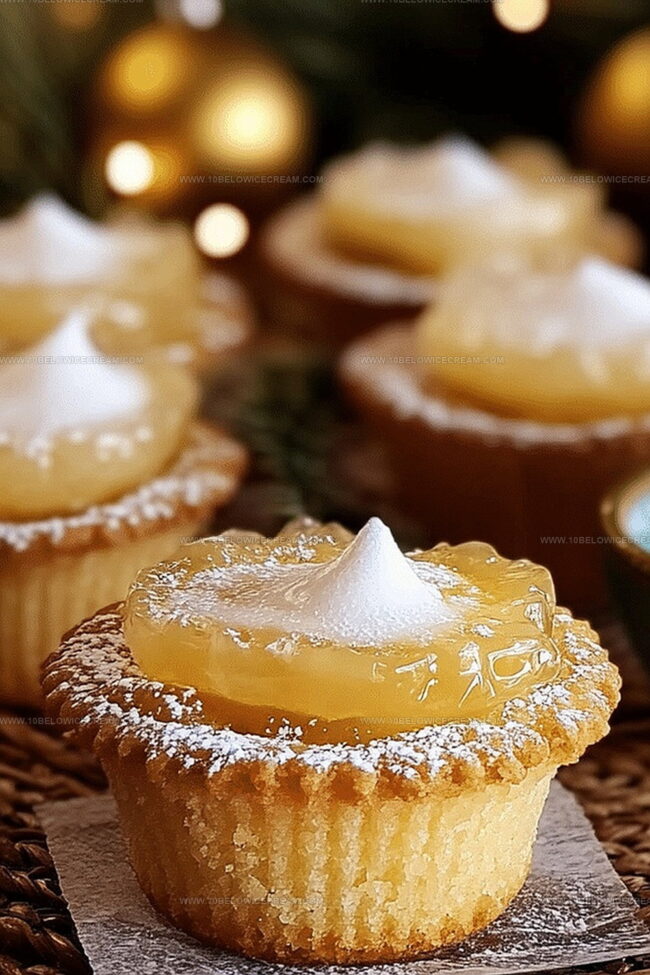
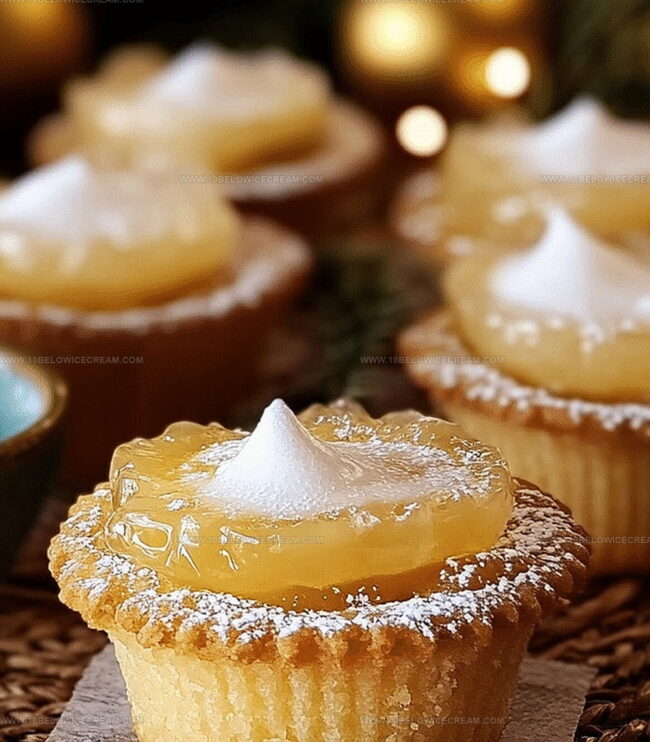
Sweet dreams come true when you whip up these delectable lemon bar cookie cups that blend tangy citrus with buttery, crumbly goodness.
Creamy filling nestles perfectly inside delicate cookie shells, creating a dessert that sparkles with bright flavor.
Each bite promises a magical combination of zesty lemon and rich, tender pastry.
Crinkled edges and golden surfaces hint at the delightful texture waiting inside these miniature treats.
My grandmother’s secret technique inspired this playful twist on classic lemon bars.
Simple ingredients and minimal prep time make these cookie cups an irresistible choice for any gathering.
You’ll want to savor every single delightful morsel of these sunshine-inspired delicacies.
Why Mouthwatering Lemon Bar Cookie Cups Shine
What’s Inside Mouthwatering Lemon Bar Cookie Cups
For the Dough Base:For the Filling:For the Finishing and Preparation:How To Make Mouthwatering Lemon Bar Cookie Cups
Step 1: Prepare Baking Station
Preheat the oven to 350°F. Generously grease a 24-cup mini muffin tin to ensure easy cookie cup removal.
Step 2: Create Cookie Dough Base
Cream softened butter with granulated sugar until the mixture becomes light and fluffy. This creates a smooth foundation for the cookie dough.
Step 3: Form Cookie Dough
Gently fold flour into the butter mixture, mixing until a cohesive, crumbly dough forms that holds together when pressed.
Step 4: Shape Cookie Shells
Press small portions of dough into each muffin cavity. Carefully mold the sides and bottom to create uniform cookie cups with thin, even walls.
Step 5: Bake Initial Cookie Shells
Bake the cookie shells for 12-15 minutes until edges turn golden. Remove from oven and allow to cool slightly while maintaining their shape.
Step 6: Craft Tangy Lemon Filling
Whisk eggs thoroughly. Combine the following ingredients:Mix until you create a vibrant, tangy filling.
Step 7: Fill Cookie Cups
Carefully pour the lemon mixture into the partially baked cookie cups, filling each almost to the top without overflowing.
Step 8: Final Baking
Return the filled cookie cups to the oven. Bake for an additional 10-12 minutes, or until the lemon filling sets and appears slightly jiggly in the center.
Step 9: Cool and Set
Remove from oven and let cool completely in the tin. This allows the filling to stabilize and the cookie cups to firm up.
Step 10: Remove from Tin
Gently remove cookie cups from the tin using a small offset spatula. Take care not to damage the delicate shells.
Step 11: Final Presentation
Dust the cooled lemon bar cookie cups with additional powdered sugar, creating an elegant, snow-like finish that enhances their visual appeal.
Helpful Hints For Mouthwatering Lemon Bar Cookie Cups
Flavor Ideas For Mouthwatering Lemon Bar Cookie Cups
What Tastes Great With Mouthwatering Lemon Bar Cookie Cups
Best Storage For Mouthwatering Lemon Bar Cookie Cups
FAQs On Mouthwatering Lemon Bar Cookie Cups
Yes, but reduce or omit the added salt in the recipe to prevent an overly salty taste.
Generously grease the mini muffin tin and use a small offset spatula to carefully remove the baked cookie cups.
Whisk the eggs thoroughly and add ingredients gradually at room temperature to maintain a smooth consistency.
Yes, you can prepare them a day in advance and store in an airtight container at room temperature until serving.
Print
Mouthwatering Lemon Bar Cookie Cups Recipe
- Total Time: 47 minutes
- Yield: 12 1x
Description
Silky lemon bar cookie cups deliver a zesty paradise of creamy citrus delight nestled in a buttery shortbread base. Crisp edges and tangy filling invite sweet memories of summer afternoons, promising pure dessert bliss you cannot resist.
Ingredients
Main Ingredients:
- 2 cups all-purpose flour
- 1 cup unsalted butter
- 1/2 cup granulated sugar
Lemon Filling:
- 3 large eggs
- 1 cup fresh lemon juice
- 2 tbsp lemon zest
- 1 1/2 cups powdered sugar
Topping:
- 1/4 cup powdered sugar (for dusting)
- 1 pinch salt
- 1 tsp vanilla extract
Instructions
- Preheat the oven to 350°F and generously grease a 24-cup mini muffin tin to ensure smooth cookie cup release.
- Cream softened butter with granulated sugar until light and fluffy, creating a smooth base for the cookie dough.
- Gently fold flour into the butter mixture, mixing until a cohesive, crumbly dough forms that holds together when pressed.
- Press small portions of dough into each muffin cavity, carefully molding the sides and bottom to create uniform cookie cups with thin, even walls.
- Bake the cookie shells for 12-15 minutes until edges turn golden, then remove and allow to cool slightly while maintaining their shape.
- Whisk eggs thoroughly, then incorporate fresh lemon juice, lemon zest, powdered sugar, vanilla extract, and salt to create a vibrant, tangy filling.
- Carefully pour the lemon mixture into the partially baked cookie cups, filling each almost to the top without overflowing.
- Return the filled cookie cups to the oven and bake for an additional 10-12 minutes, or until the lemon filling sets and appears slightly jiggly in the center.
- Remove from oven and let cool completely in the tin, allowing the filling to stabilize and the cookie cups to firm up.
- Gently remove cookie cups from the tin using a small offset spatula, taking care not to damage the delicate shells.
- Dust the cooled lemon bar cookie cups with additional powdered sugar, creating an elegant, snow-like finish that enhances their visual appeal.
Notes
- Use room temperature butter for smoother, more consistent creaming that prevents lumpy dough and ensures even mixing.
- Generously grease the mini muffin tin with butter or non-stick spray to guarantee easy cookie cup removal without breaking delicate shells.
- Press dough evenly into muffin cavities using the back of a rounded teaspoon to create uniform thickness and prevent uneven baking.
- Zest lemons before juicing to maximize flavor extraction and maintain the bright, citrusy profile of the filling.
- Let cookie cups cool completely in the tin to help stabilize the delicate lemon filling and prevent structural collapse.
- For gluten-free variation, substitute all-purpose flour with a 1:1 gluten-free baking blend to accommodate dietary restrictions.
- Reduce sugar slightly for a more tart, intense lemon flavor that highlights the citrus notes in the filling.
- Prep Time: 20 minutes
- Cook Time: 22-27 minutes
- Category: Desserts, Snacks
- Method: Baking
- Cuisine: American
Nutrition
- Serving Size: 12
- Calories: 240
- Sugar: 18 g
- Sodium: 50 mg
- Fat: 14 g
- Saturated Fat: 9 g
- Unsaturated Fat: 5 g
- Trans Fat: 0 g
- Carbohydrates: 29 g
- Fiber: 0 g
- Protein: 2 g
- Cholesterol: 60 mg
Jackson Reid
Founder & Recipe Developer
Expertise
Education
Holyoke Community College – HCC-MGM Culinary Arts Institute
Certificate in Culinary Arts
Focus: Farm-to-table cuisine, sustainable cooking practices, and hands-on kitchen training
Jackson’s love for cooking began one dish at a time. After earning his Culinary Arts Certificate from Holyoke Community College’s HCC-MGM Culinary Arts Institute, he focused on what mattered most: creating recipes that are simple to follow and full of flavor.
At 10 Below Ice Cream, Jackson brings together global influences and a less-is-more approach. His recipes reflect his belief that good food doesn’t need to be complicated; it just needs to make sense, taste great, and feel right.
When he’s not testing ingredients or adjusting seasonings, you’ll find him hiking near Asheville, exploring local markets, or chasing the best light for food photos.