
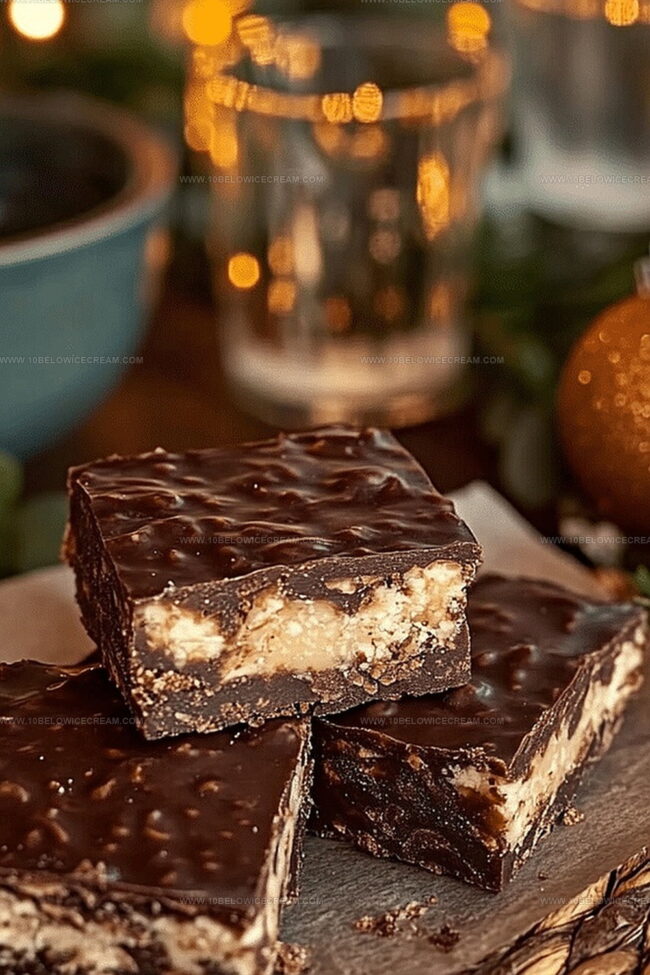
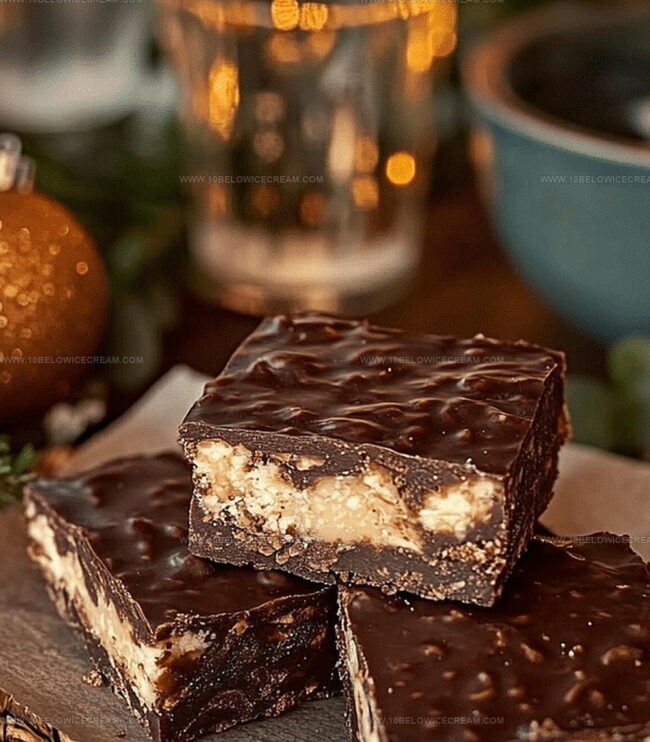
Homemade Mounds Bar Recipe with Coconut Center
Chocolate lovers find pure bliss in this mounds bar recipe that captures tropical decadence.
Coconut flakes shimmer with sweet intensity against rich dark chocolate.
Memories of island getaways dance through each delectable bite.
Simple ingredients come together like magic in your kitchen.
No complicated techniques stand between you and these dreamy treats.
Creamy coconut centers enrobed in smooth chocolate promise pure indulgence.
Dive into this delightful confection that will transport your taste buds to paradise.
Why Mounds Bar Fans Keep Coming Back
What You’ll Need To Make Mounds Bars
For the Coconut Base:For the Chocolate Coating:For the Preparation:How To Make Classic Mounds Bars
Step 1: Prepare Baking Sheet With Parchment Paper
Line a baking sheet with parchment paper to create a smooth surface for your homemade candy bars.
Step 2: Craft Coconut Filling
In a mixing bowl, combine:Mix ingredients until they form a sticky, cohesive mixture.
Step 3: Shape Coconut Bars
Use clean hands or a small scoop to create compact, oval-shaped bars. Place them carefully on the prepared baking sheet.
Step 4: Chill Coconut Bars
Refrigerate the bars for 15-20 minutes to help them maintain their shape and become firm.
Step 5: Set Up Double Boiler
Place a heatproof bowl over a pot of simmering water. Ensure the bowl’s bottom doesn’t touch the water.
Step 6: Melt Chocolate
Add dark chocolate chips and cocoa powder to the double boiler. Stir continuously until the mixture becomes smooth and glossy, which takes about 3-4 minutes.
Step 7: Create Chocolate Coating
Remove chocolate from heat and blend in coconut oil to create a silky, fluid coating.
Step 8: Dip Coconut Bars
Carefully submerge each chilled coconut bar into the melted chocolate. Use a fork to ensure complete coverage and let excess chocolate drip off.
Step 9: Set Chocolate Coating
Place the chocolate-coated bars back on the parchment-lined baking sheet. Refrigerate for 10-15 minutes until the chocolate hardens completely.
Step 10: Store Homemade Candy Bars
Keep the Mounds-style bars in an airtight container in the refrigerator. They’ll stay fresh for up to one week, ready to satisfy your sweet tooth.
Mounds Bar Success Tips You’ll Appreciate
Fun Ideas To Change Up Mounds Bars
Treats That Go Great With Mounds Bars
Storage Know-How For Homemade Mounds Bars
Mounds Bar FAQs Made Easy
The key ingredients are shredded coconut, sweetened condensed milk, powdered sugar, vanilla extract, dark chocolate chips, and coconut oil.
While possible, dark chocolate provides the authentic Mounds Bar flavor and creates a richer taste profile that complements the sweet coconut filling.
Ensure you mix the ingredients thoroughly and compact the bars tightly when shaping. Chilling the mixture before coating helps maintain the bar’s structure.
This recipe contains dairy and is not gluten-free. For alternative versions, you’ll need to substitute ingredients like using dairy-free milk and gluten-free chocolate.
Print
Mounds Bar Recipe
- Total Time: 24 minutes
- Yield: 12 1x
Description
Chocolate meets coconut paradise in this classic Mounds bar recipe, bringing tropical indulgence to your dessert table. Sweet shredded coconut enrobed in rich dark chocolate creates a simple yet irresistible treat you can easily craft at home.
Ingredients
Chocolate Ingredients:
- 2 cups dark chocolate chips
- 1/4 cup cocoa powder
Coconut Filling:
- 3 cups shredded unsweetened coconut
- 1/2 cup sweetened condensed milk
- 1/4 cup powdered sugar
Additional Ingredients:
- 2 tbsp coconut oil
- 1 tsp vanilla extract
- 1/4 tsp salt
Instructions
- Prepare a baking sheet by lining it with parchment paper, creating a smooth, non-stick surface for your Mounds Bars.
- In a mixing bowl, combine shredded coconut, sweetened condensed milk, powdered sugar, vanilla extract, and salt, blending until a cohesive, sticky mixture forms.
- Using clean hands or a small scoop, shape the coconut mixture into compact, oval-shaped bars, placing them on the prepared baking sheet.
- Chill the coconut bars in the refrigerator for 15-20 minutes at 40°F, allowing them to firm up and maintain their shape.
- Meanwhile, create a double boiler by placing a heatproof bowl over a pot of simmering water, ensuring the bottom of the bowl doesn’t touch the water.
- Melt dark chocolate chips and cocoa powder in the double boiler, stirring constantly until smooth and glossy, approximately 3-4 minutes.
- Remove the chocolate from heat and stir in coconut oil to create a silky, fluid coating.
- Carefully dip each chilled coconut bar into the melted chocolate, using a fork to ensure complete coverage and allow excess chocolate to drip off.
- Return the chocolate-coated bars to the parchment-lined baking sheet and refrigerate for 10-15 minutes at 40°F until the chocolate sets completely.
- Store the Mounds Bars in an airtight container in the refrigerator for up to one week, enjoying a cool, sweet treat reminiscent of the classic candy bar.
Notes
- Chill coconut mixture thoroughly to prevent crumbling and ensure clean, defined bar shapes during chocolate coating.
- Use high-quality dark chocolate with at least 70% cocoa content for rich, intense flavor and professional-grade glossy finish.
- Maintain consistent chocolate temperature while dipping to achieve smooth, even chocolate coverage without streaks or clumping.
- Consider dairy-free alternatives like coconut cream instead of sweetened condensed milk for vegan-friendly version, ensuring same creamy texture.
- Prep Time: 20 minutes
- Cook Time: 4 minutes
- Category: Desserts, Snacks
- Method: Baking
- Cuisine: American
Nutrition
- Serving Size: 12
- Calories: 211
- Sugar: 16 g
- Sodium: 40 mg
- Fat: 14 g
- Saturated Fat: 10 g
- Unsaturated Fat: 4 g
- Trans Fat: 0 g
- Carbohydrates: 22 g
- Fiber: 2 g
- Protein: 2 g
- Cholesterol: 5 mg
Jackson Reid
Founder & Recipe Developer
Expertise
Education
Holyoke Community College – HCC-MGM Culinary Arts Institute
Certificate in Culinary Arts
Focus: Farm-to-table cuisine, sustainable cooking practices, and hands-on kitchen training
Jackson’s love for cooking began one dish at a time. After earning his Culinary Arts Certificate from Holyoke Community College’s HCC-MGM Culinary Arts Institute, he focused on what mattered most: creating recipes that are simple to follow and full of flavor.
At 10 Below Ice Cream, Jackson brings together global influences and a less-is-more approach. His recipes reflect his belief that good food doesn’t need to be complicated; it just needs to make sense, taste great, and feel right.
When he’s not testing ingredients or adjusting seasonings, you’ll find him hiking near Asheville, exploring local markets, or chasing the best light for food photos.