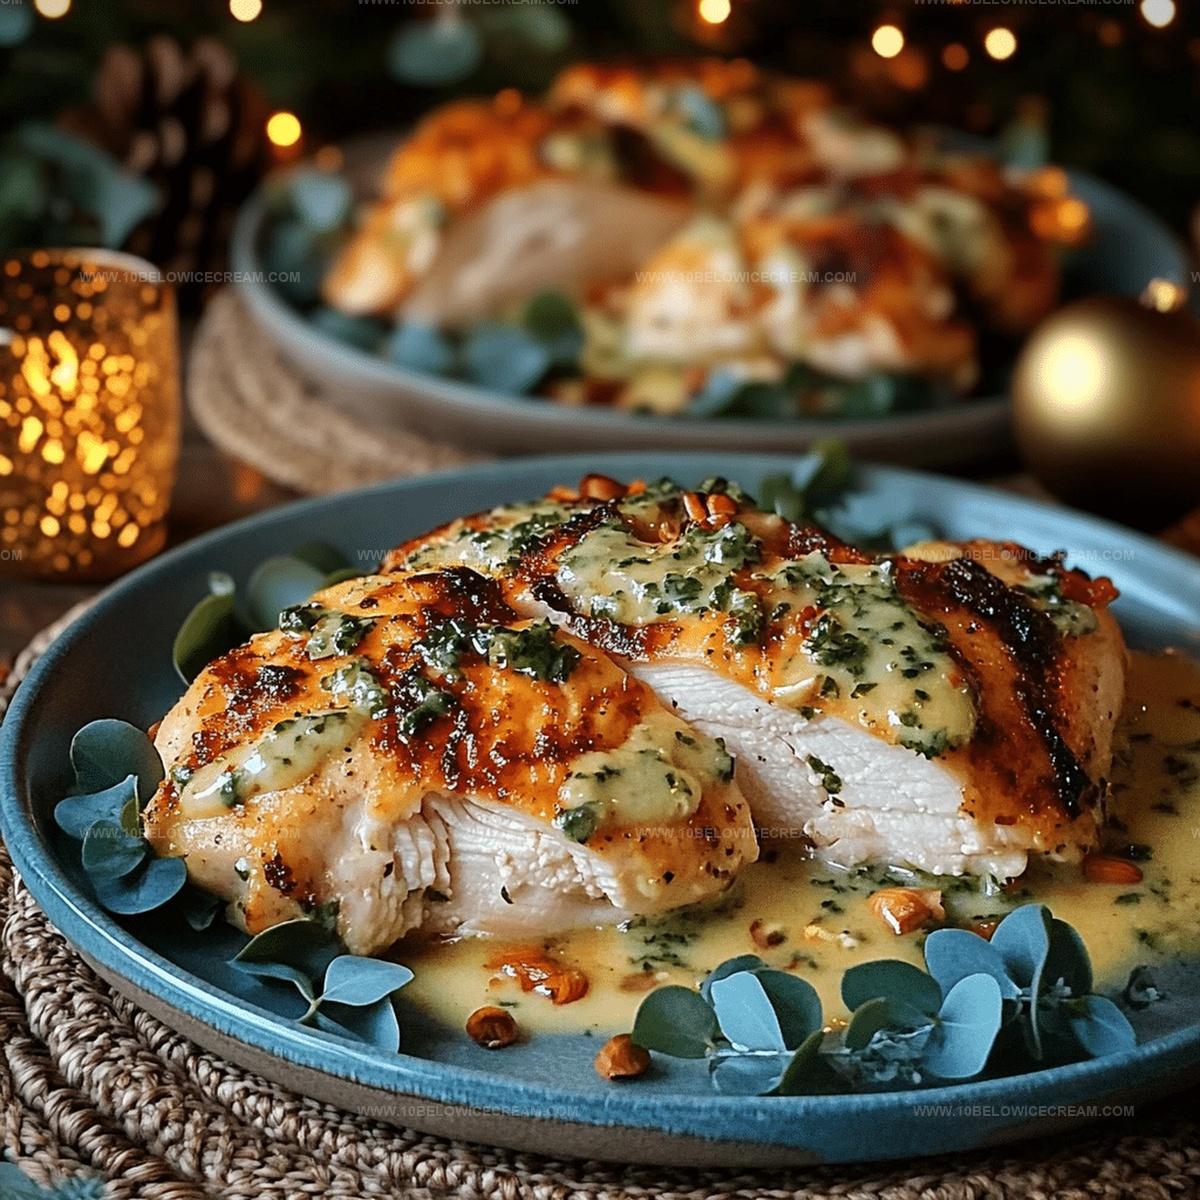
Melt-In-Your-Mouth Caesar Chicken Recipe: Juicy Perfection
Succulent caesar chicken promises a melt-in-your-mouth experience that will revolutionize your dinner routine.
Creamy dressing coats tender meat with incredible flavor profiles.
Weeknight meals suddenly feel like gourmet dining adventures.
Mediterranean influences shine through each carefully seasoned bite.
Simple ingredients combine to create something magical on your plate.
Minimal preparation ensures you can craft this delectable dish without stress.
Prepare to be amazed by how quickly restaurant-quality magic happens in your kitchen.
Why Melt-In-Your-Mouth Caesar Chicken Is So Tender
What You’ll Need For Melt-In-Your-Mouth Caesar Chicken
For the Protein:For the Coating Ingredients:For the Seasoning and Moisture Ingredients:How To Make Melt-In-Your-Mouth Caesar Chicken Easily
Step 1: Prepare Oven and Baking Dish
Heat the oven to 375°F. Grease a baking dish lightly with olive oil to prevent chicken from sticking during cooking.
Step 2: Dry Chicken Thoroughly
Use paper towels to completely pat chicken breasts dry. This helps the coating stick better and creates a crispier exterior.
Step 3: Season Chicken Base
Sprinkle salt and black pepper evenly over chicken breasts to build a delicious foundational flavor.
Step 4: Create Flavor Coating
In a mixing bowl, combine the following ingredients:Whisk everything together until you have a well-mixed, textured coating.
Step 5: Add Zesty Flavor Boosters
Crush minced garlic and squeeze fresh lemon juice into the coating mixture. Stir thoroughly to distribute the bright, tangy flavors throughout.
Step 6: Coat Chicken Generously
Cover each chicken breast completely with the caesar mixture. Press firmly to ensure the coating sticks and creates a dense, flavorful crust.
Step 7: Arrange in Baking Dish
Place the coated chicken breasts in the prepared dish. Keep them separated to allow even heat circulation.
Step 8: Add Final Moisture
Drizzle remaining olive oil over the chicken to enhance browning and add a subtle richness.
Step 9: Bake to Perfection
Bake in the preheated oven for 25-30 minutes. Chicken is ready when it reaches an internal temperature of 165°F and the coating turns golden and crispy.
Step 10: Rest and Settle
Remove chicken from the oven and let it rest for 5 minutes. This allows juices to redistribute, ensuring maximum tenderness.
Step 11: Serve and Garnish
Plate the chicken immediately. Optional: Sprinkle fresh parsley on top for a pop of color and extra herbaceous flavor.
Tips For Juicy Melt-In-Your-Mouth Caesar Chicken
Flavorful Twists On Melt-In-Your-Mouth Caesar Chicken
Perfect Pairings With Melt-In-Your-Mouth Caesar Chicken
Storing Melt-In-Your-Mouth Caesar Chicken Made Simple
Quick FAQ For Melt-In-Your-Mouth Caesar Chicken
This recipe offers a balanced meal with lean protein from chicken and moderate calories. Using olive oil and minimal ingredients makes it a nutritious option compared to fried alternatives.
Chicken thighs work well but might require slightly longer cooking time. Adjust baking duration and ensure internal temperature reaches 165°F for food safety.
You can substitute with ranch dressing or mix mayonnaise with grated parmesan and garlic powder to create a similar creamy coating. The key is maintaining moisture and flavor.
Pat chicken completely dry before coating, press mixture firmly onto chicken, and avoid moving chicken while baking. These steps help the crispy layer adhere perfectly during cooking.
Print
Melt-In-Your-Mouth Caesar Chicken Recipe
- Total Time: 45 minutes
- Yield: 4 1x
Description
Caesar chicken creates a delightful fusion of creamy, zesty flavors that elevate weeknight dinner. Crispy parmesan coating and tender chicken merge perfectly, promising a restaurant-quality meal that delivers pure comfort and satisfaction.
Ingredients
Chicken:
- 4 chicken breasts
- 1 tsp salt
- 0.5 tsp black pepper
Caesar Coating:
- 1 cup grated parmesan cheese
- 0.5 cup caesar salad dressing
- 0.25 cup breadcrumbs
- 2 tbsp dried parsley
- 1 tbsp garlic powder
Additional Ingredients:
- 2 tbsp olive oil
- 1 lemon (for juice)
- 2 cloves garlic, minced
Instructions
- Preheat the oven to 375°F and prepare a baking dish by lightly greasing it with olive oil to prevent sticking.
- Pat chicken breasts completely dry using paper towels, ensuring a crisp coating will adhere properly.
- Season chicken thoroughly with salt and black pepper, creating a foundational flavor base for the dish.
- In a mixing bowl, combine grated parmesan, caesar dressing, breadcrumbs, dried parsley, and garlic powder, whisking until a cohesive, textured mixture forms.
- Crush minced garlic and squeeze fresh lemon juice into the coating mixture, stirring to distribute the bright, zesty flavors evenly.
- Generously coat each chicken breast with the caesar mixture, pressing firmly to help the coating adhere and create a dense, flavorful crust.
- Arrange the coated chicken breasts in the prepared baking dish, ensuring they are not touching for even heat circulation.
- Drizzle remaining olive oil over the chicken to enhance browning and add a subtle richness.
- Bake in the preheated oven for 25-30 minutes, or until the chicken reaches an internal temperature of 165°F and the coating turns golden and crispy.
- Remove from oven and let the chicken rest for 5 minutes, allowing juices to redistribute and ensuring maximum tenderness.
- Serve immediately, garnishing with additional fresh parsley if desired for a pop of color and herbaceous flavor.
Notes
- Adjust caesar dressing consistency by adding extra breadcrumbs if mixture seems too wet, ensuring a perfectly crisp coating that adheres smoothly to chicken.
- Swap regular breadcrumbs with gluten-free alternatives for celiac or gluten-sensitive individuals, maintaining the recipe’s delightful crunch and flavor profile.
- Enhance protein variety by substituting chicken breasts with thighs or turkey cutlets, which offer similar cooking techniques and comparable moisture retention.
- Maximize flavor complexity by experimenting with different parmesan cheese types, such as aged or reggiano, to introduce subtle nutty undertones to the dish’s overall taste experience.
- Prep Time: 15 minutes
- Cook Time: 30 minutes
- Category: Lunch, Dinner
- Method: Baking
- Cuisine: American
Nutrition
- Serving Size: 4
- Calories: 530
- Sugar: 2 g
- Sodium: 1100 mg
- Fat: 30 g
- Saturated Fat: 9 g
- Unsaturated Fat: 18 g
- Trans Fat: 0 g
- Carbohydrates: 20 g
- Fiber: 1 g
- Protein: 50 g
- Cholesterol: 150 mg
Jackson Reid
Founder & Recipe Developer
Expertise
Education
Holyoke Community College – HCC-MGM Culinary Arts Institute
Certificate in Culinary Arts
Focus: Farm-to-table cuisine, sustainable cooking practices, and hands-on kitchen training
Jackson’s love for cooking began one dish at a time. After earning his Culinary Arts Certificate from Holyoke Community College’s HCC-MGM Culinary Arts Institute, he focused on what mattered most: creating recipes that are simple to follow and full of flavor.
At 10 Below Ice Cream, Jackson brings together global influences and a less-is-more approach. His recipes reflect his belief that good food doesn’t need to be complicated; it just needs to make sense, taste great, and feel right.
When he’s not testing ingredients or adjusting seasonings, you’ll find him hiking near Asheville, exploring local markets, or chasing the best light for food photos.