
The Most Heavenly Marbled Cake Recipe You’ll Ever Bake
Baking a delightful marble cake brings pure joy to any kitchen adventure.
Swirls of chocolate and vanilla dance together in perfect harmony.
Mixing colors and flavors creates a mesmerizing visual treat that captivates everyone.
Soft, moist layers promise an irresistible dessert experience.
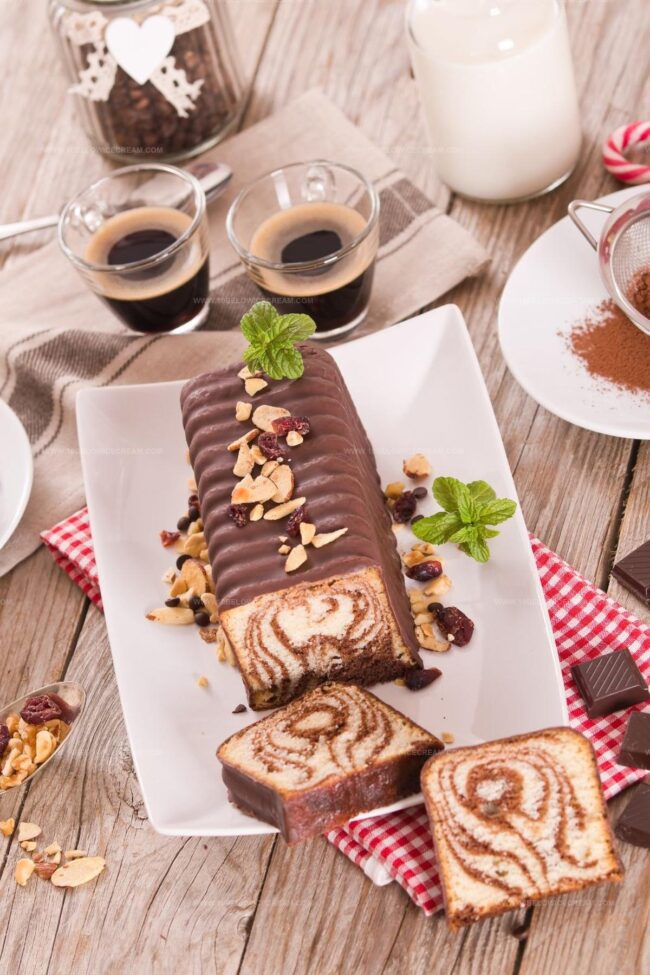
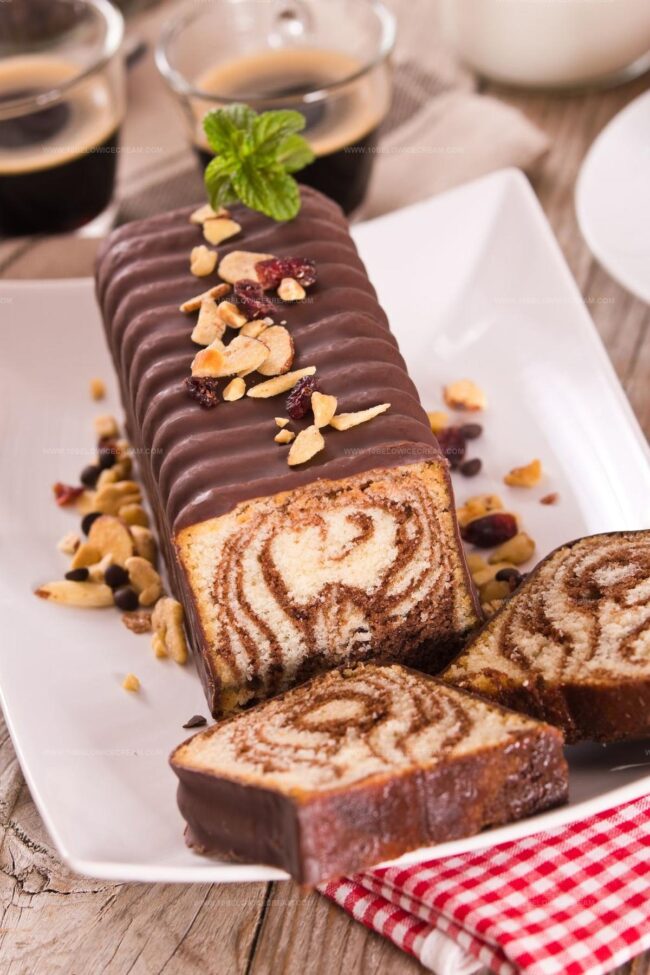
Each slice reveals a stunning pattern that makes people smile.
Rich ingredients combine to craft something truly magical.
You’ll want to slice into this stunning creation and savor every delectable moment.
Why Mary Berry Marble Cake Is Always A Hit
What’s In Mary Berry Marble Cake
Base Ingredients:Liquid Ingredients:Chocolate Components:Decorative Ingredients:Additional Baking Ingredients:How To Bake Mary Berry Marble Cake
Step 1: Warm Up the Oven
Crank your oven to 160°C (Fan 140°C, Gas Mark 3). Prepare a loaf pan by greasing it thoroughly and lining with parchment paper.
Step 2: Create Smooth Cake Base
Grab your mixing bowl and combine:Blend these ingredients until the mixture becomes silky and uniform.
Step 3: Divide and Color the Batter
Split the cake mixture into two separate bowls. In one portion, whisk cocoa powder with water to create a rich chocolate section.
Step 4: Layer the Batters
Carefully spoon alternating dollops of vanilla and chocolate batters into the prepared loaf pan. Use a knife to create gentle swirling patterns for a marbled effect.
Step 5: Bake to Perfection
Place the pan in the preheated oven. Bake for 50-60 minutes until the cake rises beautifully and feels firm when touched.
Step 6: Cool and Rest
Remove from oven and let the cake cool completely on a wire rack.
Step 7: Prepare Decadent Chocolate Frosting
Melt butter and mix with:Stir until you achieve a smooth, glossy icing.
Step 8: Decorate and Finish
Spread the chocolate icing over the cooled cake. Drizzle with melted white chocolate for an elegant touch.
Step 9: Set and Serve
Allow the icing to set for a few minutes before slicing and serving your stunning marble cake.
Smart Tips For Mary Berry Marble Cake
Fun Swirls For Mary Berry Marble Cake
Tasty Pairings For Mary Berry Marble Cake
How To Store Mary Berry Marble Cake Properly
Questions On Mary Berry Marble Cake Explained
Marbling is a technique where two different colored batters are swirled together to create a beautiful, random pattern inside the cake when sliced.
Pour the vanilla and chocolate batters alternately into the tin, then use a skewer or knife to gently swirl them together without overmixing.
Yes, you can experiment with other flavors like adding coffee to one batter or using different extracts to create unique color and taste combinations.
This happens when you overmix the batters while swirling. Always use a light hand and make minimal, gentle swirls to maintain distinct color separation.
Print
Marble Cake Recipe
- Total Time: 65-75 minutes
- Yield: 8 1x
Description
Indulgent marble cake swirls rich chocolate and vanilla flavors into a mesmerizing dessert that promises pure delight. Silky layers of contrasting batters create a delectable masterpiece you’ll savor with each perfectly moist bite.
Ingredients
Main Ingredients:
- 225 grams (8 ounces) butter, softened
- 4 large eggs
- 225 grams (8 ounces) caster sugar
- 275 grams (10 ounces) self-raising flour
- 2 level teaspoons baking powder
Chocolate Ingredients:
- 112 level tablespoons cocoa powder
- 2 tablespoons hot water
- 25 grams (1 ounce) butter
- 15 grams (0.5 ounces) cocoa powder, sifted
- 25 grams (1 ounce) white chocolate, melted
Additional Ingredients:
- 2 tablespoons milk
- 1/2 teaspoon vanilla extract
- 1/2 tablespoon milk
- 100 grams (4 ounces) icing sugar, sifted
Instructions
- Prepare the oven at 160°C (fan 140°C, gas mark 3) and prepare a loaf tin with grease and parchment paper.
- Create a smooth, homogeneous mixture by thoroughly combining butter, sugar, flour, baking powder, eggs, milk, and vanilla extract using an electric mixer.
- Separate the batter into two equal portions, then introduce cocoa powder and water into one half to create a chocolate-tinted variation.
- Carefully layer the two batters into the prepared loaf tin, alternating between light and chocolate batters to create a marbled effect.
- Gently swirl the batters using a skewer or knife to achieve an intricate pattern without overmixing.
- Place the tin in the preheated oven and bake for 50-60 minutes, monitoring until the cake rises and feels firm when touched.
- Remove from oven and allow the cake to cool completely on a wire rack.
- Prepare the icing by melting butter and blending it with cocoa powder, milk, and icing sugar until smooth and glossy.
- Once cooled, generously spread the chocolate icing over the cake’s surface.
- Drizzle melted white chocolate in a decorative pattern across the icing for visual appeal.
- Allow the icing to set entirely before slicing and serving the marble cake.
Notes
- Achieving the perfect marble effect requires gentle swirling with a skewer or knife, creating elegant chocolate and vanilla swirls without overmixing.
- Room temperature ingredients help create a smoother, more consistent batter that blends effortlessly and rises evenly during baking.
- For a gluten-free version, substitute regular flour with a quality gluten-free flour blend, ensuring the cake maintains its tender texture.
- Reduce sugar content by using alternative sweeteners like stevia or monk fruit for a lower-calorie dessert that still delivers delightful flavor.
- Prep Time: 15 minutes
- Cook Time: 50-60 minutes
- Category: Desserts
- Method: Baking
- Cuisine: Western
Nutrition
- Serving Size: 8
- Calories: 393 kcal
- Sugar: 34 g
- Sodium: 184 mg
- Fat: 26 g
- Saturated Fat: 15 g
- Unsaturated Fat: 10 g
- Trans Fat: 0.5 g
- Carbohydrates: 36 g
- Fiber: 3 g
- Protein: 5 g
- Cholesterol: 96 mg
Jackson Reid
Founder & Recipe Developer
Expertise
Education
Holyoke Community College – HCC-MGM Culinary Arts Institute
Certificate in Culinary Arts
Focus: Farm-to-table cuisine, sustainable cooking practices, and hands-on kitchen training
Jackson’s love for cooking began one dish at a time. After earning his Culinary Arts Certificate from Holyoke Community College’s HCC-MGM Culinary Arts Institute, he focused on what mattered most: creating recipes that are simple to follow and full of flavor.
At 10 Below Ice Cream, Jackson brings together global influences and a less-is-more approach. His recipes reflect his belief that good food doesn’t need to be complicated; it just needs to make sense, taste great, and feel right.
When he’s not testing ingredients or adjusting seasonings, you’ll find him hiking near Asheville, exploring local markets, or chasing the best light for food photos.