The Perfect Madeira Cake Recipe: Golden, Buttery Bliss
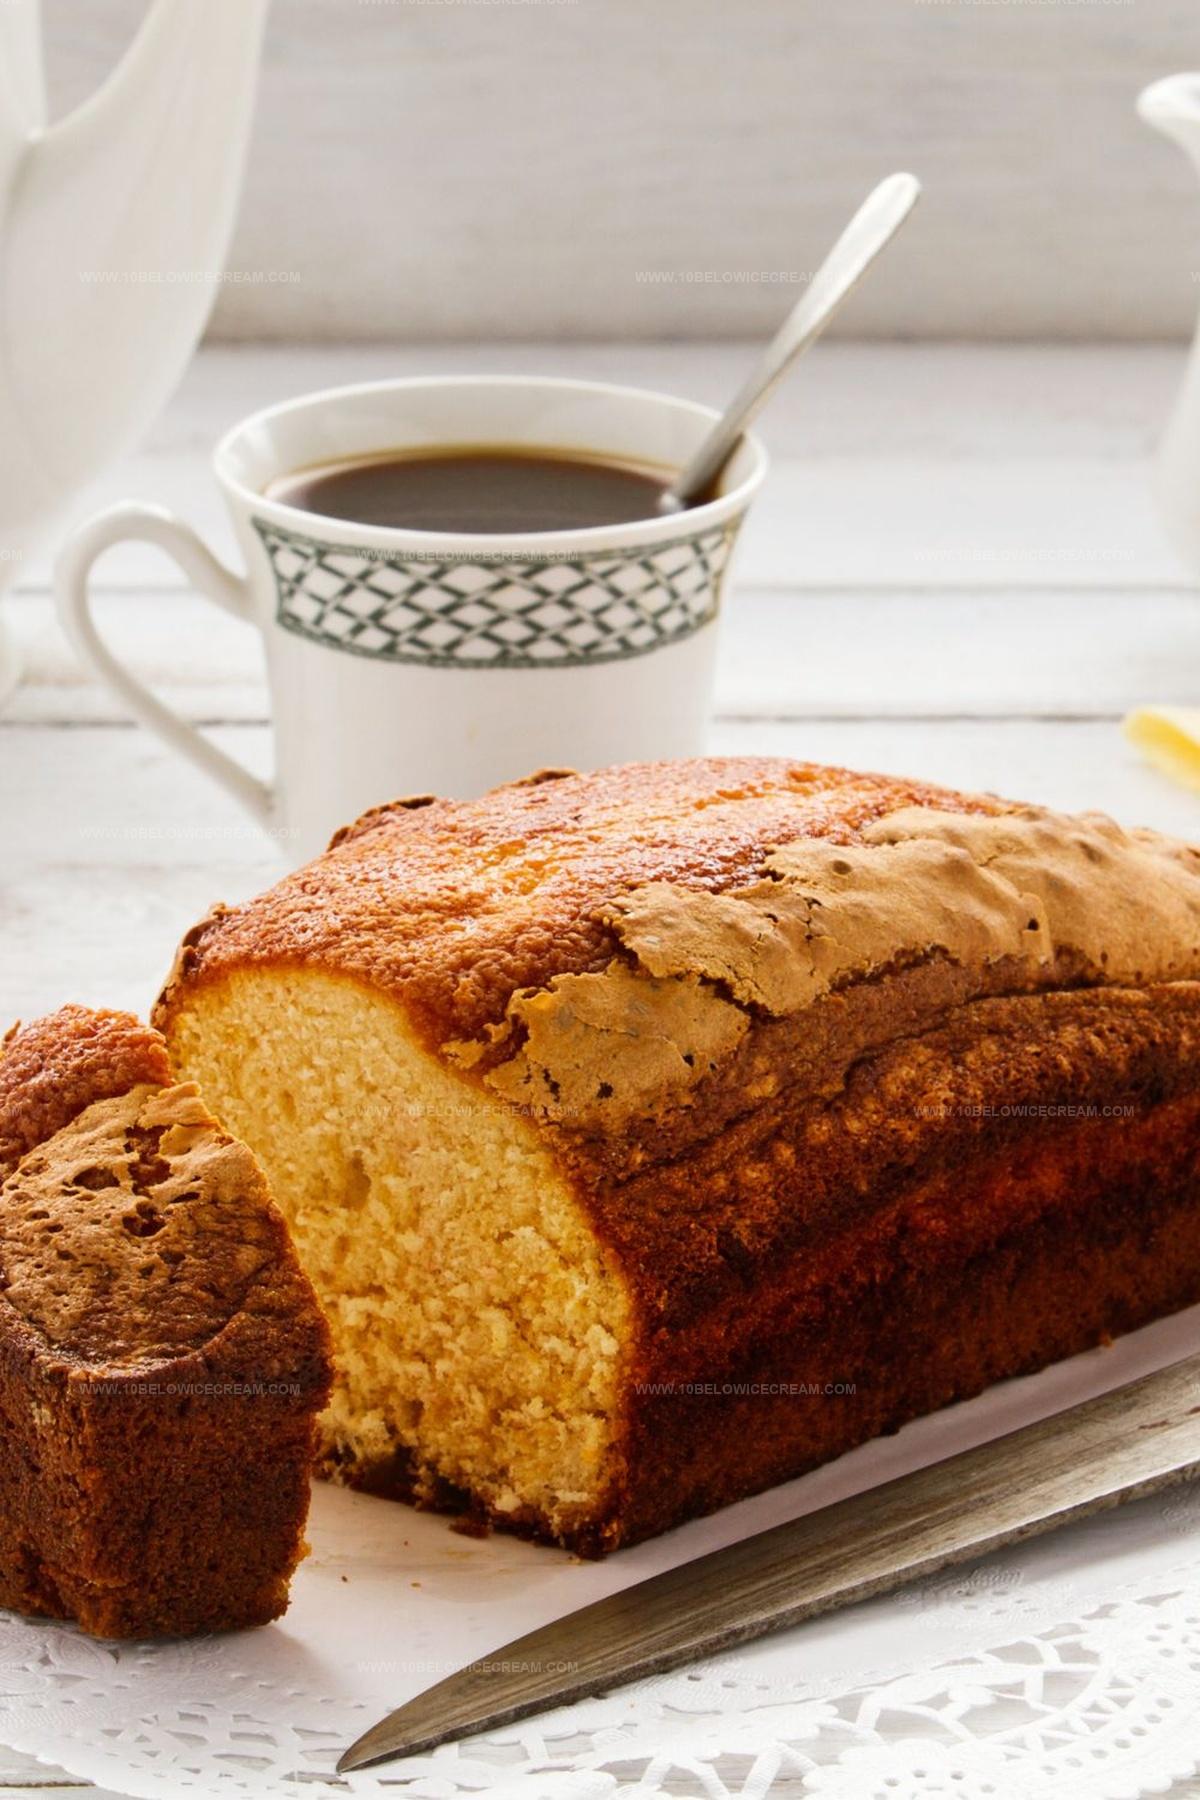
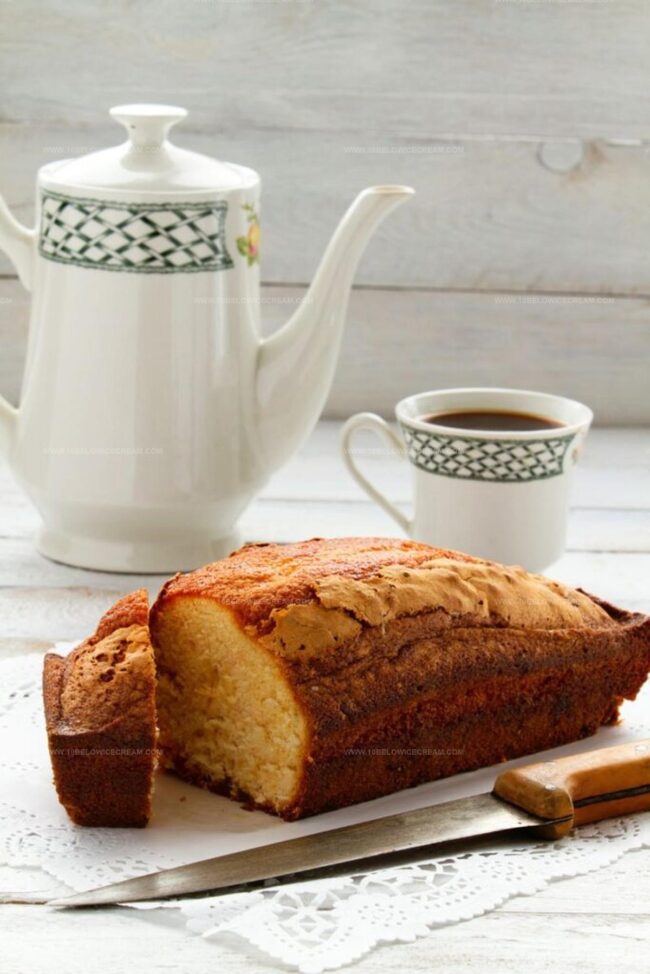
Sweet memories of childhood baking often revolve around classic madeira cake, a beloved British treat that whispers comfort with every slice.
Buttery crumbs melt deliciously on your tongue, promising rich flavor and tender texture.
Generations have cherished this simple yet elegant dessert from england.
Soft vanilla notes dance through each golden bite, creating a nostalgic experience.
Simple ingredients come together effortlessly in this timeless recipe that feels like a warm hug.
Bakers of all skill levels can confidently create this delightful cake that pairs perfectly with afternoon tea.
Let’s unlock the secrets of this delectable classic and fill your kitchen with irresistible aromas.
Why People Love Nigella Madeira Cake
What’s In Nigella Madeira Cake
Main Ingredients:Flavor Enhancers:Finishing Touches:How To Prepare Nigella Madeira Cake At Home

Step 1: Whip Butter and Sugar
Grab your electric mixer and blend softened butter with sugar and fresh lemon zest until the mixture becomes light, airy, and super creamy. The key is to beat until the texture looks fluffy and pale.
Step 2: Incorporate Eggs Carefully
Add eggs one at a time into the butter mixture, mixing thoroughly after each addition. If the batter looks like it’s starting to separate, sprinkle a small amount of flour to help stabilize and smooth out the consistency.
Step 3: Blend Dry and Wet Ingredients
Gently fold in these ingredients:Stir with a light hand to maintain the delicate air bubbles you’ve created.
Step 4: Prepare for Baking
Transfer the batter into a pre-lined loaf pan. Sprinkle a delicate layer of granulated sugar across the top for a delightful crispy crust.
Step 5: Bake to Golden Perfection
Place the cake in a preheated oven at 170°F (150°F for fan-forced ovens). Bake for approximately one hour until a golden brown color emerges and a skewer comes out clean when inserted.
Step 6: Cool and Rest
Allow the cake to cool completely inside the baking tin. This helps the cake set and makes removing it easier.
Step 7: Serve and Enjoy
Slice the Madeira cake and serve it as a standalone treat or dress it up with fresh berries, whipped cream, or a light dusting of powdered sugar.
Easy Tips For Nigella Madeira Cake Success
Change Up Your Nigella Madeira Cake Style
What Pairs Nicely With Nigella Madeira Cake
The Best Way To Store Nigella Madeira Cake
FAQ Guide For Nigella Madeira Cake
Lemon zest and a hint of lemon juice provide the classic citrusy taste, while the simple combination of butter, flour, and sugar creates its distinctive rich and tender crumb.
No, it’s a straightforward recipe that requires basic baking skills. The key is to cream the butter and sugar well, add eggs carefully, and fold in flour gently to maintain a light texture.
The cake originated in England during the 19th century and was traditionally served alongside Madeira wine. Despite its name, no wine is used in the actual recipe.
Print
Madeira Cake Recipe
- Total Time: 1 hour 15 minutes
- Yield: 8 1x
Description
Madeira cake offers a classic British delight with its tender crumb and citrusy charm. Bakers craving a simple yet elegant dessert will love this traditional treat that pairs perfectly with afternoon tea or a quiet moment of indulgence.
Ingredients
Main Ingredients:
- 240 grams (8.5 ounces) unsalted butter, softened
- 3 large eggs
- 200 grams (7 ounces) caster sugar
Flour:
- 210 grams (7.4 ounces) self-raising flour
- 90 grams (3.2 ounces) plain flour
Flavoring:
- Zest of 1 unwaxed lemon
- Juice of 1 unwaxed lemon
- Extra caster sugar for topping
Instructions
- Whip butter, sugar, and fragrant lemon zest in a mixing bowl until light and airy, creating a smooth, pale mixture.
- Incorporate eggs individually, carefully mixing after each addition, and sprinkle a touch of flour if the batter appears curdled to maintain smooth consistency.
- Gently fold flour and flour mixture into the creamy base, drizzling lemon juice to enhance flavor, ensuring minimal stirring to preserve the cake’s delicate texture.
- Transfer the silky batter into a parchment-lined loaf pan, creating an even surface and generously sprinkling granulated sugar across the top for a delightful caramelized crust.
- Position the cake in a preheated oven at 170°C (150°C fan), allowing it to bake for approximately 60 minutes until a golden-brown exterior develops and a skewer inserted emerges clean.
- Allow the freshly baked cake to rest within the tin, gradually cooling and stabilizing its structure for easier removal.
- Carefully release the cake from the pan, revealing its perfectly risen form, and slice into elegant portions ready to be enjoyed alongside fresh berries, whipped cream, or simply savored on its own.
Notes
- Use room temperature butter and eggs for smoother mixing and better texture.
- Add flour gradually when beating eggs to prevent curdling and maintain a silky batter consistency.
- Sift dry ingredients before folding to eliminate lumps and ensure even distribution of flour.
- Modify the recipe for gluten-free diets by substituting regular flour with almond or gluten-free flour blend.
- Prep Time: 15 minutes
- Cook Time: 1 hour
- Category: Desserts
- Method: Baking
- Cuisine: British
Nutrition
- Serving Size: 8
- Calories: 385
- Sugar: 24g
- Sodium: 65mg
- Fat: 21g
- Saturated Fat: 13g
- Unsaturated Fat: 8g
- Trans Fat: 0.2g
- Carbohydrates: 41g
- Fiber: 1g
- Protein: 5g
- Cholesterol: 85mg
Jackson Reid
Founder & Recipe Developer
Expertise
Education
Holyoke Community College – HCC-MGM Culinary Arts Institute
Certificate in Culinary Arts
Focus: Farm-to-table cuisine, sustainable cooking practices, and hands-on kitchen training
Jackson’s love for cooking began one dish at a time. After earning his Culinary Arts Certificate from Holyoke Community College’s HCC-MGM Culinary Arts Institute, he focused on what mattered most: creating recipes that are simple to follow and full of flavor.
At 10 Below Ice Cream, Jackson brings together global influences and a less-is-more approach. His recipes reflect his belief that good food doesn’t need to be complicated; it just needs to make sense, taste great, and feel right.
When he’s not testing ingredients or adjusting seasonings, you’ll find him hiking near Asheville, exploring local markets, or chasing the best light for food photos.