Tangy Homemade Refrigerator Pickled Vegetables Recipe for Summer
Crisp summer afternoons spark magic with homemade refrigerator pickled vegetables that dance between tangy and fresh.
Seasonal produce becomes a delightful canvas for preserving garden bounty.
Salt, vinegar, and herbs create simple alchemy in glass jars.
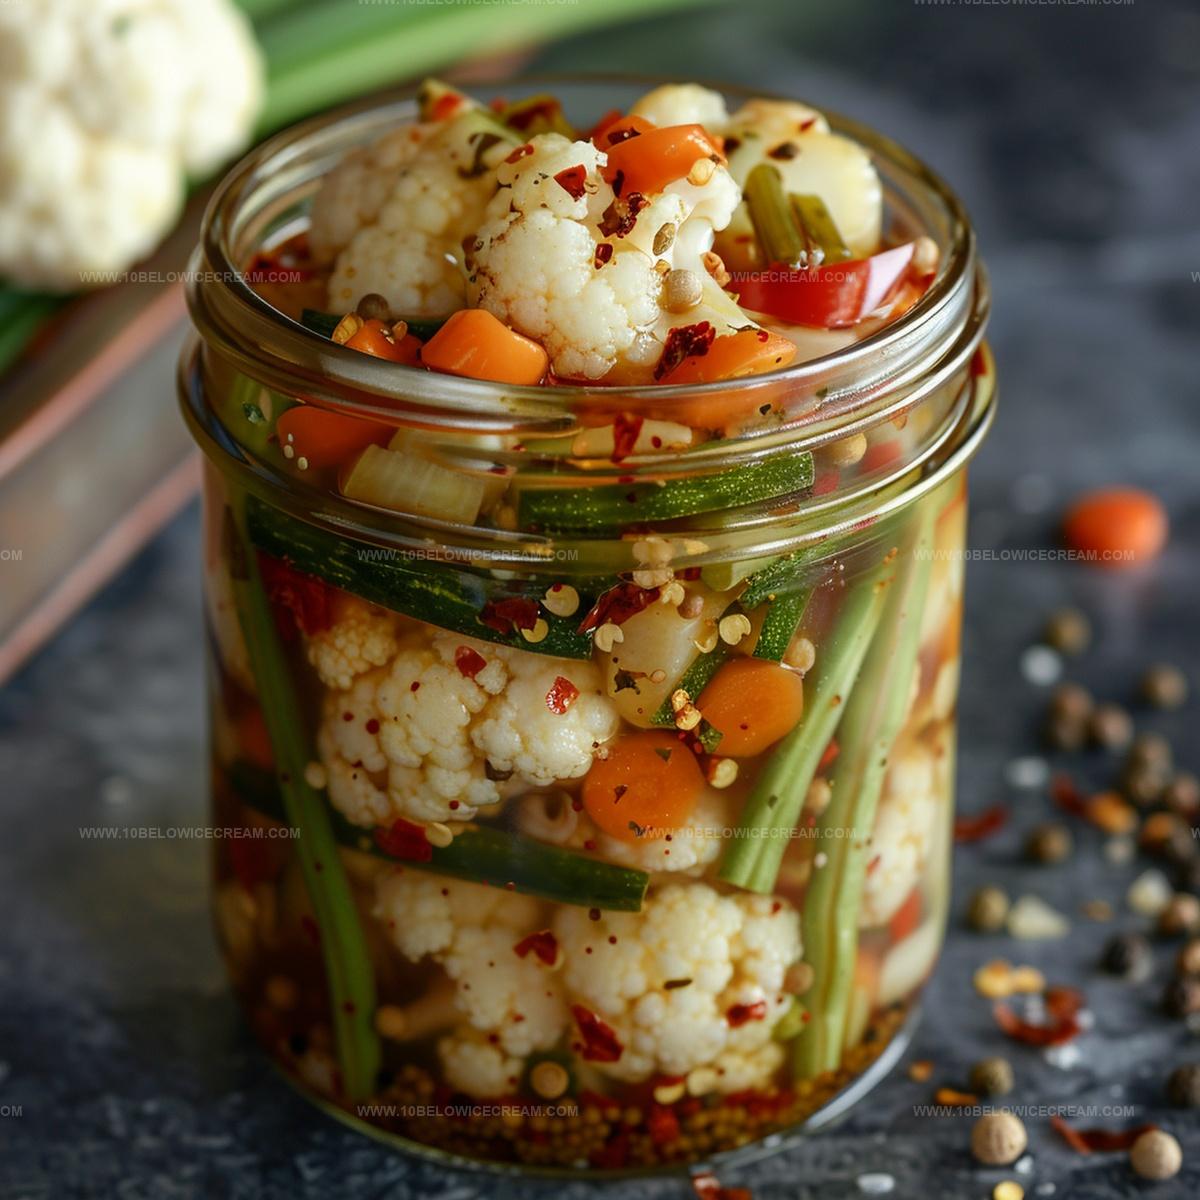
Mason jar collections gleam with vibrant colors from cucumber spears, radish slivers, and cauliflower florets.
Pickling lets you experiment without complex canning techniques or specialized equipment.
Adventurous cooks appreciate how quickly these zesty treats come together with minimal effort.
You’ll savor each crunchy bite of these easy pickled delights that brighten any meal.
Why You’ll Love Refrigerator Pickled Vegetables
Ingredients For Homemade Refrigerator Pickles
For the Vegetables:For the Pickling Liquid:For the Spices and Aromatics:Making Refrigerator Pickled Vegetables
Step 1: Clean And Prepare Jars
Thoroughly wash large glass or mason jars with hot soapy water. Sanitize by boiling jars for 10 minutes to eliminate bacteria and ensure a pristine pickling environment.
Step 2: Chop Vegetables
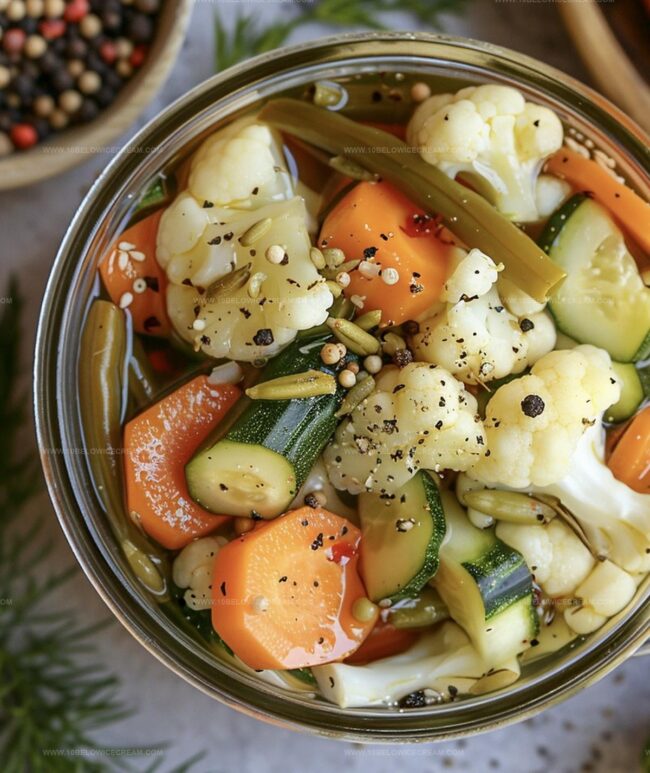
Cut vegetables into consistent bite-sized pieces using a sharp knife. Aim for uniform chunks to guarantee even pickling and an attractive presentation.
Step 3: Prepare Garlic
Peel garlic cloves and gently crush them using the flat side of a knife. This technique helps release intense aromatic compounds and enhances overall flavor.
Step 4: Create Pickling Brine
In a medium saucepan, combine:Heat mixture over medium-high heat, stirring until salt completely dissolves and liquid reaches a gentle simmer.
Step 5: Infuse Spices
Add these spices to the hot brine:Allow spices to steep and release their complex flavors into the liquid.
Step 6: Layer Vegetables
Pack prepared vegetables tightly into sterilized jars. Create visually appealing layers by alternating different vegetable types for texture and color variety.
Step 7: Pour Hot Brine
Carefully pour spice-infused hot brine over vegetables. Ensure complete coverage while leaving a small space at the top of the jar.
Step 8: Cool And Rest
Let pickled vegetables cool to room temperature for approximately 30 minutes. This allows initial flavor melding.
Step 9: Refrigerate And Develop Flavor
Seal jar with a tight-fitting lid. Refrigerate for at least 24 hours to develop deep, tangy pickle characteristics.
Step 10: Store And Enjoy
Consume pickles within 2 weeks for maximum crispness and flavor. Keep continuously refrigerated and enjoy as a zesty side or snack.
Tips For Perfect Refrigerator Pickled Vegetables
Easy Variations On Pickled Vegetables
What To Serve With Refrigerator Pickled Vegetables
Storage Tips For Pickled Vegetables
Refrigerator Pickled Vegetables FAQs
Uniform cuts ensure even pickling, consistent flavor absorption, and create an attractive presentation where each piece absorbs brine and spices equally.
Spices like dill seeds, black peppercorns, bay leaf, and mustard seeds infuse complex aromatic compounds into the brine, developing a rich, multilayered taste profile that enhances the vegetables’ natural flavors.
Vinegar creates an acidic environment that prevents bacterial growth, preserves vegetables, and provides the signature tangy flavor characteristic of traditional pickled foods.
Refrigeration slows down fermentation, maintains crisp texture, prevents spoilage, and helps develop a deep, concentrated flavor over time while ensuring food safety.
Print
Homemade Refrigerator Pickled Vegetables Recipe
- Total Time: 24 hours 30 minutes
- Yield: 4 1x
Description
Crisp, tangy homemade refrigerator pickled vegetables bring garden-fresh flavors to your plate with minimal effort. Quick pickling offers a zesty, crunchy side dish that elevates meals with colorful, homemade charm you’ll savor.
Ingredients
Vegetables:
- 2 cups mixed vegetables (carrots, cauliflower, bell peppers, cucumber)
- 1 red onion
Brine:
- 1 cup white vinegar
- 1 cup water
- 2 tbsp kosher salt
Spices and Herbs:
- 2 cloves garlic
- 1 tbsp dill seeds
- 1 tsp black peppercorns
- 1 bay leaf
- 1 tsp mustard seeds
Instructions
- Wash and thoroughly sanitize a large glass jar or multiple mason jars to ensure a clean pickling environment.
- Slice all vegetables into uniform, bite-sized pieces to promote even pickling and attractive presentation.
- Peel and crush garlic cloves to release their robust aromatic compounds.
- Combine white vinegar, water, and kosher salt in a saucepan, heating the mixture until salt completely dissolves and liquid reaches a gentle simmer.
- Add dill seeds, black peppercorns, bay leaf, and mustard seeds to the hot brine, allowing the spices to infuse their complex flavors.
- Layer the prepared vegetables tightly into the sterilized jar, alternating types to create a visually appealing and texturally diverse pickle.
- Carefully pour the hot, spice-infused brine over the vegetables, ensuring complete coverage and leaving a small headspace at the top.
- Allow the pickled vegetables to cool to room temperature for approximately 30 minutes.
- Seal the jar with a tight-fitting lid and refrigerate for at least 24 hours to develop deep, tangy flavors.
- Consume within 2 weeks for optimal crispness and taste, storing continuously in the refrigerator.
Notes
- Customize vegetable selection based on seasonal availability and personal preference for maximum flavor variety.
- Use crisp, firm vegetables like carrots, cucumbers, and bell peppers to maintain excellent texture during pickling process.
- Experiment with additional spices like red pepper flakes or fresh herbs to create unique flavor profiles matching your taste preferences.
- Opt for non-reactive glass containers to prevent chemical interactions that might alter pickle taste and quality.
- Prep Time: 20 minutes
- Cook Time: 10 minutes
- Category: Appetizer, Snacks
- Method: Pickling
- Cuisine: American
Nutrition
- Serving Size: 4
- Calories: 30
- Sugar: 2g
- Sodium: 500mg
- Fat: 0g
- Saturated Fat: 0g
- Unsaturated Fat: 0g
- Trans Fat: 0g
- Carbohydrates: 6g
- Fiber: 1g
- Protein: 1g
- Cholesterol: 0mg
Olivia Brooks
Contributing Writer
Expertise
Education
Culinary Institute of America
Accelerated Culinary Arts Certificate Program
Focus: Culinary fundamentals, nutrition, and healthy cooking technique
Olivia believes good food should feed both the body and the soul. She earned her Accelerated Culinary Arts Certificate from the Culinary Institute of America, where she focused on nutrition and practical cooking techniques that make healthy eating easy.
At 10 Below Ice Cream, Olivia shares single-serving recipes that are fresh, plant-forward, and full of heart. She loves helping people eat better, without stress, strict rules, or sacrificing flavor.
Beyond the kitchen, Olivia spends her time tending her backyard garden, practicing yoga, and discovering hidden gems in Portland’s food scene.