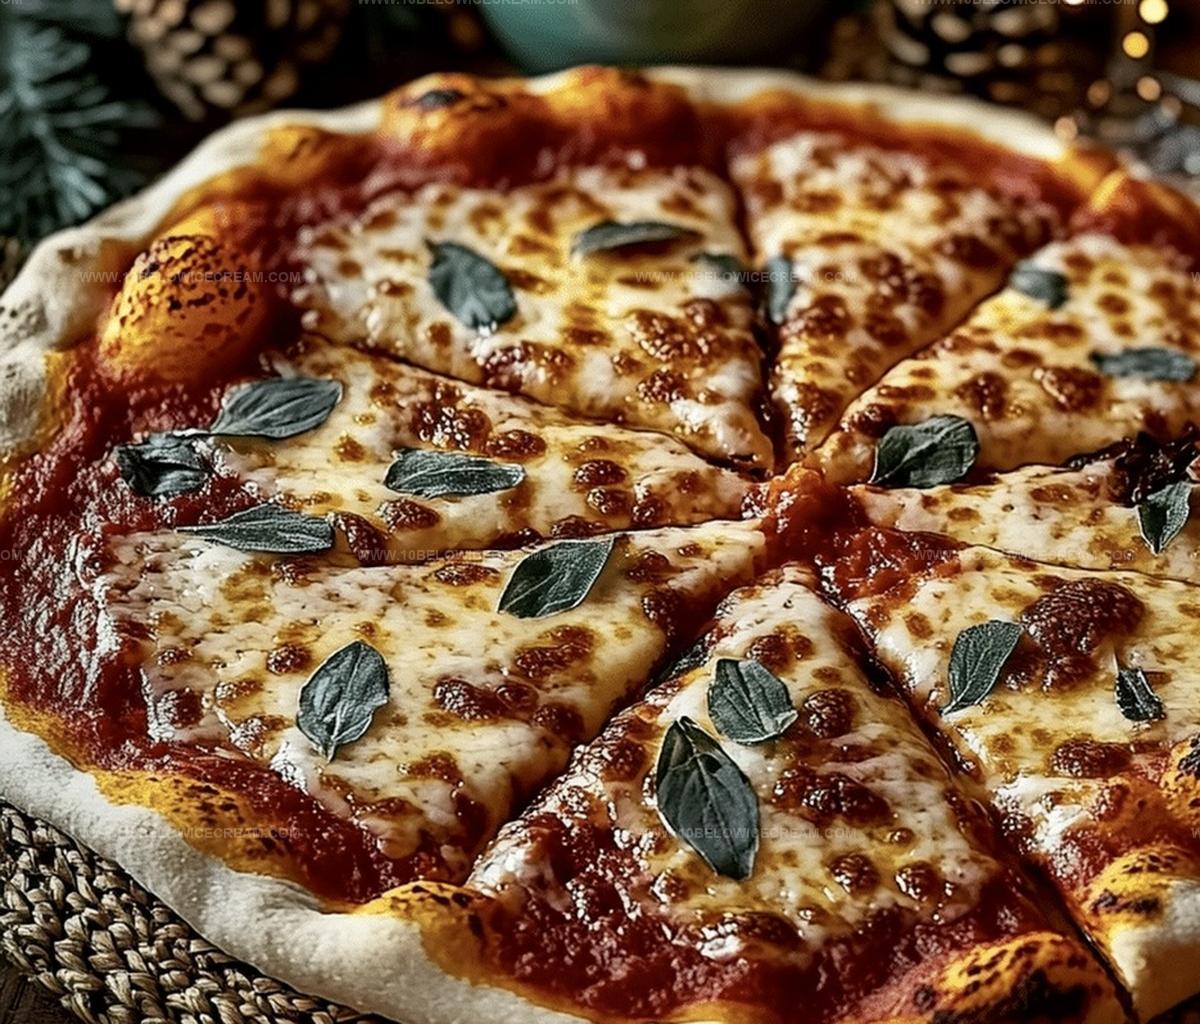
Homemade Pizza Recipe with Crisp and Cheesy Crust
Crafting a delectable homemade pizza lets you become a culinary maestro right in your kitchen.
Flour-dusted counters and fresh ingredients spark creativity for pizza lovers.
Crispy crusts and melted cheese create pure comfort on a plate.
Fragrant herbs and vibrant toppings turn simple dough into a masterpiece.
Mastering this recipe means saying goodbye to delivery forever.
Sophisticated yet simple, this approach guarantees restaurant-quality results without leaving home.
We promise you’ll impress everyone at the table with these mouthwatering techniques.
Why Homemade Pizza Makes Every Night Better
Everything You Need For Homemade Pizza
For the Dough Base:For the Liquid Ingredients:For the Toppings:For the Seasoning:How To Prepare Homemade Pizza At Home
Step 1: Bloom Magical Yeast
Mix yeast with warm water and watch it transform into a bubbly, frothy potion. Let it sit and dance for 5-7 minutes until it becomes wonderfully alive and foamy.
Step 2: Create Flavor-Packed Dry Mix
In a spacious mixing bowl, combine:Craft a cozy center well for your liquid ingredients.
Step 3: Merge Wet and Dry Ingredients
Pour the activated yeast and olive oil into the flour mixture. Stir until a shaggy, rustic dough emerges.
Step 4: Knead with Passion
Transfer the dough onto a flour-dusted surface. Knead vigorously for 8-10 minutes, transforming it into a smooth, elastic masterpiece.
Step 5: Let Dough Rise
Place the dough in a lightly oiled bowl. Cover with a damp cloth and let it rest in a warm spot. Wait until it doubles in size, about 1 hour.
Step 6: Shape the Pizza Base
Punch down the risen dough. Roll it out on a floured surface to fit your pizza pan or baking sheet.
Step 7: Layer Garlic Foundation
Spread minced garlic across the dough’s surface. Add a layer of tomato sauce, leaving a small border around the edges.
Step 8: Add Cheesy Toppings
Sprinkle mozzarella cheese generously over the sauce. Arrange pepperoni slices strategically across the surface.
Step 9: Bake to Perfection
Dust the pizza with black pepper. Slide into a preheated oven at 450°F. Bake for 12-15 minutes until the crust turns golden and cheese bubbles with excitement.
Step 10: Garnish and Serve
Remove from the oven. Scatter fresh basil leaves on top. Slice and serve immediately while it’s hot and irresistibly crispy.
Simple Tips For Making Great Homemade Pizza
Fun Ideas For Homemade Pizza Toppings
What Tastes Great With Homemade Pizza
How To Store Homemade Pizza Without Losing Flavor
Homemade Pizza FAQs Made Simple
Kneading develops gluten, which gives the pizza crust its stretchy texture and helps it rise properly, creating a better overall structure and chewiness.
If the yeast mixture becomes frothy and bubbly within 5-7 minutes when mixed with warm water, it means the yeast is alive and ready to use in your pizza dough.
Yes, you can prepare the dough in advance and refrigerate it for up to 24 hours, which can actually enhance the flavor through slow fermentation.
Dried oregano adds a subtle herbal flavor that complements the pizza’s toppings and provides an extra layer of traditional Italian seasoning to the crust.
Print
Homemade Pizza Recipe
- Total Time: 1 hour 30 minutes
- Yield: 4 1x
Description
Delicious homemade pizza brings Italian culinary magic right into kitchens with crispy, golden crust and melted cheese perfection. Gourmet ingredients and simple techniques combine to create a mouthwatering meal you’ll crave again and again.
Ingredients
Main Ingredients:
- 3 cups flour
- 1 packet active dry yeast
- 1 cup warm water
- 2 tbsp olive oil
Toppings:
- 1 cup tomato sauce
- 2 cups mozzarella cheese
- 1/2 cup pepperoni slices
- 1/4 cup fresh basil leaves
Seasonings and Extras:
- 1 tsp salt
- 1 tsp dried oregano
- 1/2 tsp black pepper
- 2 cloves garlic, minced
Instructions
- Activate the yeast by dissolving it in warm water (around 110°F), allowing it to foam and become frothy for approximately 5-7 minutes.
- In a large mixing bowl, combine flour, salt, and dried oregano, creating a well in the center for the liquid ingredients.
- Pour the activated yeast mixture and olive oil into the flour mixture, stirring until a shaggy dough begins to form.
- Transfer the dough onto a floured surface and knead vigorously for 8-10 minutes until smooth and elastic.
- Place the dough in a lightly oiled bowl, cover with a damp cloth, and let rise in a warm area for about 1 hour or until doubled in size.
- Punch down the risen dough and roll it out on a floured surface to fit your preferred pizza pan or baking sheet.
- Spread minced garlic across the dough’s surface before layering tomato sauce evenly, leaving a small border around the edges.
- Generously sprinkle mozzarella cheese over the sauce, then strategically arrange pepperoni slices across the surface.
- Dust the pizza with black pepper and place in a preheated oven at 450°F for 12-15 minutes until the crust turns golden and cheese becomes bubbly.
- Remove from the oven, garnish with fresh basil leaves, slice, and serve immediately while hot and crispy.
Notes
- Choose warm water precisely between 105-115°F to activate yeast perfectly without killing it, ensuring proper fermentation and rising.
- Knead dough on a clean surface with consistent pressure to develop gluten, creating a stretchy and smooth pizza base that holds toppings beautifully.
- Rest dough at room temperature in a draft-free spot to help it rise evenly, allowing natural fermentation to enhance flavor and texture of the crust.
- Preheat pizza stone or baking sheet for crispy bottom, transferring directly into hot oven to simulate professional pizzeria cooking techniques.
- Prep Time: 1 hour 15 minutes
- Cook Time: 12-15 minutes
- Category: Lunch, Dinner, Snacks
- Method: Baking
- Cuisine: Italian
Nutrition
- Serving Size: 4
- Calories: 500
- Sugar: 2 g
- Sodium: 600 mg
- Fat: 20 g
- Saturated Fat: 8 g
- Unsaturated Fat: 10 g
- Trans Fat: 0 g
- Carbohydrates: 60 g
- Fiber: 3 g
- Protein: 20 g
- Cholesterol: 30 mg
Olivia Brooks
Contributing Writer
Expertise
Education
Culinary Institute of America
Accelerated Culinary Arts Certificate Program
Focus: Culinary fundamentals, nutrition, and healthy cooking technique
Olivia believes good food should feed both the body and the soul. She earned her Accelerated Culinary Arts Certificate from the Culinary Institute of America, where she focused on nutrition and practical cooking techniques that make healthy eating easy.
At 10 Below Ice Cream, Olivia shares single-serving recipes that are fresh, plant-forward, and full of heart. She loves helping people eat better, without stress, strict rules, or sacrificing flavor.
Beyond the kitchen, Olivia spends her time tending her backyard garden, practicing yoga, and discovering hidden gems in Portland’s food scene.