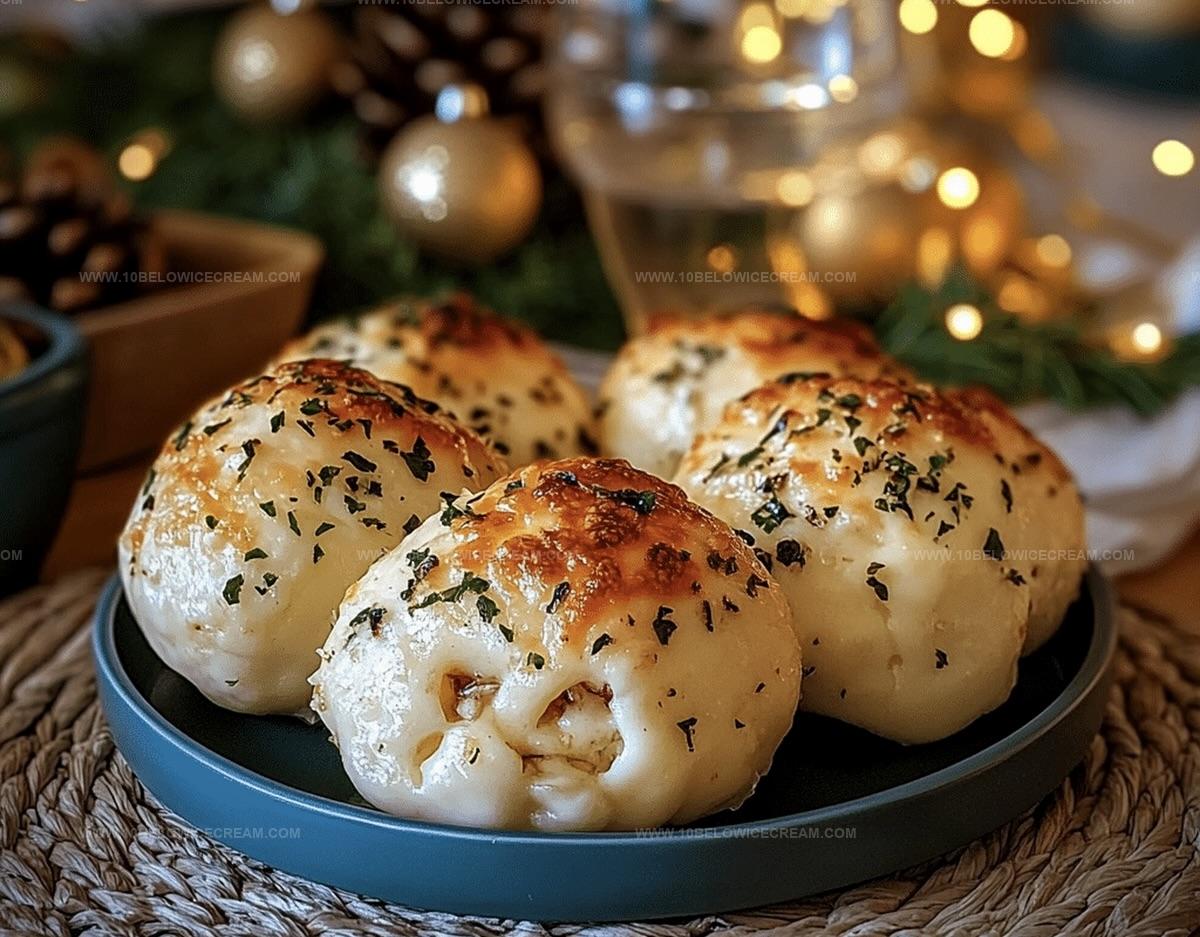
Coziest Homemade Garlic Butter Cheese Bombs Recipe Ever
Crispy golden garlic butter cheese bombs promise an explosion of flavor that’ll make your taste buds dance with delight.
Melted cheese oozes from tender dough pockets, creating irresistible bites everyone craves.
Warm, pillowy pastry wraps around gooey centers that melt in your mouth.
Simple ingredients combine to craft these addictive appetizers perfect for any gathering.
Kitchen novices and seasoned cooks alike can master this crowd-pleasing snack with ease.
Pillowy, cheesy, and packed with rich garlic notes, these bombs deliver comfort in every single bite.
You’ll want to make a double batch because one is never enough.
What’s So Tasty About Homemade Garlic Butter Cheese Bombs
Homemade Garlic Butter Cheese Bombs Ingredients Guide
For the Dough:For the Filling:For the Topping and Finishing:Easy Steps For Homemade Garlic Butter Cheese Bombs
Step 1: Prepare Yeast Activation
Dissolve yeast in warm water with sugar. Let the mixture foam and become bubbly for 5-7 minutes, creating a perfect foundation for your cheese bombs.
Step 2: Mix Dry Ingredients
In a large mixing bowl, combine flour and salt. These dry components will create the base for your delightful dough.
Step 3: Knead and Rise Dough
Incorporate the activated yeast mixture into the flour. Knead the dough on a floured surface until smooth and elastic. Place the dough in a greased bowl and let it rise in a warm spot for 45-60 minutes, allowing it to develop a soft, pillowy texture.
Step 4: Create Cheese Filling
Blend the filling ingredients:Mix until you have a creamy, irresistible cheese mixture.
Step 5: Shape Dough Bombs
Punch down the risen dough and divide into 12 equal-sized portions. Flatten each dough ball, place a generous spoonful of cheese mixture in the center, and carefully seal the edges to create stuffed dough pockets.
Step 6: Prepare for Baking
Arrange the sealed cheese bombs on a baking sheet, keeping them slightly apart. Let them rest for an additional 15 minutes to ensure perfect texture.
Step 7: Make Garlic Butter Topping
Melt butter and mix with:Brush each dough bomb generously with the garlic butter mixture and sprinkle grated parmesan cheese on top.
Step 8: Bake to Golden Perfection
Preheat oven to 375°F. Bake the cheese bombs for 15-18 minutes until they turn golden brown and puffy, with cheese bubbling through slight cracks.
Step 9: Serve and Enjoy
Remove from oven and let cool for 5 minutes. Serve these warm, mouthwatering cheese bombs as a delectable appetizer or side dish that will impress everyone at the table.
Tips To Make Homemade Garlic Butter Cheese Bombs Better
Fun Variations For Homemade Garlic Butter Cheese Bombs
Perfect Pairings With Homemade Garlic Butter Cheese Bombs
Storage Tips For Homemade Garlic Butter Cheese Bombs
Homemade Garlic Butter Cheese Bombs FAQ Section
Yes, you can substitute instant yeast. Use the same amount but skip the activation step since instant yeast doesn’t require proofing.
Ensure you seal the edges of the dough completely by pinching and folding them tightly. This creates a secure pocket that prevents cheese from escaping.
Check that your yeast is fresh and the water temperature is warm (not hot). The ideal temperature is around 110°F, and the environment should be draft-free and warm.
You can assemble the bombs and refrigerate them for up to 24 hours before baking. Just let them come to room temperature and rise slightly before putting them in the oven.
Print
Homemade Garlic Butter Cheese Bombs Recipe
- Total Time: 43 minutes
- Yield: 6 1x
Description
Pillowy garlic butter cheese bombs deliver pure comfort straight from Italian kitchens. Rich herbed dough encases melting cheese, creating irresistible golden pockets you’ll crave with every savory bite.
Ingredients
Dough:
- 2 cups all-purpose flour
- 1 packet active dry yeast
- 1/2 cup warm water
- 1 tbsp sugar
- 1 tsp salt
Filling:
- 1 cup shredded mozzarella cheese
- 1/4 cup cream cheese
- 2 cloves garlic, minced
Topping:
- 1/4 cup unsalted butter
- 2 tbsp fresh parsley, chopped
- 1 tsp garlic powder
- 1/2 tsp salt
- 1/4 cup grated parmesan cheese
Instructions
- Activate the yeast by dissolving it in warm water with sugar, allowing it to foam and become bubbly for about 5-7 minutes.
- In a large mixing bowl, combine flour and salt, then gradually incorporate the activated yeast mixture to form a soft, elastic dough.
- Knead the dough on a floured surface for 6-8 minutes until smooth and elastic, then place in a greased bowl and let rise in a warm spot for 45-60 minutes.
- While dough rises, blend mozzarella, cream cheese, and minced garlic into a creamy filling mixture.
- Punch down the risen dough and divide into equal-sized portions, approximately 12 small balls.
- Flatten each dough ball, place a generous spoonful of cheese mixture in the center, and carefully seal the edges to create stuffed dough pockets.
- Arrange the sealed cheese bombs on a baking sheet, ensuring they’re not touching, and let rest for an additional 15 minutes.
- Preheat oven to 375°F and prepare the garlic butter topping by melting butter and mixing with parsley, garlic powder, and salt.
- Brush each dough bomb generously with the prepared garlic butter mixture and sprinkle grated parmesan cheese on top.
- Bake for 15-18 minutes until golden brown and puffy, with cheese bubbling through slight cracks.
- Remove from oven, let cool for 5 minutes, then serve warm as a delectable appetizer or side dish.
Notes
- Activate yeast precisely to ensure proper dough rising, creating a light and fluffy texture for your cheese bombs.
- Use room temperature ingredients like butter and cheese to help them blend smoothly and distribute evenly throughout the filling.
- Allow sufficient resting time for the dough to develop complex flavors and achieve the perfect soft, pillowy consistency.
- For gluten-free variations, substitute all-purpose flour with a high-quality gluten-free blend that contains xanthan gum for better structure.
- Prep Time: 20-25 minutes
- Cook Time: 15-18 minutes
- Category: Appetizer, Snacks
- Method: Baking
- Cuisine: American
Nutrition
- Serving Size: 6
- Calories: 265
- Sugar: 2 g
- Sodium: 420 mg
- Fat: 17 g
- Saturated Fat: 10 g
- Unsaturated Fat: 5 g
- Trans Fat: 0 g
- Carbohydrates: 24 g
- Fiber: 1 g
- Protein: 8 g
- Cholesterol: 40 mg
Olivia Brooks
Contributing Writer
Expertise
Education
Culinary Institute of America
Accelerated Culinary Arts Certificate Program
Focus: Culinary fundamentals, nutrition, and healthy cooking technique
Olivia believes good food should feed both the body and the soul. She earned her Accelerated Culinary Arts Certificate from the Culinary Institute of America, where she focused on nutrition and practical cooking techniques that make healthy eating easy.
At 10 Below Ice Cream, Olivia shares single-serving recipes that are fresh, plant-forward, and full of heart. She loves helping people eat better, without stress, strict rules, or sacrificing flavor.
Beyond the kitchen, Olivia spends her time tending her backyard garden, practicing yoga, and discovering hidden gems in Portland’s food scene.