
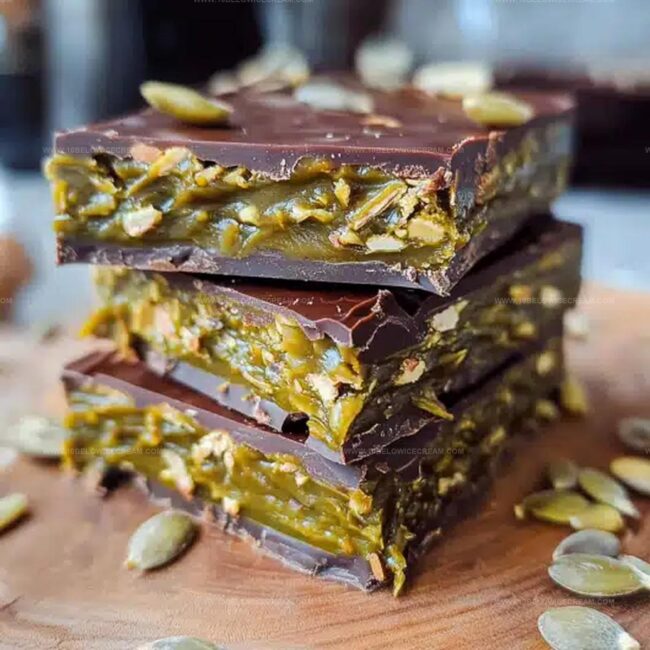
Homemade Dubai Chocolate Bar Recipe for Chocolate Lovers
Sweet dreams come alive with this delectable homemade dubai chocolate bar that melts hearts instantly.
Crafted from premium ingredients, our recipe promises pure indulgence.
Rich cocoa blends seamlessly with local flavors, creating a luxurious treat.
Passion meets precision in every delicate bite.
No store-bought bar compares to the magic you can create in your kitchen.
Smooth textures and intense flavors await your culinary adventure.
Unleash your inner chocolatier and prepare for an unforgettable taste sensation!
Why Homemade Dubai Chocolate Bar Recipe Is Worth It
What You Need For Homemade Dubai Chocolate Bar Recipe
For the Chocolate Base:For the Nuts:For the Flavor Enhancers:For the Preparation:Making Homemade Dubai Chocolate Bar Recipe Step By Step
Step 1: Prepare Double Boiler Setup
Create a makeshift double boiler by placing a heat-safe glass bowl on top of a pot with simmering water. Ensure the bowl hovers above the water without touching the bottom, which prevents direct heat and allows gentle melting.
Step 2: Melt Chocolate Base
Chop dark and milk chocolate into uniform pieces. Combine with cocoa butter in the double boiler, stirring continuously until the mixture becomes smooth and develops a glossy appearance.
Step 3: Toast Nutty Goodness
Carefully toast the following nuts in a dry skillet over medium heat:Stir frequently for 3-4 minutes to prevent burning and achieve a golden, fragrant result.
Step 4: Prepare Chopped Nuts
Remove nuts from heat and let cool completely. Roughly chop into varied-sized pieces to create an interesting textural contrast in the final chocolate creation.
Step 5: Blend Date Sweetness
Incorporate date paste into the melted chocolate mixture. Whisk thoroughly until the paste integrates completely, creating a uniform and smooth consistency.
Step 6: Enhance with Aromatic Spices
Add the following flavor enhancers to the chocolate base:Stir meticulously to distribute the spices evenly throughout the mixture.
Step 7: Combine Nuts and Chocolate
Gently fold the toasted, chopped nuts into the spiced chocolate mixture. Ensure even distribution of nuts throughout the chocolate.
Step 8: Prepare Molding Surface
Line a rectangular mold with parchment paper, allowing slight overhang to facilitate easy removal of the finished chocolate bar.
Step 9: Pour and Set Chocolate
Pour the chocolate mixture into the prepared mold. Use a spatula to spread evenly and tap gently to release any trapped air bubbles.
Step 10: Chill and Solidify
Refrigerate the chocolate bar for 2-3 hours or until completely set and firm to the touch.
Step 11: Unmold and Slice
Remove from refrigerator and lift out of the mold using the parchment paper edges. Slice into desired serving pieces.
Step 12: Store and Preserve
Store the chocolate in an airtight container in a cool, dark place. The chocolate will maintain its optimal texture and flavor for up to two weeks.
Tips To Nail The Homemade Dubai Chocolate Bar Recipe
New Takes On Homemade Dubai Chocolate Bar Recipe
What Pairs Well With Homemade Dubai Chocolate Bar Recipe
How To Store Homemade Dubai Chocolate Bar Recipe Right
FAQs About Homemade Dubai Chocolate Bar Recipe
Yes, it uses natural sweeteners like dates and honey, includes nutrient-rich nuts like almonds and pistachios, and avoids refined sugars, making it a healthier chocolate option.
Absolutely! You can replace the almonds, pistachios, and cashews with seeds like sunflower or pumpkin seeds to maintain similar texture and nutritional profile.
The chocolate should look smooth, glossy, and have no lumps. Stir continuously and use low, gentle heat to prevent burning or seizing.
This recipe offers a complex taste with warm spices like cardamom and cinnamon, balanced by sea salt, creating a rich, aromatic, and slightly exotic chocolate experience.
Print
Homemade Dubai Chocolate Bar Recipe
- Total Time: 40 minutes
- Yield: 4 1x
Description
Delectable Homemade Dubai Chocolate Bar blends rich Middle Eastern flavors with smooth chocolate craftsmanship. Sweet indulgence awaits you with this luxurious treat that promises an irresistible culinary journey through Dubai’s exquisite dessert landscape.
Ingredients
Main Chocolate Ingredients:
- 250g dark chocolate
- 100g milk chocolate
- 50g cocoa butter
Nuts and Filling:
- 75g roasted almonds
- 50g pistachios
- 25g cashew nuts
- 30g date paste
Binding and Flavor Enhancers:
- 15ml vanilla extract
- 10g honey
- 5g sea salt
- 3g ground cardamom
- 2g cinnamon powder
Instructions
- Create a double boiler by placing a heat-safe glass bowl over a pot of simmering water, ensuring the bottom of the bowl doesn’t touch the water.
- Chop dark and milk chocolate into uniform pieces, then gently melt with cocoa butter, stirring continuously until smooth and glossy.
- Carefully toast the almonds, pistachios, and cashew nuts in a dry skillet over medium heat for 3-4 minutes, stirring frequently to prevent burning.
- Remove nuts from heat and let cool completely, then roughly chop into varied-sized pieces to create textural complexity.
- Incorporate date paste into the melted chocolate mixture, whisking until fully integrated and creating a uniform consistency.
- Add vanilla extract, honey, sea salt, ground cardamom, and cinnamon powder to the chocolate base, stirring meticulously to distribute flavors evenly.
- Fold the toasted, chopped nuts into the spiced chocolate mixture, ensuring even distribution throughout the chocolate.
- Line a rectangular mold with parchment paper, allowing slight overhang for easy removal.
- Pour the chocolate mixture into the prepared mold, using a spatula to spread evenly and tap gently to release any air bubbles.
- Refrigerate the chocolate bar for 2-3 hours or until completely set and firm to the touch.
- Remove from refrigerator, lift out of the mold using parchment paper edges, and slice into desired serving pieces.
- Store in an airtight container in a cool, dark place for up to two weeks to maintain optimal texture and flavor.
Notes
- Toast nuts carefully to enhance their natural flavors and prevent burning, watching them closely during the process.
- Experiment with nut ratios to create personalized texture and crunch in your chocolate bar.
- Use high-quality dark chocolate with at least 70% cocoa content for a richer, more intense chocolate experience.
- Consider alternative sweeteners like maple syrup or agave for different flavor profiles and dietary preferences.
- Prep Time: 30 minutes
- Cook Time: 10 minutes
- Category: Snacks, Desserts
- Method: Baking
- Cuisine: Middle Eastern
Nutrition
- Serving Size: 4
- Calories: 335 kcal
- Sugar: 13 g
- Sodium: 125 mg
- Fat: 22 g
- Saturated Fat: 9 g
- Unsaturated Fat: 12 g
- Trans Fat: 0 g
- Carbohydrates: 30 g
- Fiber: 4 g
- Protein: 5 g
- Cholesterol: 0 mg
Olivia Brooks
Contributing Writer
Expertise
Education
Culinary Institute of America
Accelerated Culinary Arts Certificate Program
Focus: Culinary fundamentals, nutrition, and healthy cooking technique
Olivia believes good food should feed both the body and the soul. She earned her Accelerated Culinary Arts Certificate from the Culinary Institute of America, where she focused on nutrition and practical cooking techniques that make healthy eating easy.
At 10 Below Ice Cream, Olivia shares single-serving recipes that are fresh, plant-forward, and full of heart. She loves helping people eat better, without stress, strict rules, or sacrificing flavor.
Beyond the kitchen, Olivia spends her time tending her backyard garden, practicing yoga, and discovering hidden gems in Portland’s food scene.