Jolly Green Grinch Oreo Balls Recipe for Holiday Magic
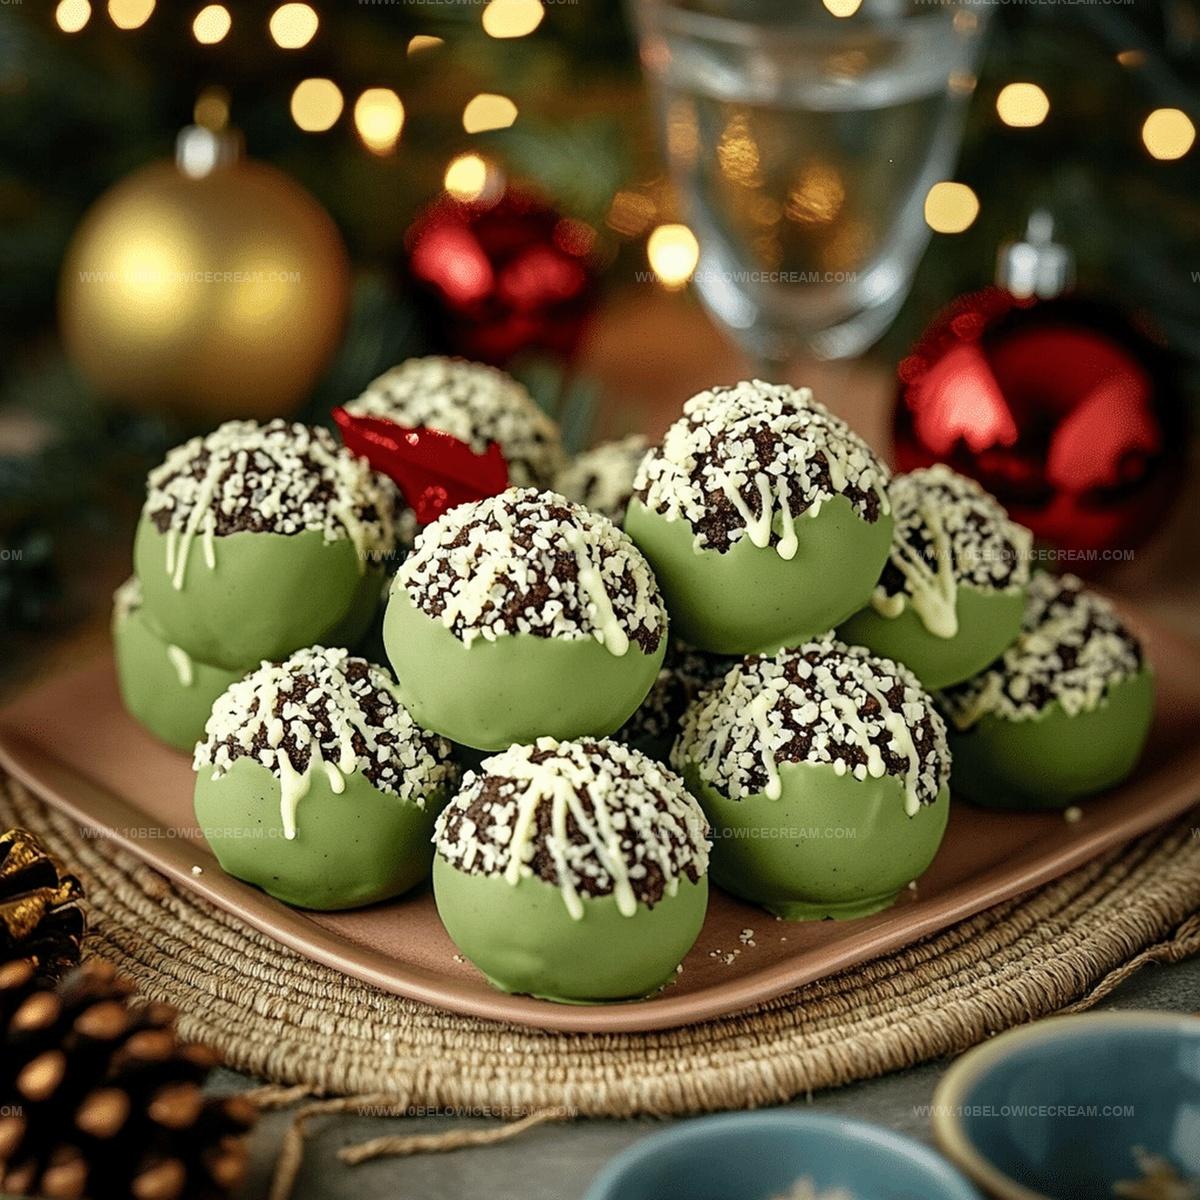
Magical grinch oreo balls sparkle with festive cheer during holiday celebrations.
Crushed cookies blend seamlessly with cream cheese for a delightful treat.
Sweet green coloring adds whimsical charm to these bite-sized delights.
Winter gatherings feel more special when you serve these playful desserts.
Chocolate lovers will adore the rich, creamy texture of each perfectly crafted ball.
Kids and adults alike cannot resist these cheerful seasonal snacks.
Prepare to wow everyone with this simple yet spectacular recipe that captures pure holiday joy.
Why Grinch Oreo Balls Bring The Holiday Cheer
What You Need For Grinch Oreo Balls
For the Base:For the Coating:For the Decoration:Steps To Make Grinch Oreo Balls Quick And Easy
Step 1: Crush Oreo Cookies into Powder
Toss Oreo cookies into a food processor and pulse until they transform into fine, uniform crumbs with a powdery consistency.
Step 2: Create Creamy Cookie Mixture
Blend softened cream cheese with the cookie crumbs until a cohesive, moldable mixture forms that easily holds together.
Step 3: Shape Tasty Spheres
Use a small cookie scoop or spoon to portion the mixture and roll into uniform bite-sized balls. Place them on a parchment-lined baking sheet.
Step 4: Chill Cookie Balls
Refrigerate the Oreo balls for about 20 minutes to firm up their structure and prepare them for coating.
Step 5: Melt Chocolate Coating
Microwave white chocolate wafers in a microwave-safe bowl. Heat in 30-second intervals, stirring between each session until completely smooth and melted.
Step 6: Color Chocolate Grinch Green
Mix green food coloring into the melted white chocolate, stirring until a vibrant, consistent Grinch-inspired green shade develops.
Step 7: Dip and Coat Balls
Using a fork, carefully dip each chilled Oreo ball into the green-tinted chocolate. Ensure complete and even coverage, then gently tap to remove excess coating.
Step 8: Place on Parchment
Return the chocolate-coated balls to the parchment paper, allowing excess chocolate to drip off and create a clean, glossy finish.
Step 9: Add Festive Sprinkles
Before the chocolate sets, sprinkle green sprinkles over the balls for a festive, textured appearance.
Step 10: Optional Grinch Decoration
Add a tiny Santa hat candy for an extra whimsical Grinch-themed touch.
Step 11: Final Chill
Refrigerate the Oreo balls for 15 minutes to solidify the chocolate coating and maintain their perfect shape.
Pro Tips To Get Perfect Grinch Oreo Balls
Festive Variations For Grinch Oreo Balls
What Pairs Well With Grinch Oreo Balls
How To Store Grinch Oreo Balls Without Losing That Holiday Crunch
Grinch Oreo Balls FAQ For A Sweet Holiday Treat
Make sure to blend the cream cheese and Oreo crumbs thoroughly until they form a cohesive mixture that easily holds its shape when rolled into balls.
White chocolate works best for achieving the Grinch green color, but you can substitute with milk or dark chocolate if you prefer a different look and flavor.
Add a small amount of coconut oil or vegetable shortening to thin out the melted chocolate, making it easier to create a smooth, even coating on the Oreo balls.
Ensure the balls are well-chilled before dipping and work quickly when coating to maintain their temperature and prevent cracking.
Print
Grinch Oreo Balls Recipe
- Total Time: 50 minutes
- Yield: 36 1x
Description
Playful Grinch oreo balls bring holiday cheer with their festive green coating and whimsical design. Sweet chocolate cookie centers wrapped in vibrant emerald white chocolate create a merry treat perfect for Christmas celebrations.
Ingredients
Oreo Base:
- 36 oreo cookies
- 8 oz cream cheese, softened
Coating and Decoration:
- 16 oz white chocolate melting wafers
- 2–3 drops green food coloring
- 1/4 cup red candy melts or sprinkles
Garnish:
- 1/4 cup green sprinkles
- 1 small santa hat candy decoration (optional)
Instructions
- Pulse Oreo cookies in a food processor until they transform into fine, uniform crumbs, creating a powdery texture.
- Add softened cream cheese to the cookie crumbs and blend until a cohesive, moldable mixture forms that holds together seamlessly.
- Using a small cookie scoop or spoon, portion the mixture and roll into uniform bite-sized spheres, placing them on a parchment-lined baking sheet.
- Chill the Oreo balls in the refrigerator for approximately 20 minutes to firm up their structure and make them easier to coat.
- Melt white chocolate wafers in a microwave-safe bowl, heating in 30-second intervals and stirring between each interval until completely smooth.
- Incorporate green food coloring into the melted white chocolate, stirring until a vibrant, consistent Grinch-inspired green shade emerges.
- Using a fork, carefully dip each chilled Oreo ball into the green-tinted chocolate, ensuring complete and even coverage, then gently tap to remove excess coating.
- Place the chocolate-coated balls back on the parchment paper, allowing excess chocolate to drip off and create a clean, glossy finish.
- Before the chocolate sets, sprinkle green sprinkles over the balls for a festive, textured appearance.
- Optional: Decorate with a tiny Santa hat candy for an extra whimsical Grinch-themed touch.
- Refrigerate the Oreo balls for 15 minutes to solidify the chocolate coating and maintain their shape.
Notes
- Customize cookie texture by experimenting with different Oreo varieties like mint or peanut butter for unique flavor profiles.
- Ensure cream cheese is at room temperature to blend smoothly and prevent lumpy consistency in the mixture.
- Prevent chocolate cracking by maintaining a consistent dipping temperature and avoiding sudden temperature changes during coating.
- For gluten-free adaptation, substitute regular Oreos with gluten-free cookie alternatives and check cream cheese ingredients for dietary compliance.
- Prep Time: 25 minutes
- Cook Time: 10 minutes
- Category: Snacks, Desserts
- Method: Blending
- Cuisine: American
Nutrition
- Serving Size: 36
- Calories: 150
- Sugar: 12 g
- Sodium: 50 mg
- Fat: 8 g
- Saturated Fat: 5 g
- Unsaturated Fat: 3 g
- Trans Fat: 0 g
- Carbohydrates: 19 g
- Fiber: 1 g
- Protein: 2 g
- Cholesterol: 15 mg
Jackson Reid
Founder & Recipe Developer
Expertise
Education
Holyoke Community College – HCC-MGM Culinary Arts Institute
Certificate in Culinary Arts
Focus: Farm-to-table cuisine, sustainable cooking practices, and hands-on kitchen training
Jackson’s love for cooking began one dish at a time. After earning his Culinary Arts Certificate from Holyoke Community College’s HCC-MGM Culinary Arts Institute, he focused on what mattered most: creating recipes that are simple to follow and full of flavor.
At 10 Below Ice Cream, Jackson brings together global influences and a less-is-more approach. His recipes reflect his belief that good food doesn’t need to be complicated; it just needs to make sense, taste great, and feel right.
When he’s not testing ingredients or adjusting seasonings, you’ll find him hiking near Asheville, exploring local markets, or chasing the best light for food photos.