
Grandma’s Cozy Chocolate Pie Recipe To Enjoy
Memories of warm kitchen gatherings always flood back when I think about grandmas chocolate pie, a dessert that whispers comfort and love.
Sweet aromas would drift through her cozy home, promising delectable moments ahead.
My grandmother carefully crafted each slice with precision and affection, using simple ingredients that seemed magical under her skilled hands.
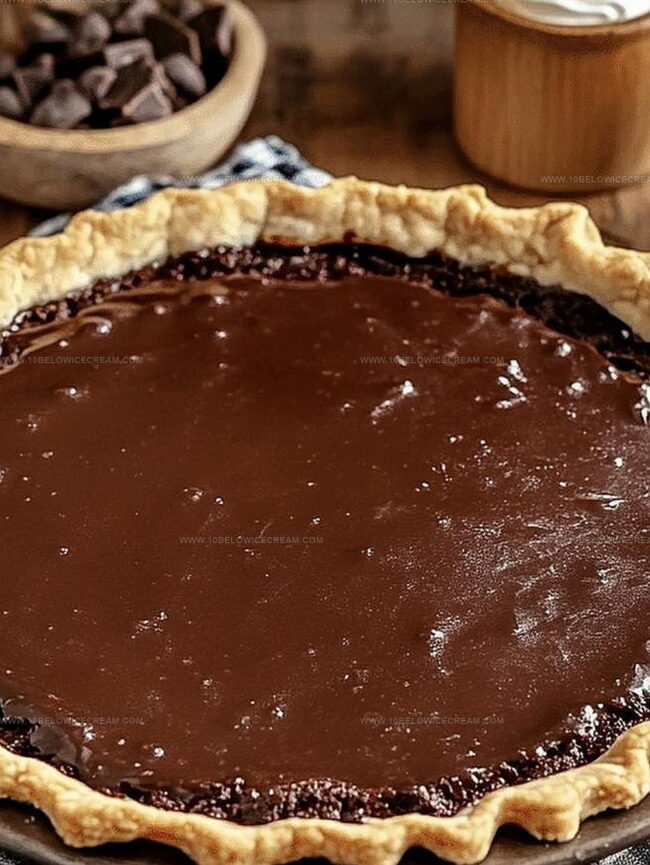
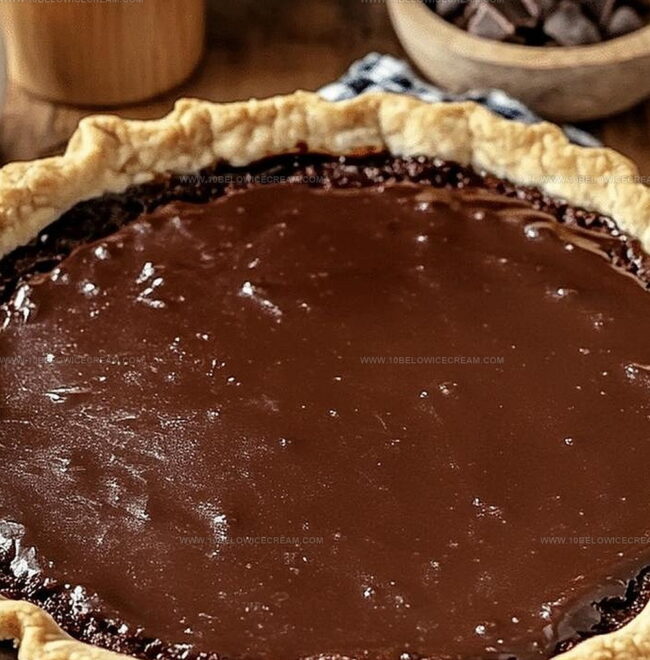
Chocolate filling would shimmer beneath a perfectly golden crust, tempting everyone around the table.
Rich and creamy textures melted effortlessly, creating pure happiness with each delightful bite.
Generations of family traditions live within this remarkable recipe, waiting to connect you with cherished moments.
Follow these steps, and you’ll recreate a slice of nostalgic joy that transcends time.
Why You’ll Love Grandma’s Chocolate Pie
What You’ll Need For Grandma’s Chocolate Pie
For the Chocolate Base:For the Custard Components:For the Finishing and Flavoring:How To Make Grandma’s Chocolate Pie
Step 1: Set Up Melting Station
Create a cozy double boiler by nestling a heatproof bowl over a pot of gently bubbling water. Make sure the bowl hovers above the water without touching, preventing direct heat contact.
Step 2: Craft Chocolate Base
Combine unsweetened chocolate and butter in the bowl, stirring lovingly until they transform into a smooth, glossy mixture that gleams with richness.
Step 3: Blend Dry Ingredients
In a separate bowl, whisk together:Ensure the mixture looks perfectly integrated with zero lumps.
Step 4: Introduce Eggs
Crack eggs into the sugar mixture, whisking with enthusiasm to create a silky, uniform custard base that looks luxuriously smooth.
Step 5: Marry Chocolate and Custard
Slowly stream the melted chocolate into the egg mixture, stirring continuously to prevent any unwanted scrambling and create a decadent chocolate filling.
Step 6: Cook the Custard
Return the entire mixture to the double boiler, cooking and stirring for 5-7 minutes. Watch for the magical moment when the custard thickens and coats the back of a spoon.
Step 7: Enhance with Vanilla
Remove from heat and stir in vanilla extract, allowing the filling to cool slightly and develop deeper, more complex flavor notes.
Step 8: Fill the Pie Crust
Pour the warm chocolate custard into the pre-baked pie crust, using a spatula to create a perfectly even layer that looks absolutely irresistible.
Step 9: Chill and Set
Refrigerate the pie for at least 3 hours, giving the filling time to set completely and develop its ultimate texture.
Step 10: Prepare Whipped Cream Topping
Whip heavy cream with powdered sugar until soft, billowy peaks form, creating a light and airy cloud-like topping.
Step 11: Final Decorative Touch
Just before serving, generously crown the pie with whipped cream and sprinkle chocolate shavings for an elegant, Instagram-worthy finish.
Step 12: Serve and Savor
Slice the chilled pie with pride, revealing its rich, velvety interior and indulging in the intense chocolate experience that awaits.
Tips For Grandma’s Chocolate Pie Success
Flavor Twists For Grandma’s Chocolate Pie
What Goes Well With Grandma’s Chocolate Pie
Keeping Grandma’s Chocolate Pie Fresh
Grandma’s Chocolate Pie Common Questions
A double boiler prevents direct heat, which can burn chocolate. It creates gentle, even heating that keeps chocolate smooth and prevents scorching.
The custard is ready when it coats the back of a spoon and leaves a clear path when you run your finger through it. The mixture should look glossy and hold its shape.
Dark or semi-sweet chocolate work best. Milk chocolate might make the filling too sweet, while unsweetened chocolate provides the most intense chocolate flavor and allows better control of sweetness.
Print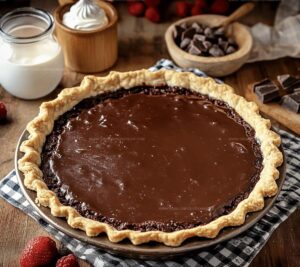
Grandmas Chocolate Pie Recipe
- Total Time: 45 minutes
- Yield: 8 1x
Description
Grandma’s chocolate pie delivers rich, velvety comfort straight from cherished family kitchens. Silky chocolate filling nestled in a buttery crust promises delightful memories you’ll savor with each delectable bite.
Ingredients
Main Ingredients:
- 1 pre-baked pie crust (9-inch)
- 4 oz unsweetened chocolate
- 1 cup sugar
- 4 large eggs
- 2 tbsp (30 ml) butter
Thickening Agents:
- 1/4 cup cornstarch
- 1/4 tsp salt
Garnish and Flavor Enhancers:
- 1 tsp vanilla extract
- 1 cup heavy cream
- 2 tbsp powdered sugar
- 1/4 cup chocolate shavings
Instructions
- Prepare a double boiler by placing a heatproof bowl over a pot of simmering water, ensuring the bottom of the bowl doesn’t touch the water.
- Melt unsweetened chocolate and butter together in the double boiler, stirring continuously until smooth and glossy.
- In a separate mixing bowl, whisk together sugar, cornstarch, and salt until fully integrated and lump-free.
- Crack eggs into the sugar mixture, whisking vigorously to create a uniform, silky custard base.
- Gradually pour the melted chocolate into the egg mixture, stirring constantly to prevent scrambling and create a rich, glossy chocolate filling.
- Return the entire mixture to the double boiler, cooking and stirring for 5-7 minutes until the custard thickens and coats the back of a spoon.
- Remove from heat and stir in vanilla extract, allowing the filling to cool slightly and develop deeper flavor notes.
- Pour the warm chocolate custard into the pre-baked pie crust, smoothing the surface with a spatula for an even layer.
- Refrigerate the pie for at least 3 hours, or until the filling is completely set and chilled.
- Whip heavy cream with powdered sugar until soft peaks form, creating a light and airy topping.
- Just before serving, generously dollop whipped cream over the pie and sprinkle with chocolate shavings for an elegant finish.
- Slice and serve the pie chilled, enjoying the rich, velvety texture and intense chocolate flavor.
Notes
- Use a heavy-bottomed double boiler to prevent chocolate from burning and ensure even, gentle heating.
- Sift dry ingredients like cornstarch to eliminate lumps and create a smoother, silkier custard texture.
- Temper eggs carefully by slowly adding hot chocolate mixture to prevent scrambling and maintain a creamy consistency.
- For a gluten-free version, substitute the traditional pie crust with a nut-based or gluten-free graham cracker crust.
- Prep Time: 30 minutes
- Cook Time: 15 minutes
- Category: Desserts
- Method: Double Boiler
- Cuisine: American
Nutrition
- Serving Size: 8
- Calories: 370
- Sugar: 27 g
- Sodium: 100 mg
- Fat: 25 g
- Saturated Fat: 15 g
- Unsaturated Fat: 10 g
- Trans Fat: 0 g
- Carbohydrates: 38 g
- Fiber: 1 g
- Protein: 6 g
- Cholesterol: 110 mg
Olivia Brooks
Contributing Writer
Expertise
Education
Culinary Institute of America
Accelerated Culinary Arts Certificate Program
Focus: Culinary fundamentals, nutrition, and healthy cooking technique
Olivia believes good food should feed both the body and the soul. She earned her Accelerated Culinary Arts Certificate from the Culinary Institute of America, where she focused on nutrition and practical cooking techniques that make healthy eating easy.
At 10 Below Ice Cream, Olivia shares single-serving recipes that are fresh, plant-forward, and full of heart. She loves helping people eat better, without stress, strict rules, or sacrificing flavor.
Beyond the kitchen, Olivia spends her time tending her backyard garden, practicing yoga, and discovering hidden gems in Portland’s food scene.