Irresistible Garlic Pull-Apart Bread Recipe for Cozy Gatherings
Crafting a mouthwatering garlic pull-apart bread at home sparks culinary excitement for adventurous cooks.
Soft, buttery layers beckon with irresistible aromas wafting through kitchen spaces.
Fragrant herbs and melted butter create a magical combination that promises pure comfort.
Kneading dough becomes a delightful sensory experience connecting you to classic baking traditions.
Crisp edges and pillowy interior guarantee a crowd-pleasing side dish for any meal.
Simple ingredients transform into something spectacular with minimal kitchen skills.
You’ll find this recipe surprisingly easy and incredibly delicious, tempting everyone to gather around the table.
Switch Things Up In Pull-Apart Garlic Bread
Tasty Sides For Pull-Apart Cheesy Garlic Bread
Smart Storage For Pull-Apart Garlic Bread
Your Pull-Apart Bread Questions Answered
Yes, you can use French bread, sourdough, or any thick, crusty bread that holds its shape well when cut.
Mozzarella, cheddar, and parmesan are excellent choices. Combine two or three for a richer flavor profile.
Use plant-based butter and dairy-free cheese alternatives to create a vegetarian-friendly version of the pull-apart bread.
Absolutely! Kids love pulling apart cheesy bread, and the mild garlic flavor makes it appealing to most children.
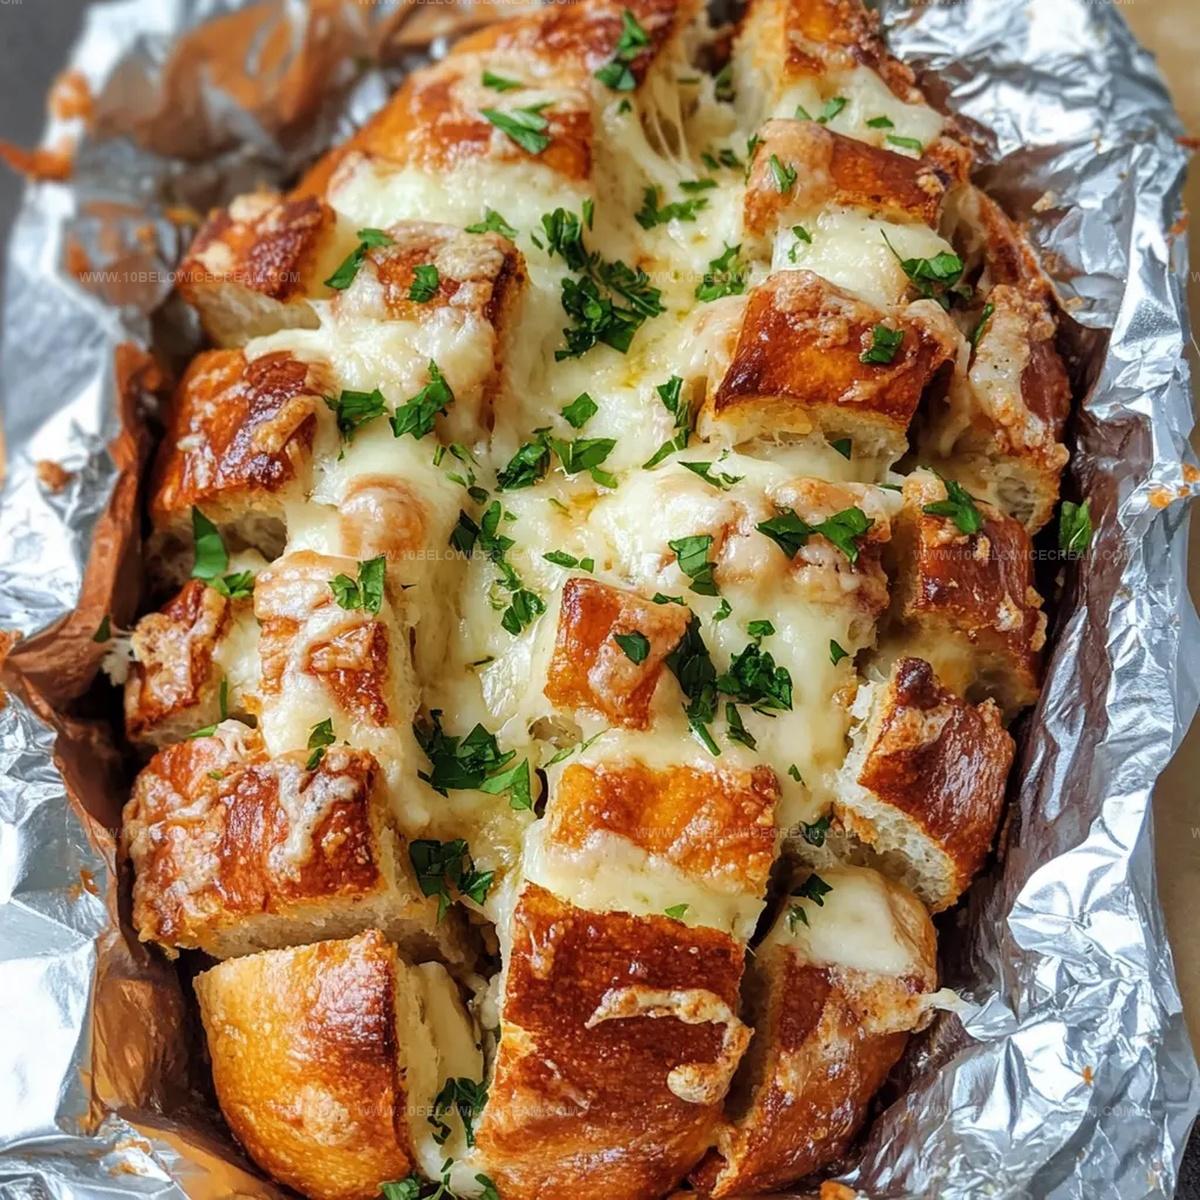
Pull-Apart Cheesy Garlic Bread Everyone Will Love
Everything You Need For Pull-Apart Garlic Bread
Main Ingredients:Butter and Seasoning Mixture:Finishing Touches:How To Bake Pull-Apart Garlic Bread With Ease
Step 1: Warm Up the Oven
Heat the oven to 375°F so it’s perfectly ready for your bread adventure.
Step 2: Create Flavor-Packed Butter Mixture
Whip up a delicious blend of ingredients in a small bowl:Mix everything until the ingredients become best friends.
Step 3: Prepare the Bread Canvas
Grab a loaf and place it on aluminum foil. Carefully slice the bread in a crisscross pattern, making sure not to cut completely through.
Step 4: Generously Coat with Garlic Butter
Use a pastry brush to spread the butter mixture all over the bread. Make sure it seeps into every single cut for maximum flavor explosion.
Step 5: Stuff with Cheesy Goodness
Tuck shredded cheese into each bread cut. Don’t hold back – more cheese means more happiness!
Step 6: Wrap and Prepare for Baking
Loosely wrap the loaf in aluminum foil and place on a baking sheet to catch any delicious drips.
Step 7: Bake to Perfection
Bake for 15-20 minutes covered. Then uncover and bake an additional 10-15 minutes until the cheese bubbles and the top turns golden brown.
Step 8: Add Final Touches
Once out of the oven, let it cool slightly. Sprinkle extra parsley or parmesan for an extra flavor kick.
Step 9: Serve and Enjoy
Pull apart the bread with friends and family. Savor every cheesy, garlicky bite of this crowd-pleasing treat.
Pro Tip: Experiment with different cheese blends or serve alongside your favorite soup for a complete meal experience.
Pull-Apart Garlic Bread Tips That Work
Print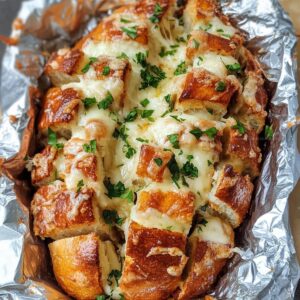
Garlic Pull-Apart Bread Recipe
- Total Time: 35-45 minutes
- Yield: 8 1x
Description
Irresistible garlic pull-apart bread combines savory herb-infused layers with golden, buttery goodness. Warm comfort emerges from each perfectly seasoned slice, inviting you to savor every delectable moment of this classic crowd-pleasing comfort dish.
Ingredients
Main Ingredients:
- 1 large loaf of bread (Italian or French)
- 2 cups shredded cheese (mix of mozzarella and cheddar)
- 1/2 cup (113 grams) unsalted butter, melted
Seasoning and Flavor Enhancers:
- 4 cloves garlic, minced
- 1 tablespoon fresh parsley, finely chopped
- 1/2 teaspoon onion powder
- 1/2 teaspoon Italian seasoning
- 1/4 teaspoon salt
- 1/4 teaspoon black pepper
Optional Garnishes:
- Extra parsley
- Parmesan cheese
Instructions
- Heat oven to 375°F, creating the perfect environment for transforming a simple bread loaf into a mouthwatering appetizer.
- Craft a decadent garlic butter infusion by whisking melted butter with minced garlic, parsley, onion powder, Italian seasoning, salt, and pepper until ingredients harmonize.
- Position bread on an aluminum foil sheet, meticulously creating a crisscross pattern of deep cuts without slicing completely through the loaf.
- Employ a pastry brush to lavishly distribute the garlic butter mixture, ensuring every crevice and cut receives a generous coating.
- Strategically tuck shredded cheese into each intricate cut, pressing and compacting to maximize cheesy coverage throughout the bread.
- Envelop the loaded bread loosely in aluminum foil, placing it on a baking sheet to catch potential drips during cooking.
- Bake for 15-20 minutes fully wrapped, then unveil the foil and continue baking 10-15 minutes until cheese bubbles and surface transforms to a golden-brown perfection.
- Allow bread to rest momentarily after removing from oven, optionally garnishing with additional parsley or parmesan for an elegant finishing touch.
- Tear apart the warm, aromatic bread, revealing melted cheese and celebrating the communal joy of shared dining.
Notes
- Elevate the bread’s flavor by using high-quality artisan bread like sourdough or rustic Italian for maximum texture and taste.
- Customize cheese combinations using a blend of sharp cheddar, mozzarella, and parmesan for deeper, more complex flavor profiles.
- Keep bread moist by tenting foil loosely during initial baking to prevent excessive drying while ensuring perfect cheese melting.
- Transform this recipe into a gluten-free version by substituting traditional bread with gluten-free alternatives like cauliflower or almond flour bread.
- Prep Time: 10 minutes
- Cook Time: 25-35 minutes
- Category: Appetizer, Snacks
- Method: Baking
- Cuisine: Italian
Nutrition
- Serving Size: 8
- Calories: 320
- Sugar: 1 g
- Sodium: 400 mg
- Fat: 18 g
- Saturated Fat: 11 g
- Unsaturated Fat: 5 g
- Trans Fat: 0 g
- Carbohydrates: 32 g
- Fiber: 1 g
- Protein: 10 g
- Cholesterol: 40 mg
Olivia Brooks
Contributing Writer
Expertise
Education
Culinary Institute of America
Accelerated Culinary Arts Certificate Program
Focus: Culinary fundamentals, nutrition, and healthy cooking technique
Olivia believes good food should feed both the body and the soul. She earned her Accelerated Culinary Arts Certificate from the Culinary Institute of America, where she focused on nutrition and practical cooking techniques that make healthy eating easy.
At 10 Below Ice Cream, Olivia shares single-serving recipes that are fresh, plant-forward, and full of heart. She loves helping people eat better, without stress, strict rules, or sacrificing flavor.
Beyond the kitchen, Olivia spends her time tending her backyard garden, practicing yoga, and discovering hidden gems in Portland’s food scene.