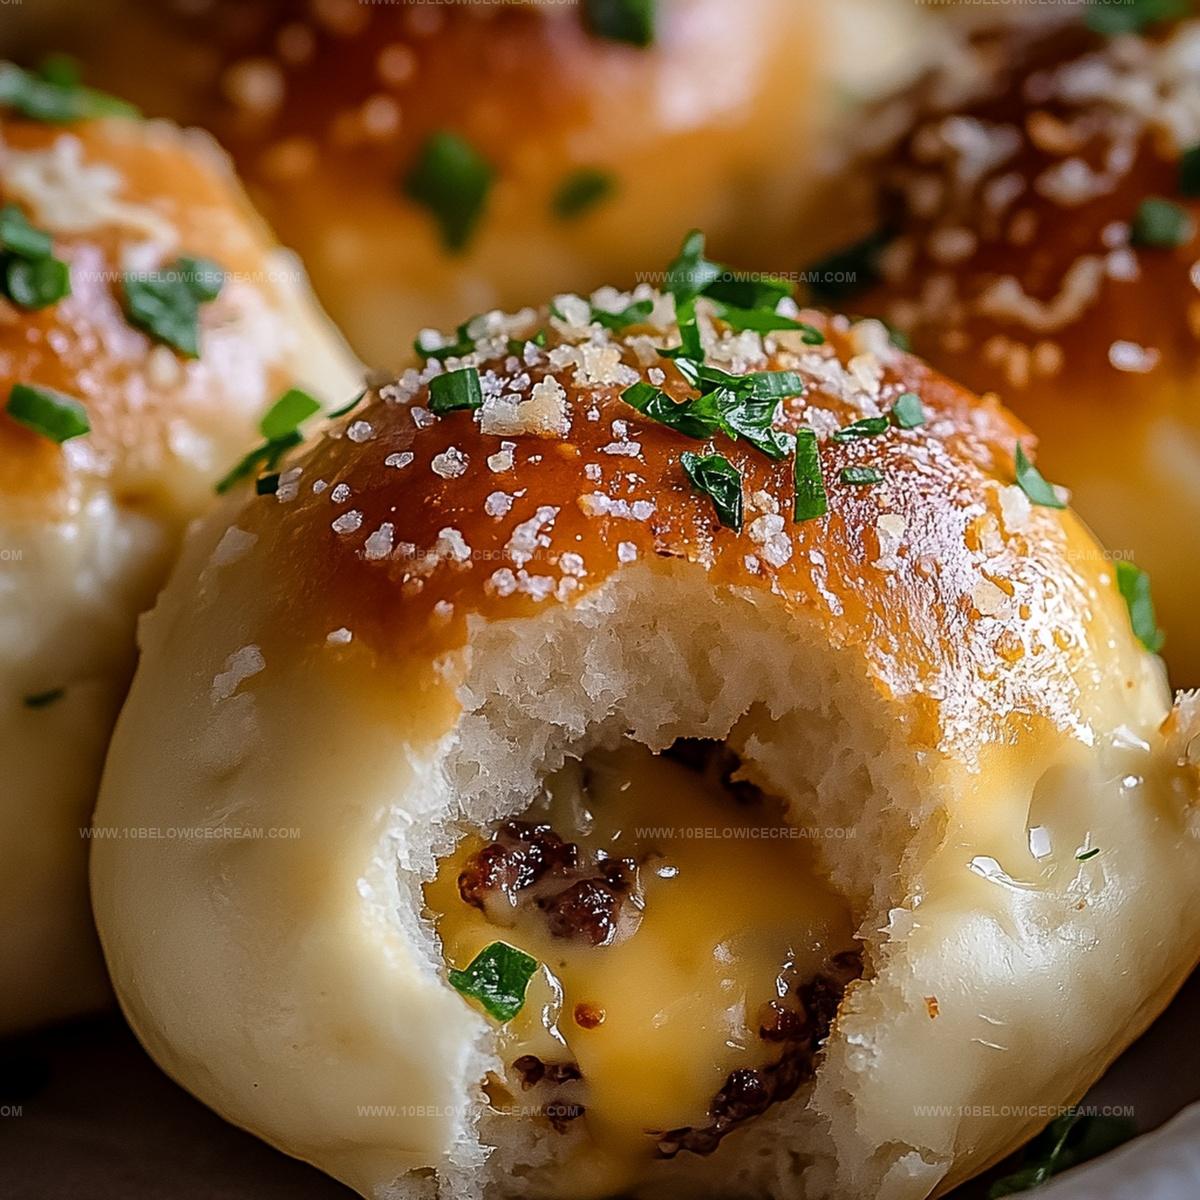
Irresistible Garlic Parmesan Cheeseburger Bombs Recipe
Crafting a mouthwatering garlic parmesan cheeseburger bombs recipe brings pure culinary excitement to your kitchen adventure.
Cheese lovers will immediately fall in love with these incredible handheld delights.
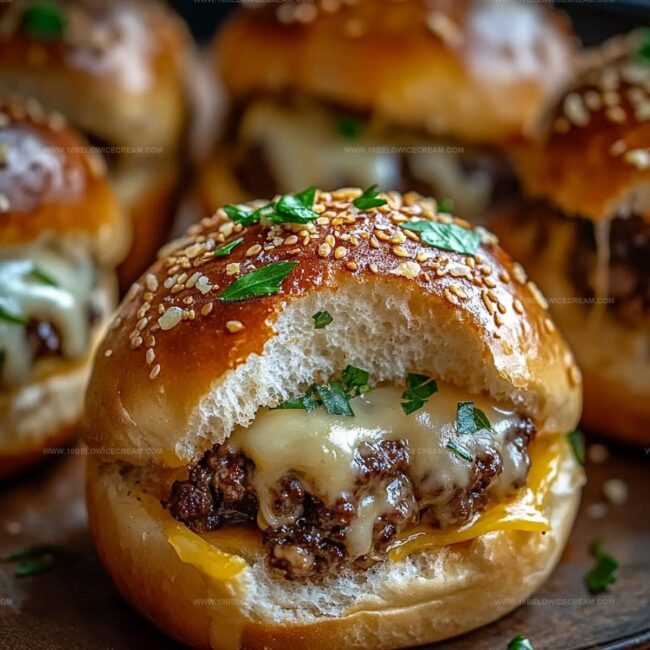
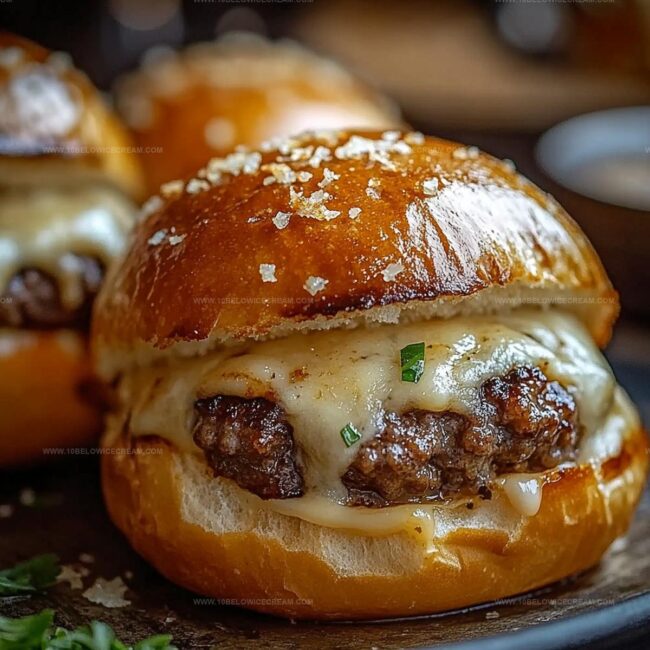
Meaty, crispy, and packed with incredible flavor, these bombs explode with deliciousness in every single bite.
Imagine biting into a perfectly seasoned ground beef center surrounded by melted cheese and garlic-infused goodness.
Each bomb combines classic burger elements with an unexpected twist that makes dinner feel like a celebration.
The combination of savory ingredients creates something truly special for casual meals or weekend gatherings.
Steps to Make Cheeseburger Bombs with Garlic Parmesan
Step 1: Warm Up the Kitchen
Fire up your oven to a toasty 375°F and get ready for some delicious magic.
Step 2: Create Flavor-Packed Beef Base
Brown your ground beef in a sizzling skillet over medium heat.
Sprinkle in:Cook until the kitchen fills with an irresistible aroma, about 2 minutes.
Step 3: Season and Enhance the Beef
Mix in your savory flavor boosters:Pull the skillet off the heat and let the mixture cool down slightly.
Step 4: Wrap the Flavor Bombs
Grab your biscuit dough rounds and create delicious packages:Step 5: Bake to Golden Perfection
Transfer your wrapped flavor bombs to a lined baking sheet and slide into the oven.
Bake for 15-20 minutes until they turn a gorgeous golden brown color.
Step 6: Serve and Enjoy
Pull out these crispy, cheesy beef bombs and watch everyone’s eyes light up with excitement. These handheld treats are perfect for game day, family dinners, or spontaneous snack attacks.
Tips to Nail Perfect Cheeseburger Bombs Every Time
Flavorful Twists on Garlic Parmesan Cheeseburger Bombs
Pairings That Go Well with Cheeseburger Bombs
Storing Ideas for Cheeseburger Bombs
FAQs
Yes, you can use homemade biscuit dough. Just ensure it’s rolled out thin enough to wrap around the beef mixture easily.
Absolutely! Prepare the bombs and store them in the refrigerator for up to 24 hours before baking. This makes meal prep super convenient.
Yes, you can freeze them before baking. Wrap individually in plastic wrap, then store in a freezer bag for up to 3 months. Thaw in the refrigerator before baking.
Garlic Parmesan Cheeseburger Bombs That Impress Everyone
Ingredients for Juicy Garlic Parmesan Cheeseburger Bombs
Protein Base:Dough and Flavor Enhancers:Cooking and Finishing Elements: Print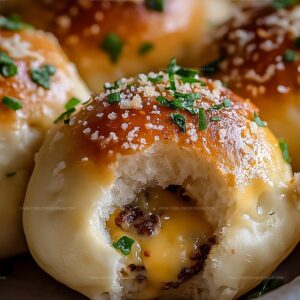
Garlic Parmesan Cheeseburger Bombs Recipe
- Total Time: 40 minutes
- Yield: 8 1x
Description
Succulent garlic parmesan cheeseburger bombs deliver an explosion of flavor in each bite. Melted cheese and savory ground beef nestled inside golden, crispy bread create a mouthwatering meal that satisfies hearty appetites.
Ingredients
- 1 lb lean ground beef
- 1 cup grated fresh Parmesan cheese
- 1 can (16.3 oz) refrigerated biscuit dough
- 3 cloves fresh garlic, minced
- 1 tsp onion powder
- 1/2 tsp salt
- 1/4 tsp black pepper
Instructions
- Prepare the cooking surface by heating the oven to 375°F, ensuring an even, hot environment for baking.
- Transform ground beef into a savory filling by sautéing in a skillet over medium heat, incorporating minced garlic and onion powder for aromatic depth.
- Enhance the meat mixture with Parmesan cheese, salt, and pepper, creating a robust flavor profile; allow the mixture to cool slightly for easier handling.
- Carefully unfold each biscuit dough round, creating a delicate pocket for the seasoned beef mixture.
- Meticulously encase approximately one tablespoon of the prepared meat filling within each dough round, sealing the edges completely to prevent leakage.
- Strategically position the wrapped parcels on a lined baking sheet, ensuring adequate spacing for even heat circulation.
- Slide the baking sheet into the preheated oven, allowing the cheeseburger bombs to transform into golden-brown delicacies over 15-20 minutes.
- Remove from the oven when the exterior achieves a crisp, appetizing golden color, indicating complete cooking and optimal texture.
Notes
- Use lean ground beef to reduce excess grease and create a lighter, healthier version of the cheeseburger bombs.
- Experiment with different cheese varieties like sharp cheddar or mozzarella for unique flavor profiles and textures.
- Prepare the beef mixture ahead of time and refrigerate to enhance the melding of flavors before assembling the bombs.
- Consider adding finely chopped herbs like parsley or chives to introduce fresh, bright notes to the savory filling.
- Prep Time: 20 minutes
- Cook Time: 20 minutes
- Category: Lunch, Dinner, Appetizer, Snacks
- Method: Baking
- Cuisine: American
Nutrition
- Serving Size: 8
- Calories: 380
- Sugar: 1 g
- Sodium: 1150 mg
- Fat: 28 g
- Saturated Fat: 12 g
- Unsaturated Fat: 13 g
- Trans Fat: 1 g
- Carbohydrates: 14 g
- Fiber: 1 g
- Protein: 23 g
- Cholesterol: 75 mg
Jackson Reid
Founder & Recipe Developer
Expertise
Education
Holyoke Community College – HCC-MGM Culinary Arts Institute
Certificate in Culinary Arts
Focus: Farm-to-table cuisine, sustainable cooking practices, and hands-on kitchen training
Jackson’s love for cooking began one dish at a time. After earning his Culinary Arts Certificate from Holyoke Community College’s HCC-MGM Culinary Arts Institute, he focused on what mattered most: creating recipes that are simple to follow and full of flavor.
At 10 Below Ice Cream, Jackson brings together global influences and a less-is-more approach. His recipes reflect his belief that good food doesn’t need to be complicated; it just needs to make sense, taste great, and feel right.
When he’s not testing ingredients or adjusting seasonings, you’ll find him hiking near Asheville, exploring local markets, or chasing the best light for food photos.