Fried Cheesecake Recipe for a Quick Sweet Craving
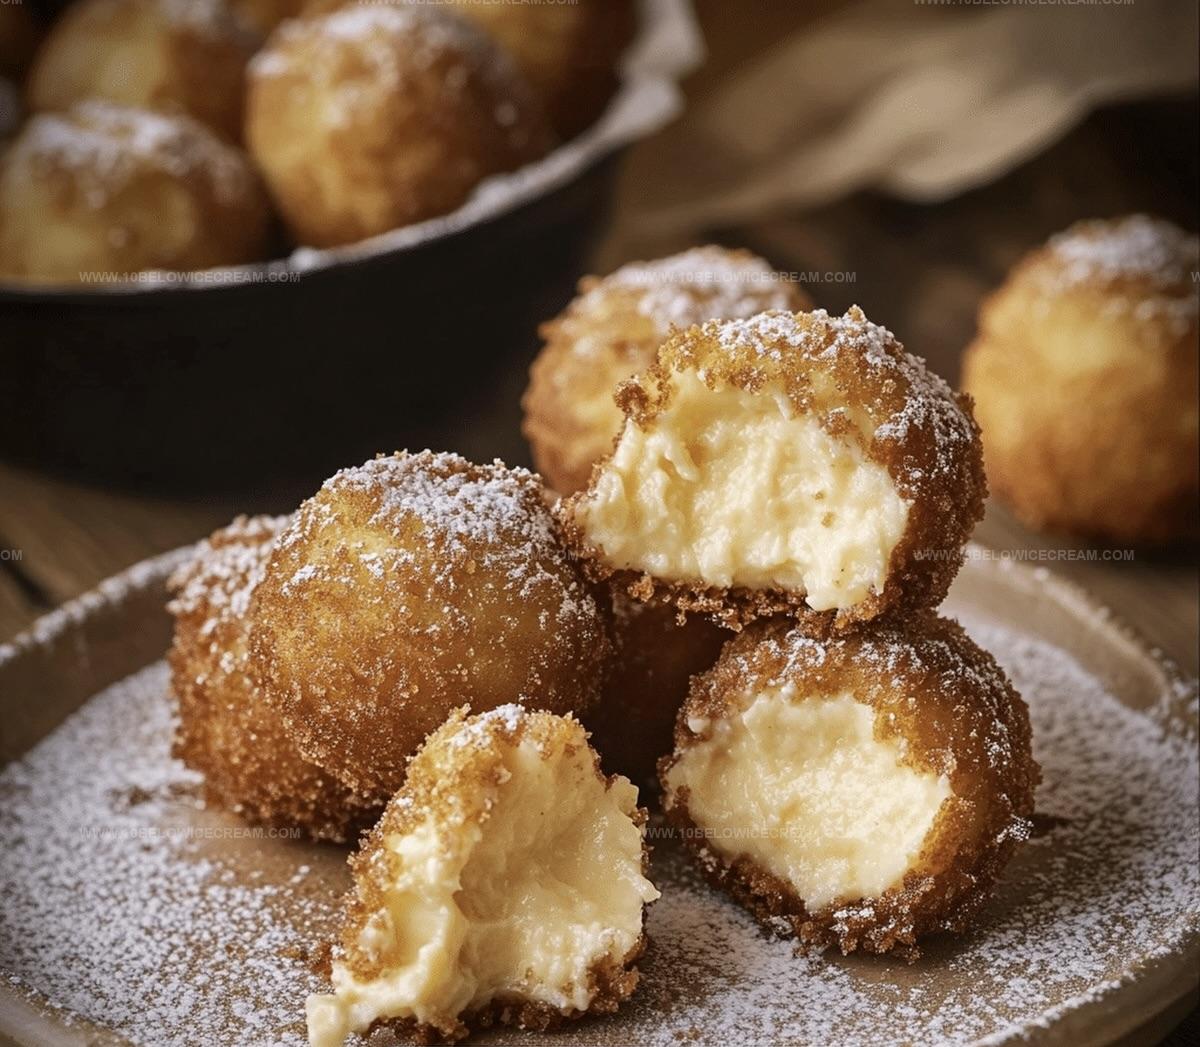
Creamy cheesecake takes a delightful crispy turn when you plunge this classic dessert into a bubbling oil bath.
Crisp golden edges promise a surprising textural adventure for your taste buds.
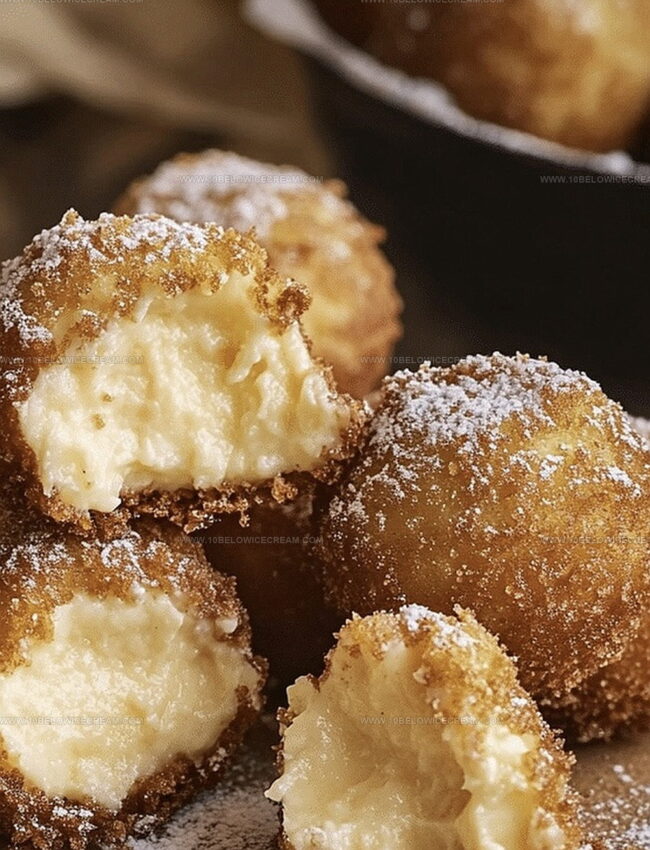
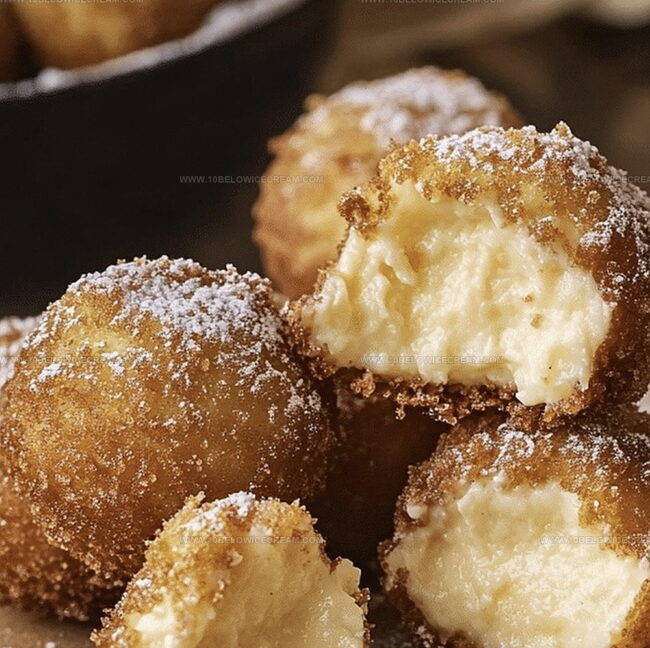
Every slice reveals a molten center that melts beautifully against its crunchy exterior.
Decadent and indulgent, this treat breaks all traditional dessert boundaries with its unexpected crunch.
Pastry chefs love pushing culinary limits, and this recipe embodies that adventurous spirit.
Sweet-toothed friends will absolutely adore how simple ingredients become something magical through clever cooking techniques.
Prepare to be amazed by a dessert that defies expectations and delivers pure deliciousness.
Why Fried Cheesecake Is A Sweet Surprise
Everything You Need For Fried Cheesecake
For the Core Ingredients:For the Coating Ingredients:For the Frying and Preparation Ingredients:Optional Serving Ingredients:Steps To Make Fried Cheesecake
Step 1: Prepare Cream Cheese Base
Mix cream cheese with sugar until smooth and creamy. Add vanilla extract, lemon juice, sour cream, and heavy cream. Blend until the mixture becomes light and fluffy with a silky texture.
Step 2: Shape Cheesecake Balls
Scoop the cream cheese mixture onto a parchment-lined baking sheet, forming small, uniform spheres. Place in the freezer for 2 hours until completely solid and firm.
Step 3: Create Crispy Coating
In a shallow dish, combine:Mix thoroughly to create an even coating mixture.
Step 4: Prepare Egg Wash
Whisk eggs in a separate bowl to create a binding agent for the coating process.
Step 5: Coat Cheesecake Balls
Remove frozen cheesecake balls from the freezer. Quickly roll each ball through the whisked eggs, then generously coat with the graham cracker mixture. Ensure complete and even coverage.
Step 6: Heat Cooking Oil
Warm vegetable oil in a deep skillet or fryer to 350°F. Maintain a consistent temperature for even frying.
Step 7: Fry Cheesecake Balls
Carefully lower coated cheesecake balls into hot oil, frying 2-3 at a time. This prevents overcrowding and ensures a golden-brown, crispy exterior.
Step 8: Achieve Perfect Golden Color
Fry for 1-2 minutes, rotating occasionally. Look for a rich, amber color and a crisp, crunchy coating.
Step 9: Drain and Cool
Remove fried cheesecake balls using a slotted spoon. Place on paper towels to drain excess oil.
Step 10: Serve and Enjoy
Allow balls to cool for 3-5 minutes. Serve warm, optionally dusting with powdered sugar or drizzling with chocolate sauce for extra indulgence.
Tips To Get Fried Cheesecake Just Right
Flavor Ideas For Fried Cheesecake
Tasty Pairings For Fried Cheesecake
How To Store Fried Cheesecake Properly
Fried Cheesecake FAQs
Freezing helps the cheesecake balls maintain their shape during the coating and frying process, preventing them from falling apart and ensuring a perfect, intact final product.
Yes, you can substitute graham crackers with vanilla wafers, digestive biscuits, or even crushed pretzels for a unique twist on the coating.
Use a deep-fry thermometer to monitor the oil temperature, keeping it consistently at 350°F. If the oil is too cool, the cheesecake balls will absorb too much oil; if too hot, they’ll burn quickly.
Print
Fried Cheesecake Recipe
- Total Time: 2 hours 35 minutes
- Yield: 4 1x
Description
Indulgent “fried cheesecake” brings Italian-American dessert magic straight to your plate, blending creamy New York style with crispy golden exterior. Warm, sweet slices promise pure comfort that melts smoothly across palates, inviting pure dessert bliss with each delectable bite.
Ingredients
Dairy:
- 16 oz cream cheese
- 1/2 cup heavy cream
- 1/4 cup sour cream
Crust and Coating:
- 1.5 cups graham cracker crumbs
- 2 eggs
- 1/2 cup all-purpose flour
- 1/4 cup powdered sugar
- 2 cups vegetable oil (for frying)
Sweeteners and Flavoring:
- 1/3 cup granulated sugar
- 1 tsp vanilla extract
- 1/4 tsp salt
- 1 tbsp lemon juice
Instructions
- Soften cream cheese at room temperature for 30 minutes, ensuring a smooth, pliable texture for effortless mixing.
- Whip cream cheese with granulated sugar until light and fluffy, incorporating vanilla extract, lemon juice, sour cream, and heavy cream into a silky, homogeneous mixture.
- Line a baking sheet with parchment paper and dollop the cheesecake mixture into small, uniform spheres. Freeze for 2 hours until completely solid.
- Combine graham cracker crumbs, powdered sugar, and flour in a shallow dish, creating a crisp, even coating mixture.
- Whisk eggs in a separate bowl, preparing them as a binding agent for the coating process.
- Remove frozen cheesecake balls, quickly roll each through whisked eggs, then generously coat with the graham cracker mixture, ensuring complete coverage.
- Heat vegetable oil in a deep skillet or fryer to 350°F, maintaining a consistent temperature for even frying.
- Carefully lower coated cheesecake balls into hot oil, frying 2-3 at a time to prevent overcrowding and ensure golden-brown crispiness.
- Fry for approximately 1-2 minutes, rotating occasionally until exterior turns a rich, amber color and coating becomes crisp and crunchy.
- Remove fried cheesecake balls with a slotted spoon, allowing excess oil to drain on paper towels.
- Let cool for 3-5 minutes to prevent burning, then serve warm with optional dusting of powdered sugar or drizzle of chocolate sauce.
Notes
- Chill the cream cheese mixture thoroughly to maintain ball shape during frying, preventing potential leakage.
- Use cold cheesecake balls straight from the freezer for optimal structural integrity and easier coating process.
- Experiment with alternative graham cracker alternatives like crushed gingersnaps or vanilla wafers for unique flavor profiles.
- Consider preparing smaller bite-sized portions for easier handling and more consistent cooking results.
- Prep Time: 2 hours 30 minutes
- Cook Time: 5 minutes
- Category: Desserts, Snacks
- Method: Frying
- Cuisine: American
Nutrition
- Serving Size: 4
- Calories: 645
- Sugar: 30 g
- Sodium: 150 mg
- Fat: 44 g
- Saturated Fat: 18 g
- Unsaturated Fat: 24 g
- Trans Fat: 0 g
- Carbohydrates: 55 g
- Fiber: 1 g
- Protein: 8 g
- Cholesterol: 95 mg
Jackson Reid
Founder & Recipe Developer
Expertise
Education
Holyoke Community College – HCC-MGM Culinary Arts Institute
Certificate in Culinary Arts
Focus: Farm-to-table cuisine, sustainable cooking practices, and hands-on kitchen training
Jackson’s love for cooking began one dish at a time. After earning his Culinary Arts Certificate from Holyoke Community College’s HCC-MGM Culinary Arts Institute, he focused on what mattered most: creating recipes that are simple to follow and full of flavor.
At 10 Below Ice Cream, Jackson brings together global influences and a less-is-more approach. His recipes reflect his belief that good food doesn’t need to be complicated; it just needs to make sense, taste great, and feel right.
When he’s not testing ingredients or adjusting seasonings, you’ll find him hiking near Asheville, exploring local markets, or chasing the best light for food photos.