Quick Ham and Cheese Pinwheels Recipe: Swirly Party Pleasers
Rolled pastry with ham and cheese pinwheels create a delightful snack that promises quick satisfaction.
Soft dough wrapped around savory ingredients makes everyone smile at first bite.
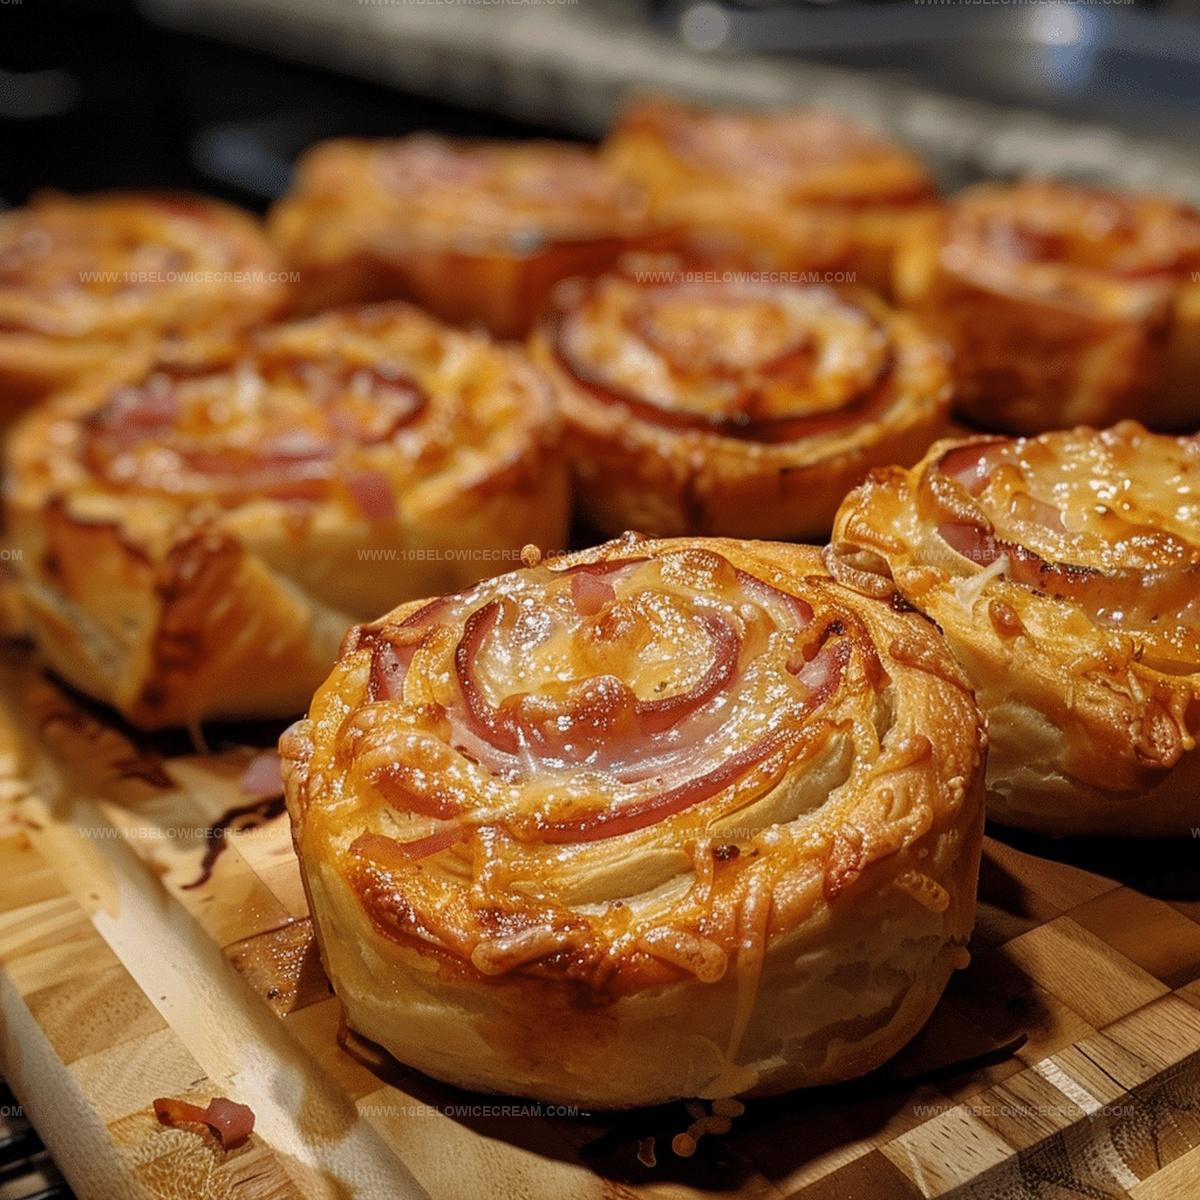
Crisp edges and melted cheese peek through golden-brown surfaces, tempting hungry crowds.
Kids and adults alike appreciate these compact little treats perfect for lunch boxes or party platters.
Simple ingredients combine effortlessly to craft something memorable and delicious.
Minimal prep time means you can whip up these crowd-pleasers in less than thirty minutes.
Hungry for a crowd-pleasing appetizer that disappears faster than you can serve?
Let’s roll into this tasty adventure!
Storing Ham and Cheese Pinwheels Properly
Frequently Asked Questions About Ham and Cheese Pinwheels
Perfect for kids! They’re easy to pack, bite-sized, and have crowd-pleasing ham and cheese that most children love.
Absolutely! Deli ham, honey ham, or Black Forest ham all work great. Choose your favorite or what you have on hand.
Swiss and cheddar are top choices. They melt beautifully and provide excellent flavor that complements the ham perfectly.
Yes! You can assemble the pinwheels up to 24 hours in advance and refrigerate. Just bake when ready to serve, making it super convenient for meal prep.
Why Ham and Cheese Pinwheels Are a Party Favorite
Ingredients Used in Ham and Cheese Pinwheels
Base Ingredients:Glaze Ingredients:Preparation Ingredients:How to Prepare Ham and Cheese Pinwheels Step by Step
Step 1: Prepare Baking Setup
Warm up your oven to a cozy 350°F. Grab a 9×13-inch baking dish and give it a quick spray with cooking oil to prevent sticking.
Step 2: Roll Out the Dough
Take your pizza dough and spread it out on a clean cutting board. Gently press and stretch the dough into a lovely 13×18-inch rectangular shape.
Step 3: Layer Delicious Fillings
Carefully arrange your filling ingredients across the dough:Make sure the layers cover the entire surface evenly.
Step 4: Create the Pinwheel Roll
Starting from the longer side, tightly roll the dough into a neat log. Pinch the seam to seal it completely and place the roll seam-side down.
Step 5: Slice and Arrange
Using a sharp knife, cut the roll into 12 beautiful pinwheel slices, each about 1-inch thick. Nestle these slices into your prepared baking dish.
Step 6: Craft the Flavor-Packed Glaze
In a saucepan over medium heat, whisk together:Keep stirring until the mixture becomes smooth and glossy.
Step 7: Finish and Bake
Pour the glaze evenly over the pinwheels. Pop the dish into the preheated oven and bake uncovered for 25 minutes until they turn a beautiful golden brown.
Helpful Suggestions for Ham and Cheese Pinwheels
Variation Ideas for Ham and Cheese Pinwheels
Pairings That Go Well with Ham and Cheese Pinwheels
Print
Flavorful Ham and Cheese Pinwheels Recipe
- Total Time: 35 minutes
- Yield: 12 1x
Description
Savory ham and cheese pinwheels spiral with delightful flavor, bringing party-perfect appetizers to life. Creamy cheese and salty ham dance together in these irresistible rolled bites that guests will devour in seconds.
Ingredients
Main Ingredients:
- 1 can refrigerated classic pizza crust
- 3/4 pound (340 grams) deli ham
- 12 slices Swiss cheese
Glaze Ingredients:
- 1/2 cup (8 tablespoons / 113 grams) butter
- 2 tablespoons brown sugar
- 1 tablespoon Worcestershire sauce
- 1 tablespoon Dijon mustard
- 1 tablespoon poppy seeds
Garnish/Seasoning Ingredients:
(none)
Instructions
- Spread pizza dough flat on a clean surface, stretching into a rectangular shape that maximizes ham and cheese coverage.
- Layer ham slices uniformly across the entire surface, ensuring complete dough coverage with minimal overlap.
- Distribute cheese slices evenly on top of ham, creating a consistent layer that reaches all dough edges.
- Carefully roll the dough tightly from the longer side, maintaining compact tension to prevent filling from shifting.
- Pinch the final edge to seal the roll completely, preventing ingredients from escaping during baking.
- Using a sharp knife, slice the roll into 12 equal pinwheel sections approximately 1-inch thick.
- Arrange pinwheels in a greased 9×13-inch baking dish, positioning them with sealed edges facing downward.
- Prepare glaze by melting butter in a saucepan over medium heat, then incorporating brown sugar, Worcestershire sauce, mustard, and poppy seeds.
- Whisk glaze ingredients until smooth and fully integrated, creating a consistent liquid mixture.
- Pour glaze evenly over pinwheels, ensuring each piece receives equal coating.
- Preheat oven to 350°F and bake uncovered for 25 minutes until golden brown and slightly crispy on edges.
- Allow pinwheels to cool for 5 minutes before serving to set the glaze and prevent burning.
Notes
- Swap pizza dough with gluten-free alternatives for those with wheat sensitivities, ensuring everyone can enjoy these delicious pinwheels.
- Use low-fat ham and reduced-fat cheese to create a lighter version without compromising flavor and texture.
- Experiment with different meat and cheese combinations like turkey and Swiss or prosciutto and provolone for exciting variations.
- Prepare pinwheels ahead of time and freeze unbaked for convenient meal prep, storing in an airtight container up to 3 months.
- Prep Time: 10 minutes
- Cook Time: 25 minutes
- Category: Appetizer, Snacks
- Method: Baking
- Cuisine: American
Nutrition
- Serving Size: 12
- Calories: 330
- Sugar: 4 g
- Sodium: 720 mg
- Fat: 22 g
- Saturated Fat: 11 g
- Unsaturated Fat: 9 g
- Trans Fat: 0.5 g
- Carbohydrates: 15 g
- Fiber: 1 g
- Protein: 16 g
- Cholesterol: 55 mg
Olivia Brooks
Contributing Writer
Expertise
Education
Culinary Institute of America
Accelerated Culinary Arts Certificate Program
Focus: Culinary fundamentals, nutrition, and healthy cooking technique
Olivia believes good food should feed both the body and the soul. She earned her Accelerated Culinary Arts Certificate from the Culinary Institute of America, where she focused on nutrition and practical cooking techniques that make healthy eating easy.
At 10 Below Ice Cream, Olivia shares single-serving recipes that are fresh, plant-forward, and full of heart. She loves helping people eat better, without stress, strict rules, or sacrificing flavor.
Beyond the kitchen, Olivia spends her time tending her backyard garden, practicing yoga, and discovering hidden gems in Portland’s food scene.