
Best Beef And Cheese Chimichangas Recipe For Taco Tuesdays
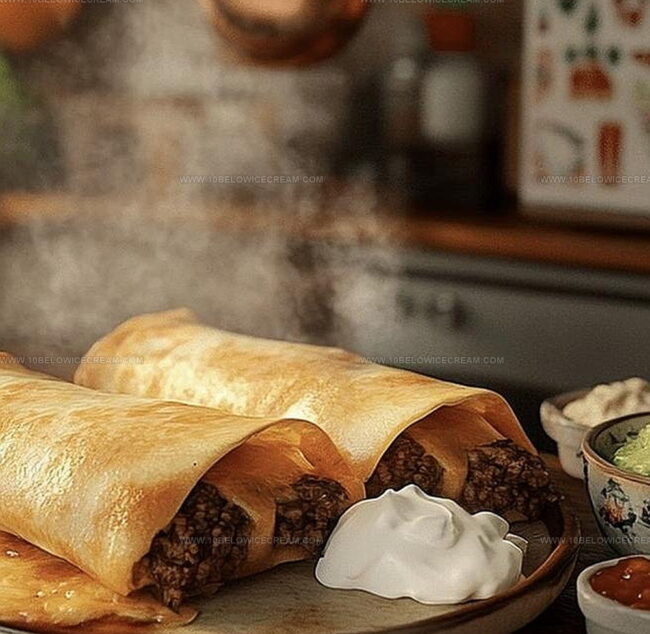
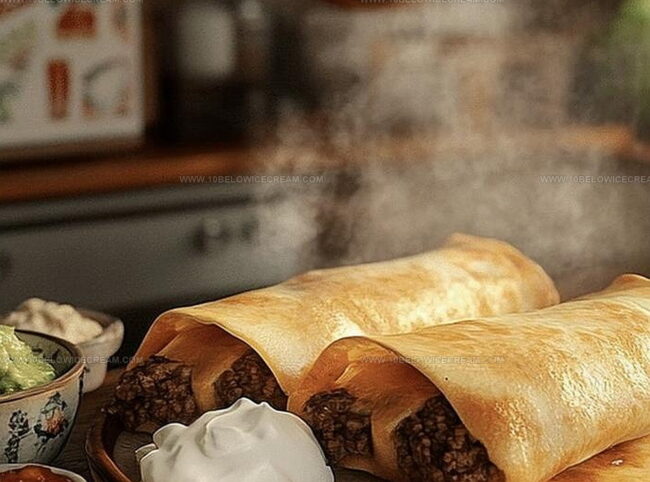
Crispy, golden beef and cheese chimichangas offer a mouthwatering twist on traditional Mexican fare.
Mexican cuisine inspires incredible comfort food adventures for anyone seeking bold flavors.
Packed with savory ground beef and melted cheese, these delightful parcels promise a satisfying meal.
Layers of seasoned meat nestled in warm tortillas create an irresistible combination that makes you crave every single bite.
Perfectly sealed and fried to a beautiful crunch, chimichangas deliver a restaurant-quality experience right in your kitchen.
Quick to prepare and guaranteed to impress, this recipe turns an ordinary dinner into something extraordinary.
You can’t wait to slice into these golden pockets of deliciousness.
Beef And Cheese Chimichangas—Crispy, Meaty, Melty Goodness
Everything That Goes Into Beef And Cheese Chimichangas
For the Main Protein:For the Aromatics and Flavor Enhancers:For the Binding and Finishing Ingredients:For the Garnish and Serving:How To Make Beef And Cheese Chimichangas Without Fuss
Step 1: Brown Ground Beef
Heat a large skillet over medium-high heat. Crumble ground beef into the pan, cooking until it develops a rich brown color and breaks into small pieces.
Step 2: Sauté Aromatics
Add ingredients to the beef:Sauté until the vegetables become soft and release their fragrant aroma.
Step 3: Season the Meat
Sprinkle taco seasoning over the beef mixture. Stir thoroughly to ensure every piece of meat gets coated with the flavorful spices.
Step 4: Incorporate Salsa
Mix in salsa and continue cooking for 2-3 minutes. This allows the flavors to blend and the liquid to reduce slightly.
Step 5: Add Cheese
Remove the beef mixture from heat and let it cool for 5 minutes. Gently fold in shredded cheddar cheese until it’s evenly distributed throughout the mixture.
Step 6: Prepare Tortillas
Warm flour tortillas to make them more pliable. Place a generous portion of the beef and cheese filling in the center of each tortilla.
Step 7: Wrap Chimichangas
Fold the sides of the tortilla inward, then roll tightly to create a sealed packet. Ensure the filling is completely enclosed with no openings.
Step 8: Prepare for Frying
Heat vegetable oil in a deep skillet or heavy-bottomed pan until it reaches 375°F. Use a cooking thermometer to check the temperature.
Step 9: Fry Chimichangas
Carefully place the chimichangas seam-side down into the hot oil. Fry until they turn a beautiful golden brown and become crispy, about 2-3 minutes per side.
Step 10: Drain Excess Oil
Remove the chimichangas and place them on paper towels to drain excess oil. Let them rest for 2 minutes to cool slightly.
Step 11: Serve and Garnish
Transfer the chimichangas to serving plates. Top with a dollop of sour cream and sprinkle freshly chopped cilantro over the top. Serve immediately while hot and crispy.
Tips To Make Beef And Cheese Chimichangas Even Better
Yummy Ways To Switch Up Beef And Cheese Chimichangas
Sides That Go Great With Beef And Cheese Chimichangas
How To Store Beef And Cheese Chimichangas Without Losing Crunch
Beef And Cheese Chimichangas—Questions? We’ve Got Answers
Deep-fried burritos originating from Mexican-American cuisine, typically filled with seasoned meat, cheese, and rolled tightly before being crispy fried to golden perfection.
Yes, you can bake them at 400°F for 20-25 minutes, brushing with oil to achieve a crispy exterior, though the texture won’t be exactly the same as deep-frying.
Ground beef is traditional, but ground chicken, turkey, or plant-based alternatives can also create delicious chimichangas with similar seasoning techniques.
Print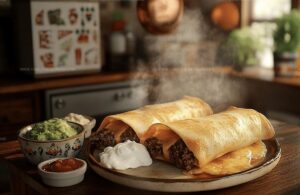
Flaming Beef And Cheese Chimichangas Recipe
- Total Time: 30 minutes
- Yield: 4 1x
Description
Sizzling beef and cheese chimichangas bring Mexican street food magic straight to your kitchen. Crispy tortillas wrapped around seasoned beef and melted cheese create an irresistible dinner that satisfies deep cravings with each golden, crunchy bite.
Ingredients
Protein:
- 1 lb ground beef
- 1 cup shredded cheddar cheese
Produce:
- 0.5 cup diced onions
- 2 cloves garlic, minced
Pantry and Seasonings:
- 1 packet taco seasoning
- 0.25 cup salsa
- 4 large flour tortillas
- 2 tbsp olive oil
- 0.5 tsp salt
- 0.25 tsp black pepper
Garnish and Optional Toppings:
- 0.25 cup sour cream
- 2 tbsp chopped fresh cilantro
- 1 cup vegetable oil (for frying)
Instructions
- Preheat a large skillet over medium-high heat and brown the ground beef, breaking it into crumbled pieces while cooking.
- Add minced garlic and diced onions to the beef, sautéing until vegetables become translucent and fragrant.
- Sprinkle taco seasoning over the beef mixture, stirring thoroughly to ensure even distribution and coating of the meat.
- Mix in salsa and cook for an additional 2-3 minutes, allowing flavors to meld and liquid to slightly reduce.
- Remove beef mixture from heat and let cool for 5 minutes, then fold in shredded cheddar cheese until well incorporated.
- Warm flour tortillas slightly to increase flexibility, then place a portion of the beef and cheese filling in the center of each tortilla.
- Fold the sides of the tortilla inward, then roll tightly to create a sealed chimichanga packet, ensuring no filling can escape.
- Heat vegetable oil in a deep skillet or heavy-bottomed pan to 375°F, preparing for frying.
- Carefully place chimichangas seam-side down into the hot oil, frying until golden brown and crispy, approximately 2-3 minutes per side.
- Remove chimichangas and drain on paper towels to remove excess oil, allowing them to rest for 2 minutes.
- Plate the chimichangas and garnish with a dollop of sour cream and freshly chopped cilantro before serving immediately.
Notes
- Select ground beef with a moderate fat content for richer flavor and juicier filling, avoiding extremely lean meat that might dry out during cooking.
- Drain excess fat after browning beef to prevent greasy chimichangas and ensure a cleaner, more balanced taste profile.
- Use fresh tortillas at room temperature for easier folding and reduced risk of tearing during the wrapping process.
- Seal chimichanga edges meticulously with gentle pressure to prevent filling from leaking during frying, creating a crispy, intact final product.
- Prep Time: 10 minutes
- Cook Time: 15-20 minutes
- Category: Lunch, Dinner, Appetizer, Snacks
- Method: Frying
- Cuisine: Mexican
Nutrition
- Serving Size: 4
- Calories: 640
- Sugar: 2 g
- Sodium: 900 mg
- Fat: 36 g
- Saturated Fat: 12 g
- Unsaturated Fat: 22 g
- Trans Fat: 0 g
- Carbohydrates: 47 g
- Fiber: 2 g
- Protein: 30 g
- Cholesterol: 85 mg
Olivia Brooks
Contributing Writer
Expertise
Education
Culinary Institute of America
Accelerated Culinary Arts Certificate Program
Focus: Culinary fundamentals, nutrition, and healthy cooking technique
Olivia believes good food should feed both the body and the soul. She earned her Accelerated Culinary Arts Certificate from the Culinary Institute of America, where she focused on nutrition and practical cooking techniques that make healthy eating easy.
At 10 Below Ice Cream, Olivia shares single-serving recipes that are fresh, plant-forward, and full of heart. She loves helping people eat better, without stress, strict rules, or sacrificing flavor.
Beyond the kitchen, Olivia spends her time tending her backyard garden, practicing yoga, and discovering hidden gems in Portland’s food scene.