Fluffy Fatless Sponge Recipe: Light & Airy Cake Magic
Whipping up a delightful fatless sponge cake can transform ordinary afternoons into memorable moments of pure bliss.
Soft and airy textures promise a delectable treat that melts in your mouth.
Bakers love this classic recipe for its simplicity and elegance.
Light ingredients dance together, creating a cloud-like dessert that feels incredibly indulgent.
Culinary magic happens when you understand the delicate balance of technique and passion.
Whisking egg whites to perfection requires patience and a gentle touch.
You’ll want to savor every delicate crumb of this heavenly creation.
Ingredients For Delia Smith Fatless Sponge
Dry Ingredients:Wet Ingredients:Preparation Ingredients:Step By Step For Delia Smith Fatless Sponge

Step 1: Warm Up the Oven
Crank your oven to 180°C (350°F). Grab two 18cm cake pans and give them a quick spray of cooking oil, then line the bottoms with parchment paper for easy cake removal.
Step 2: Prepare the Dry Ingredients
Sift together your flour and baking powder into a large mixing bowl, creating a light and airy base for your delicate sponge cake.
Step 3: Create the Cake Batter
Combine your ingredients and whip them into a smooth, silky mixture:Whisk everything together until the batter looks glossy and well-blended, with no lumps in sight.
Step 4: Fill the Cake Pans
Carefully divide the batter evenly between your prepared pans. Use a spatula to smooth out the tops, ensuring an even surface for perfect baking.
Step 5: Bake to Golden Perfection
Slide the pans into the preheated oven and bake for about 25 minutes. Look for a beautiful golden color and a springy texture when you gently press the center of the cake.
Step 6: Cool and Rest
Transfer the cakes to a wire rack and let them cool completely. This step is crucial for achieving the perfect texture and making sure they’re ready for filling.
Step 7: Finish and Serve
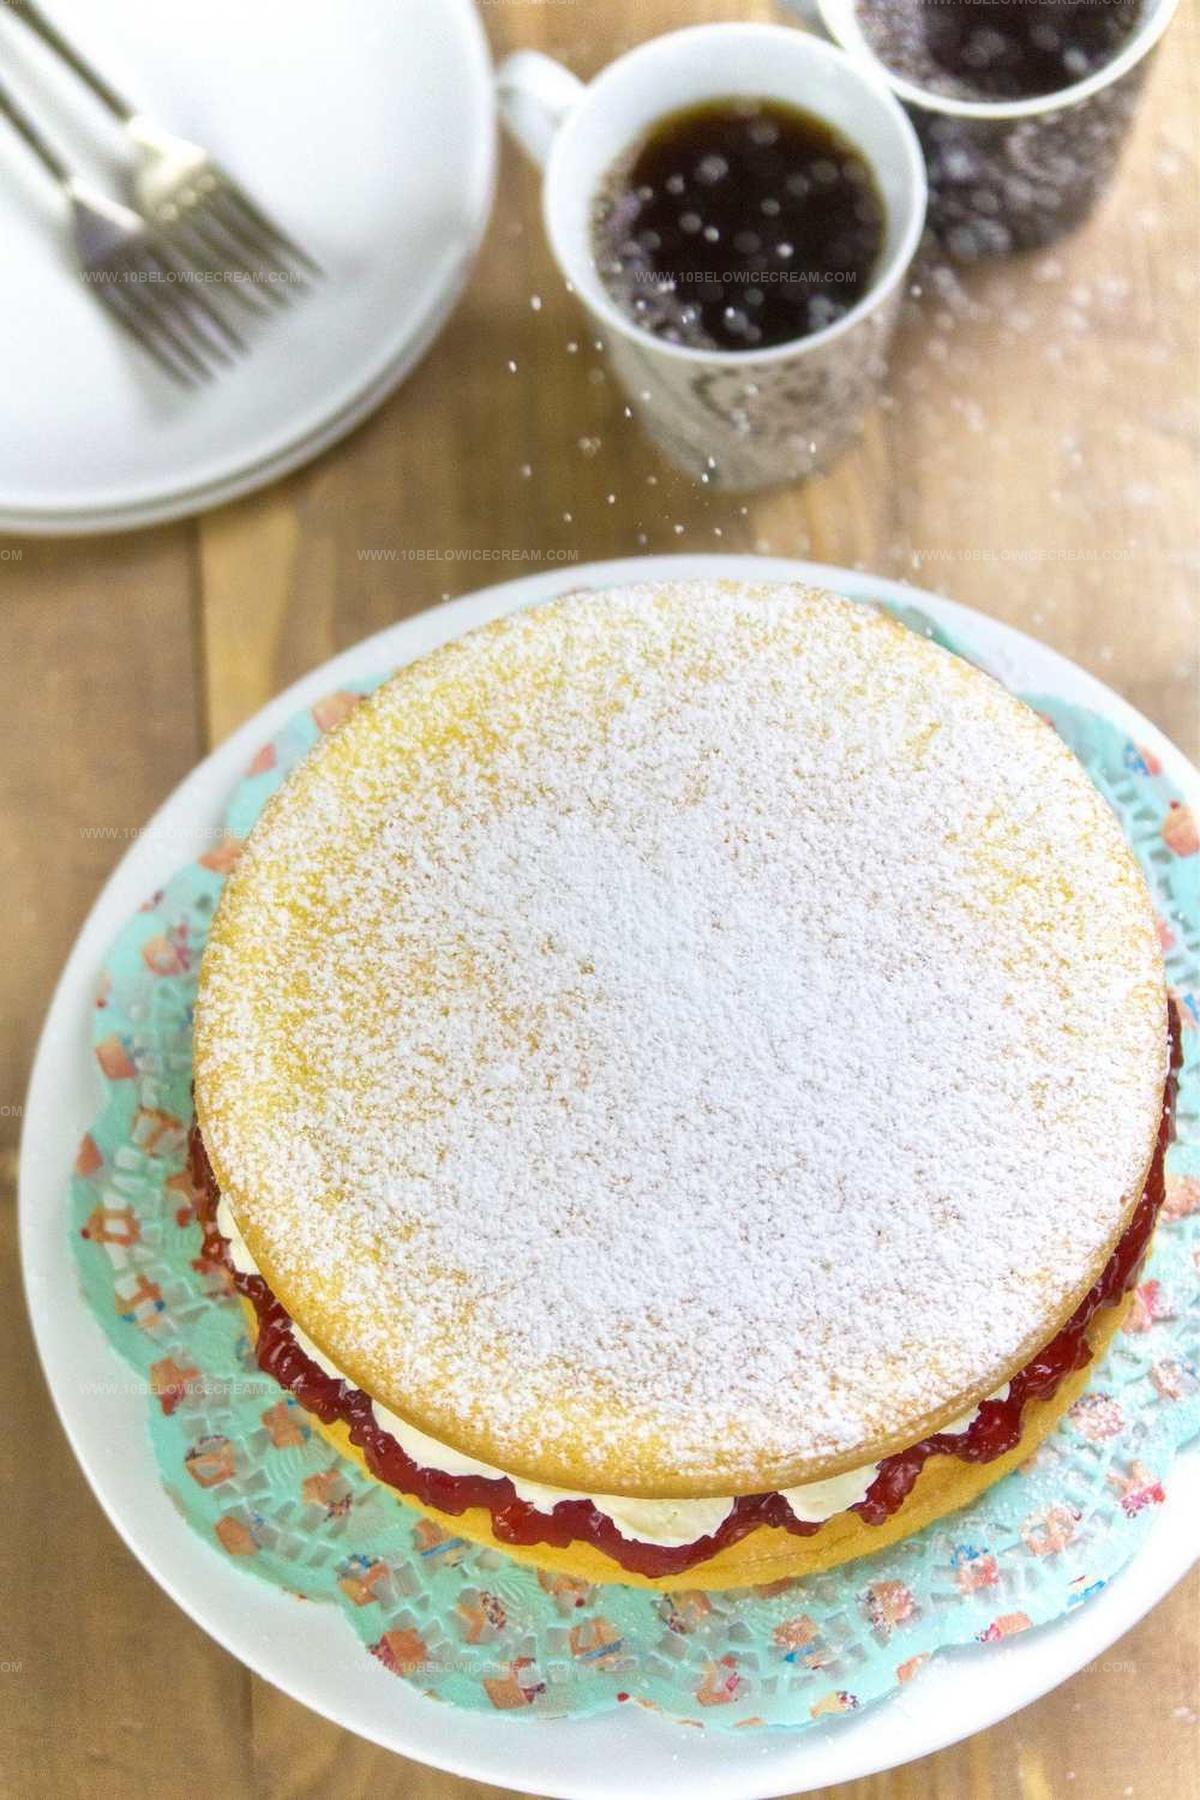
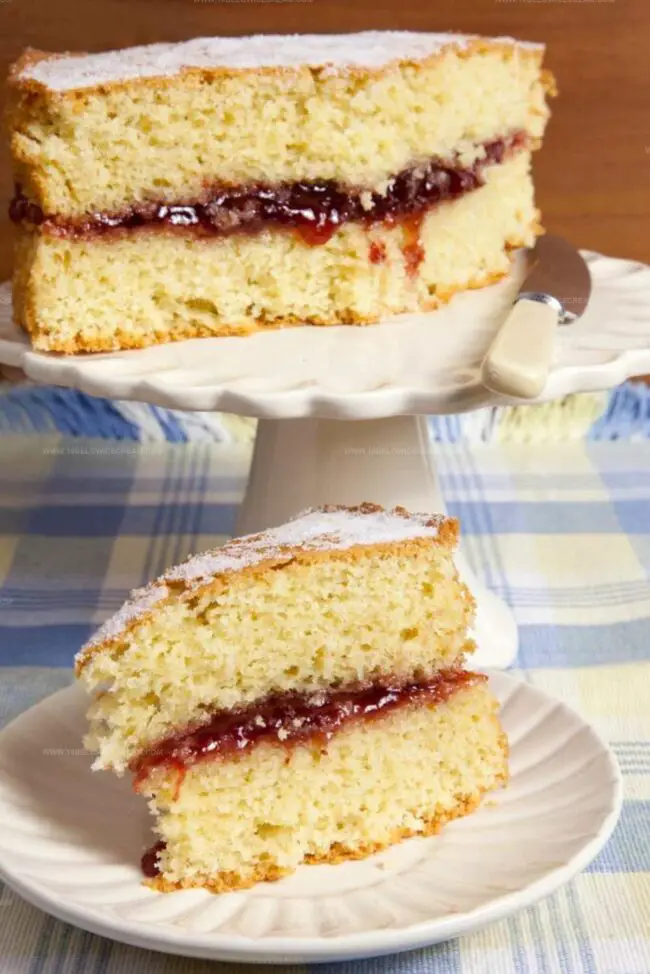
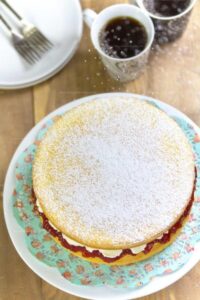
Once cooled, sandwich the two cake layers with your favorite filling. Dust the top with a light sprinkle of powdered sugar for a classic, elegant touch. Slice and enjoy your light, airy fatless sponge cake!
Baking Tips For Delia Smith Fatless Sponge
Ways To Switch Up Delia Smith Fatless Sponge
Great Pairings For Delia Smith Fatless Sponge
Best Way To Store Delia Smith Fatless Sponge
FAQs About Delia Smith Fatless Sponge
This fatless sponge uses no butter in the batter, creating a lighter, airier texture compared to traditional sponge cakes.
Yes, if using self-rising flour, you can reduce or omit the baking powder since it’s already included in the mix.
The batter should look smooth, pale, and slightly fluffy, with no visible lumps of flour or unmixed ingredients.
Sifting aerates the flour, breaks up clumps, and helps create a lighter, more delicate cake texture by incorporating more air into the mixture.
Why Delia Smith Fatless Sponge Is Light And Lovely
Fatless Sponge Recipe
- Total Time: 35 mins
- Yield: 8 1x
Description
Classic French fatless sponge brings light, airy elegance to dessert tables with its delicate crumb and versatile nature. Bakers can easily master this simple yet sophisticated cake, creating a perfect base for endless sweet adventures.
Ingredients
Main Ingredients:
- 2 large eggs
- 115 grams (4 ounces) golden caster sugar
- 115 grams (4 ounces) spreadable butter
Flour and Leavening Agents:
- 115 grams (4 ounces) self-raising flour
- 1 teaspoon baking powder
Flavoring and Finishing:
- 1 teaspoon vanilla extract
- Jam (for filling)
- Lemon curd (for filling)
- Whipped cream (for filling)
- Icing sugar (for dusting)
Instructions
- Prepare baking equipment by greasing two 18cm round cake pans and lining with parchment paper to prevent sticking.
- Carefully sift the flour and baking powder together in a large mixing bowl, ensuring no lumps remain for a smooth texture.
- Crack eggs into the flour mixture, adding sugar and vanilla extract, then whisk vigorously using an electric mixer until the batter becomes light, airy, and pale in color.
- Gently pour the mixture evenly between the prepared cake pans, using a spatula to spread and level the surfaces for uniform baking.
- Place pans in a preheated oven at 180°C (350°F) and bake for approximately 25 minutes, watching for a golden-brown color and a springy texture when lightly touched.
- Remove from oven and allow cakes to cool completely on a wire rack, which prevents moisture buildup and maintains the sponge’s delicate structure.
- Once cooled, carefully spread your chosen filling between the layers and dust the top with a delicate layer of powdered sugar for an elegant finish.
Notes
- Swap out wheat flour with gluten-free alternatives like almond or rice flour for those with gluten sensitivities.
- Add zest from lemon or orange to enhance the cake’s flavor profile and create a bright, citrusy undertone.
- Reduce sugar content by using natural sweeteners like stevia or replacing half the sugar with applesauce for a healthier version.
- Ensure eggs are at room temperature for smoother batter and more even rising during baking, which helps achieve a light, airy texture.
- Prep Time: 10 mins
- Cook Time: 25 mins
- Category: Desserts
- Method: Baking
- Cuisine: Western
Nutrition
- Serving Size: 8
- Calories: 234 kcal
- Sugar: 14 g
- Sodium: 120 mg
- Fat: 12 g
- Saturated Fat: 7 g
- Unsaturated Fat: 5 g
- Trans Fat: 0.2 g
- Carbohydrates: 27 g
- Fiber: 1 g
- Protein: 4 g
- Cholesterol: 55 mg
Jackson Reid
Founder & Recipe Developer
Expertise
Education
Holyoke Community College – HCC-MGM Culinary Arts Institute
Certificate in Culinary Arts
Focus: Farm-to-table cuisine, sustainable cooking practices, and hands-on kitchen training
Jackson’s love for cooking began one dish at a time. After earning his Culinary Arts Certificate from Holyoke Community College’s HCC-MGM Culinary Arts Institute, he focused on what mattered most: creating recipes that are simple to follow and full of flavor.
At 10 Below Ice Cream, Jackson brings together global influences and a less-is-more approach. His recipes reflect his belief that good food doesn’t need to be complicated; it just needs to make sense, taste great, and feel right.
When he’s not testing ingredients or adjusting seasonings, you’ll find him hiking near Asheville, exploring local markets, or chasing the best light for food photos.