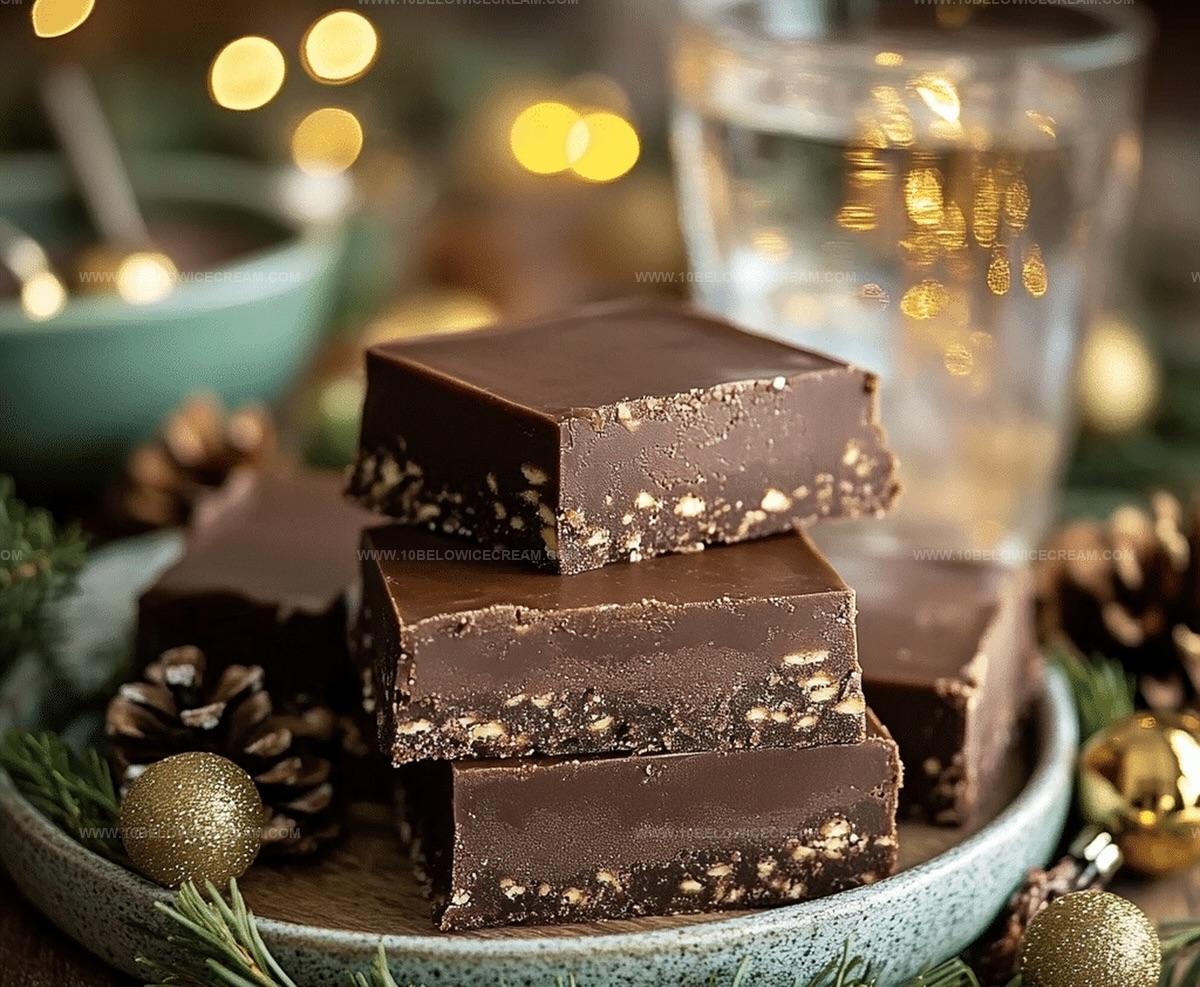
Easy Christmas Fudge Recipe Everyone Will Love
Sweet memories of holiday gatherings often spark cravings for an easy christmas fudge recipe that melts hearts faster than snow on warm hands.
Chocolate lovers understand the magic behind simple desserts that create instant joy.
Creamy textures and rich flavors merge into delightful squares of pure happiness.
Minimal ingredients transform ordinary moments into extraordinary celebrations.
Grandmothers’ secret techniques now live on through generations of festive treats.
Smooth, decadent bites promise to become your new seasonal tradition.
You’ll find this recipe connects people through shared sweetness and warmth.
Why Easy Christmas Fudge Is A Holiday Favorite
What You’ll Need For Easy Christmas Fudge
For the Chocolate Base:For the Flavor Enhancers:For the Mix-Ins and Decorative Elements:For the Preparation:How To Make Easy Christmas Fudge Fast
Step 1: Prepare Baking Pan
Line an 8×8-inch baking pan with parchment paper, creating overhang on all sides for easy removal. Lightly grease the exposed surfaces to prevent sticking.
Step 2: Create Melting Station
Set up a double boiler by placing a heat-safe glass bowl over a pot of simmering water. Ensure the bowl’s bottom doesn’t touch the water to prevent direct heat.
Step 3: Melt Chocolate Base
Combine ingredients in the glass bowl:Stir gently over low-medium heat until completely melted and smooth, about 5-7 minutes.
Step 4: Add Flavor Enhancers
Remove chocolate mixture from heat. Quickly fold in:Stir until achieving a uniform, glossy consistency.
Step 5: Mix In Festive Elements
Gently incorporate half of the decorative ingredients into the melted chocolate:Save some for topping later.
Step 6: Transfer to Baking Pan
Pour the fudge mixture into the prepared pan. Use a spatula to spread evenly and create a smooth surface.
Step 7: Decorate Top Layer
Sprinkle remaining mix-ins across the surface. Gently press to ensure they adhere to the fudge.
Step 8: Add Optional Decoration
Drizzle melted white chocolate in zigzag patterns across the top for extra visual appeal.
Step 9: Chill and Set
Refrigerate the fudge for 2-3 hours or until completely firm and set.
Step 10: Cut and Serve
Lift the fudge from the pan using parchment paper overhang. Slice into small, bite-sized squares using a sharp knife.
Step 11: Store Properly
Store in an airtight container in the refrigerator for up to one week. Separate layers with parchment paper to prevent sticking.
Helpful Tips For Easy Christmas Fudge
Fun Ways To Tweak Easy Christmas Fudge
Tasty Pairings For Easy Christmas Fudge
Keeping Easy Christmas Fudge Fresh
Easy Christmas Fudge Q&A
Use a double boiler method and stir gently while melting ingredients. Avoid high heat and overstirring, which can cause sugar crystallization and create a rough texture.
Yes, you can substitute milk, dark, or semi-sweet chocolate chips depending on your preference. Just ensure they melt smoothly and maintain the same quantity as the original recipe.
Make sure to refrigerate the fudge for the full 2-3 hours. The condensed milk and low heat help create a smooth consistency, but chilling is crucial for achieving the right firmness.
Print
Easy Christmas Fudge Recipe
- Total Time: 25 minutes
- Yield: 12 1x
Description
Chocolate-packed Christmas fudge brings festive cheer with its rich, creamy texture and delightful sweetness. Melt-in-your-mouth morsels create a holiday treat you’ll savor and share with joyful memories.
Ingredients
Chocolate Base:
- 3 cups chocolate chips (milk or semi-sweet)
- 1 can (14 oz/397 g) sweetened condensed milk
- 1/4 cup butter
Festive Mix-ins:
- 1 cup holiday sprinkles
- 1/2 cup crushed candy canes
- 1/4 cup chopped pecans
Optional Finishing Touches:
- 2 tbsp white chocolate drizzle
- 1 tsp vanilla extract
- 1/4 tsp salt
Instructions
- Line an 8×8-inch baking pan with parchment paper, ensuring overhang on all sides for easy removal, and lightly grease the exposed surfaces.
- Create a double boiler by placing a heat-safe glass bowl over a pot of simmering water, ensuring the bottom of the bowl doesn’t touch the water.
- Combine chocolate chips, sweetened condensed milk, and butter in the glass bowl, stirring gently until completely melted and smooth at low-medium heat (approximately 5-7 minutes).
- Remove the chocolate mixture from heat and quickly fold in vanilla extract and salt, creating a uniform, glossy consistency.
- Gently incorporate half of the holiday sprinkles, crushed candy canes, and chopped pecans into the melted chocolate base, preserving some for topping.
- Pour the fudge mixture into the prepared pan, spreading evenly with a spatula and creating a smooth surface.
- Immediately sprinkle the remaining mix-ins across the top, pressing them lightly to ensure they adhere to the fudge.
- Optional: Drizzle melted white chocolate in zigzag patterns across the surface for additional decoration.
- Refrigerate the fudge for 2-3 hours or until completely set and firm.
- Using parchment paper overhang, lift the fudge from the pan and slice into small, bite-sized squares using a sharp knife.
- Store in an airtight container in the refrigerator for up to one week, separating layers with parchment paper.
Notes
- Customize the fudge by swapping holiday sprinkles with seasonal-themed decorations matching different celebrations.
- Choose high-quality chocolate chips for richer, smoother texture and more luxurious taste experience.
- Prevent chocolate from seizing by ensuring no water droplets enter the melting process and maintaining low, consistent heat.
- Create gluten-free version by verifying all ingredient labels, especially chocolate chips and condensed milk, for potential cross-contamination.
- Prep Time: 15 minutes
- Cook Time: 10 minutes
- Category: Desserts, Snacks
- Method: Baking
- Cuisine: American
Nutrition
- Serving Size: 12
- Calories: 200
- Sugar: 22 g
- Sodium: 40 mg
- Fat: 10 g
- Saturated Fat: 6 g
- Unsaturated Fat: 4 g
- Trans Fat: 0 g
- Carbohydrates: 26 g
- Fiber: 1 g
- Protein: 2 g
- Cholesterol: 15 mg
Jackson Reid
Founder & Recipe Developer
Expertise
Education
Holyoke Community College – HCC-MGM Culinary Arts Institute
Certificate in Culinary Arts
Focus: Farm-to-table cuisine, sustainable cooking practices, and hands-on kitchen training
Jackson’s love for cooking began one dish at a time. After earning his Culinary Arts Certificate from Holyoke Community College’s HCC-MGM Culinary Arts Institute, he focused on what mattered most: creating recipes that are simple to follow and full of flavor.
At 10 Below Ice Cream, Jackson brings together global influences and a less-is-more approach. His recipes reflect his belief that good food doesn’t need to be complicated; it just needs to make sense, taste great, and feel right.
When he’s not testing ingredients or adjusting seasonings, you’ll find him hiking near Asheville, exploring local markets, or chasing the best light for food photos.