
The Fluffiest Dropped Scones Recipe for Sunny Breakfasts
Delightful dropped scones have been a cherished breakfast treat in scotland for generations.
Fluffy and light, these pancake-like delicacies melt in your mouth with every bite.
Regional bakers pass down traditional techniques that create perfectly golden edges.
Crispy exterior and soft interior make them irresistible at morning tables.
Each scone carries a rustic charm that connects you to humble kitchen traditions.
Warm butter and honey transform these simple treats into something magical.
You’ll want to savor every delectable morsel of this classic recipe.
Helpful Tips for Mary Berry Dropped Scones Success
Flavor Twists for Mary Berry Dropped Scones
Pair These with Mary Berry Dropped Scones
Best Way to Store Mary Berry Dropped Scones
Questions and Answers for Mary Berry Dropped Scones
Dropped scones are a Scottish pancake-like breakfast item that’s thicker than regular pancakes but smaller and rounder, traditionally cooked on a griddle or pan.
While similar, dropped scones are typically smaller, thicker, and have a slightly different texture compared to traditional pancakes, with a more cake-like consistency.
You can substitute the egg with alternatives like mashed banana, applesauce, or a commercial egg replacer to maintain the binding and moisture in the batter.
Use a medium-low heat and ensure your pan is evenly greased, which helps achieve a uniform golden-brown color without burning the scones.
What Makes Mary Berry Dropped Scones So Enjoyable
What Goes Into Mary Berry Dropped Scones
Dry Ingredients:Wet Ingredients:Cooking and Serving:Optional Toppings:Making Mary Berry Dropped Scones at Home

Step 1: Blend Dry Components
Grab a mixing bowl and combine flour, baking powder, sugar, and a pinch of salt. Whisk these ingredients together until they’re evenly distributed and look light and fluffy.
Step 2: Create Silky Batter
Crack an egg into the dry mixture and pour in half the milk. Whisk vigorously until the batter becomes smooth and free of lumps. Make sure to blend thoroughly.
Step 3: Adjust Batter Consistency
Slowly pour the remaining milk into the mixture, stirring continuously. The goal is to create a batter that flows easily but isn’t too thin. It should drop smoothly from a spoon.
Step 4: Prepare Cooking Surface
Heat a skillet or griddle over medium heat. Lightly grease the surface with butter or cooking spray to prevent sticking and ensure golden edges.
Step 5: Drop and Cook Scones
Using a spoon, drop small dollops of batter onto the hot surface. Watch for tiny bubbles to form on the top of each scone, which signals it’s time to flip.
Step 6: Flip and Finish Cooking
Carefully turn each scone using a spatula. Cook the second side until it turns a beautiful golden brown. The scones should be light and fluffy when done.
Step 7: Keep Warm and Serve
Transfer cooked scones to a plate and cover with a clean kitchen towel to keep them soft and warm. Repeat the cooking process with remaining batter.
Step 8: Enjoy with Delicious Toppings
Serve the dropped scones warm with your favorite accompaniments like jam, honey, butter, or fresh cream. Enjoy immediately for the best taste and texture.
Print
Dropped Scones Recipe
- Total Time: 25 minutes
- Yield: 4 1x
Description
Scottish dropped scones offer a delightful journey through traditional breakfast comfort. Pillowy pancakes dance with golden edges, promising a delectable morning treat that connects you to Scotland’s rich culinary heritage.
Ingredients
Main Ingredients:
- 175 grams (6 ounces) self-raising flour
- 1 teaspoon baking powder
- 40 grams (1.5 ounces) caster sugar
- 1 free-range egg
- 200 milliliters (7 fluid ounces) milk
Zest and Flavoring:
- 1 small orange, zest only
Serving and Topping Ingredients:
- Sunflower oil, for greasing
- Butter
- Maple syrup
- Honey
- Greek-style yoghurt
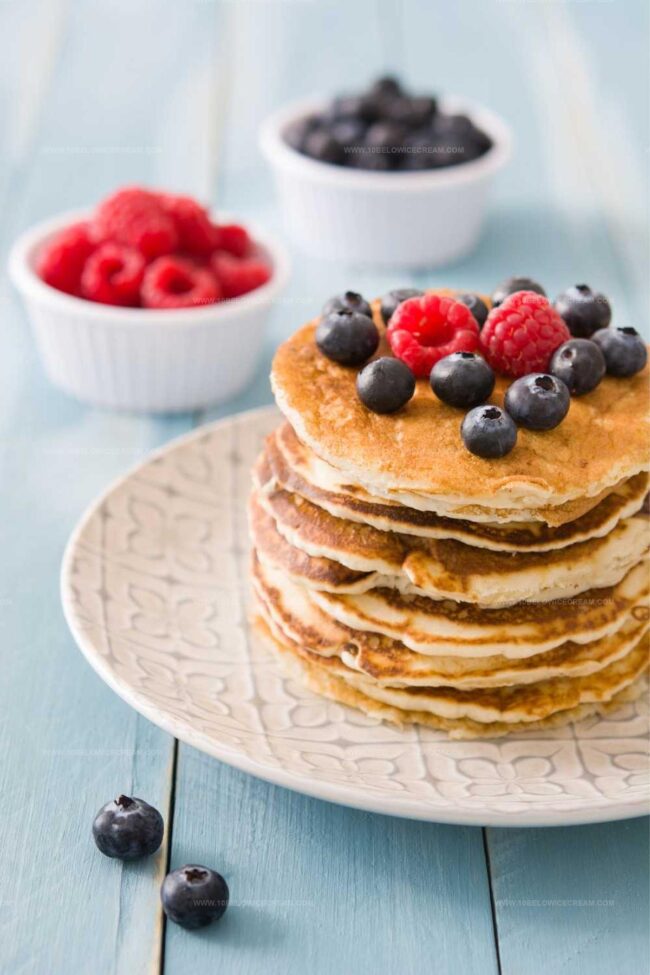
- Fresh blueberries
- Fresh raspberries
Instructions
- Combine flour, sugar, baking powder, and salt in a mixing vessel, ensuring even distribution of dry components.
- Create a central well in the dry mixture and crack the egg into it, then pour in half the milk.
- Whisk the ingredients vigorously until a uniform, lump-free consistency develops.
- Gradually incorporate the remaining milk, stirring continuously to achieve a smooth, pourable batter with a light, airy texture.
- Preheat a non-stick skillet or griddle over medium heat (around 375°F), lightly coating the surface with butter or oil.
- Using a spoon, carefully drop small rounds of batter onto the heated surface, allowing sufficient space between each scone.
- Watch for small bubbles to form across the surface of each scone, indicating it’s time to flip, which typically takes 2-3 minutes.
- Gently turn each scone and cook the reverse side until golden brown, approximately 1-2 minutes.
- Transfer cooked scones to a plate and immediately drape with a clean tea towel to maintain softness and prevent drying.
- Repeat the dropping and cooking process with remaining batter, adjusting heat as needed to prevent burning.
- Serve warm alongside butter, jam, honey, or preferred accompaniments for a delightful breakfast or teatime treat.
Notes
- Check batter consistency by ensuring it drops easily from a spoon but isn’t too runny.
- Use a non-stick pan or well-seasoned griddle for best results with minimal sticking.
- Experiment with alternative flours like whole wheat or gluten-free blends for dietary variations.
- Keep scones warm and soft by covering with a clean tea towel immediately after cooking, which traps steam and prevents drying.
- Prep Time: 10 minutes
- Cook Time: 15 minutes
- Category: Breakfast, Snacks, Desserts
- Method: Frying
- Cuisine: British
Nutrition
- Serving Size: 4
- Calories: 203 kcal
- Sugar: 10 g
- Sodium: 187 mg
- Fat: 4 g
- Saturated Fat: 1 g
- Unsaturated Fat: 2.5 g
- Trans Fat: 0 g
- Carbohydrates: 37 g
- Fiber: 1.5 g
- Protein: 6 g
- Cholesterol: 38 mg
Jackson Reid
Founder & Recipe Developer
Expertise
Education
Holyoke Community College – HCC-MGM Culinary Arts Institute
Certificate in Culinary Arts
Focus: Farm-to-table cuisine, sustainable cooking practices, and hands-on kitchen training
Jackson’s love for cooking began one dish at a time. After earning his Culinary Arts Certificate from Holyoke Community College’s HCC-MGM Culinary Arts Institute, he focused on what mattered most: creating recipes that are simple to follow and full of flavor.
At 10 Below Ice Cream, Jackson brings together global influences and a less-is-more approach. His recipes reflect his belief that good food doesn’t need to be complicated; it just needs to make sense, taste great, and feel right.
When he’s not testing ingredients or adjusting seasonings, you’ll find him hiking near Asheville, exploring local markets, or chasing the best light for food photos.