Crispy Pickle Paradise: The Crunchy Fried Pickles Recipe
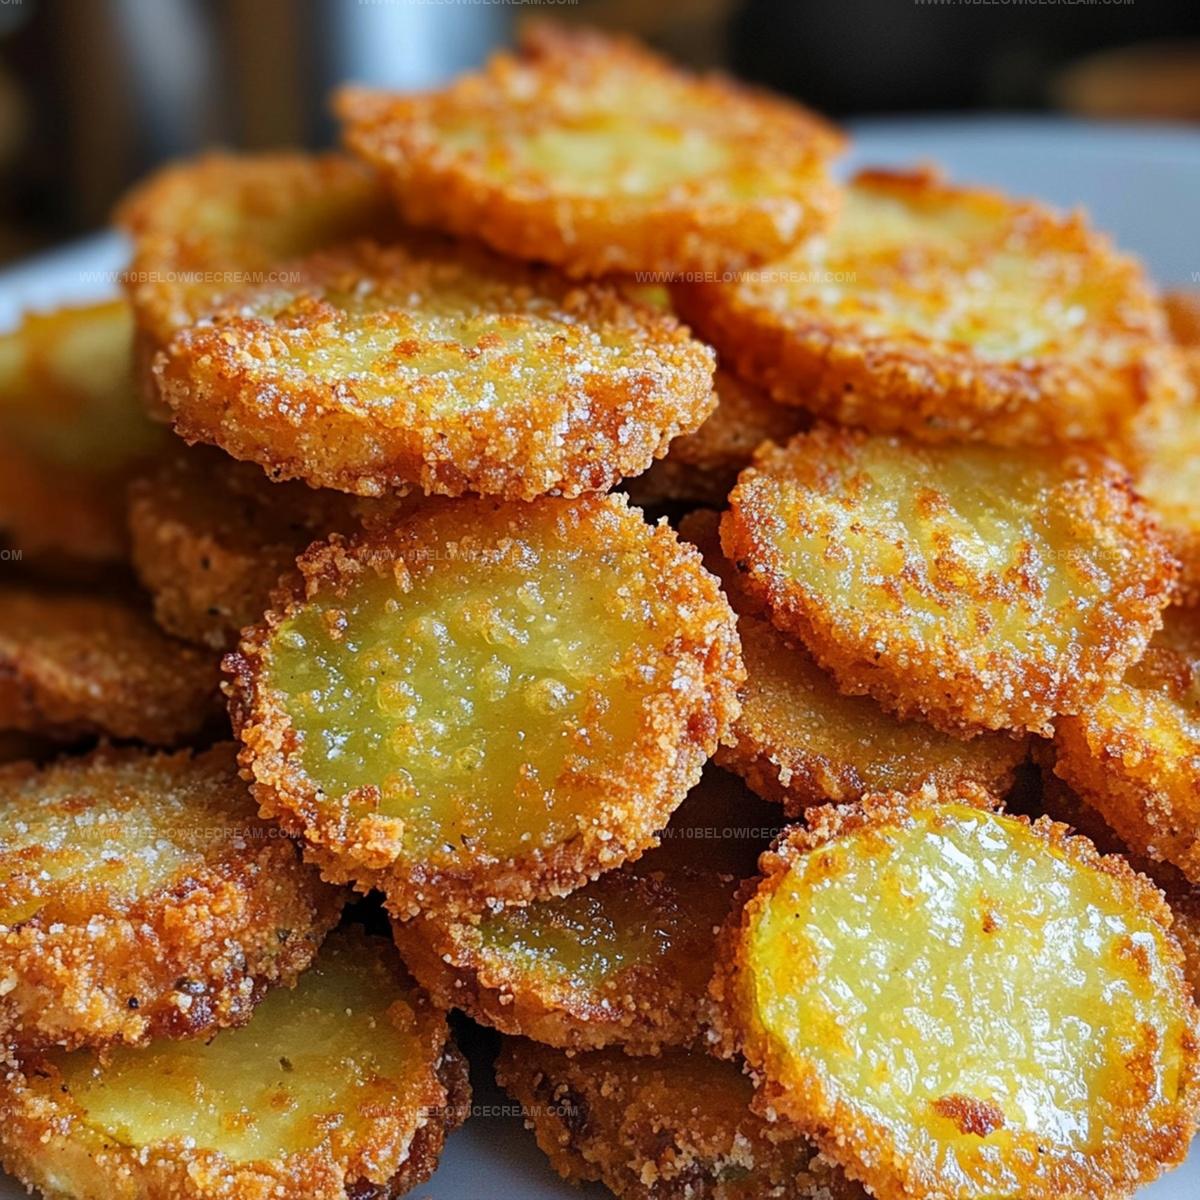
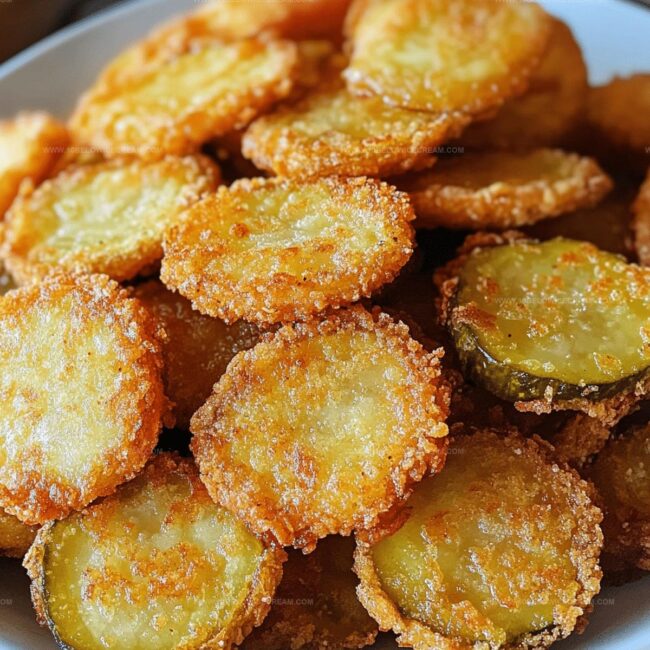
These irresistible crispy and crunchy fried pickles will make you the star of any gathering, turning a simple snack into a crowd-pleasing sensation.
Sliced pickle rounds get coated in a perfectly seasoned batter that crackles with every delectable bite.
Zesty and golden, each morsel promises a delightful crunch that surprises your taste buds.
Southern diners and casual party hosts alike adore this simple yet impressive appetizer.
Crisp breading creates an incredible contrast against tangy pickle interiors, ensuring maximum flavor in every single piece.
Dip them in ranch or spicy aioli for an extra kick that complements the pickle’s natural zinginess.
Jump into this easy recipe and watch how quickly these addictive bites disappear from your plate.
Why Crispy Fried Pickles Are Addictive

Ingredients In Crispy Fried Pickles
For the Main Star:For the Coating Layers:For the Cooking Medium:Optional Finishing Touch:How To Make Fried Pickles Crunchy
Step 1: Prepare Pickle Slices
Pat each pickle completely dry using paper towels. Slice pickles into thin, consistent rounds approximately 1/4-inch thick to ensure even cooking and crispy texture.
Ingredients:Step 2: Create Seasoning Stations
Set up three separate shallow dishes for coating process.
Ingredients:Step 3: First Coating Layer
Dredge each pickle slice thoroughly in seasoned flour mixture, covering completely and shaking off any excess powder.
Step 4: Wet Coating Application
Dip the floured pickle slice into egg and buttermilk blend, allowing extra liquid to drip back into dish.
Step 5: Final Breadcrumb Coating
Roll coated pickle slice in breadcrumbs, pressing gently to create an even, crispy exterior.
Step 6: Heat Cooking Oil
Warm vegetable oil in deep skillet or heavy-bottomed pan until temperature reaches 375°F. Use digital thermometer for precise measurement.
Step 7: Fry Pickle Slices
Carefully lower breaded pickle slices into hot oil. Fry in small batches to prevent overcrowding and ensure consistent browning.
Step 8: Achieve Golden Crispiness
Cook for 2-3 minutes, turning once, until pickle slices become golden brown and develop a crunchy exterior.
Step 9: Drain and Season
Remove fried pickles using slotted spoon. Place on wire rack or paper towels to drain excess oil. Sprinkle with additional salt if desired.
Step 10: Serve Immediately
Enjoy hot, crispy pickle slices right away for maximum crunchiness and flavor.
Best Tips For Crispy Fried Pickles
Fried Pickle Flavor Variations
Fried Pickle Pairings You’ll Enjoy
Storage Tips For Fried Pickles
Fried Pickles FAQ Section
Buttermilk helps create a tangier flavor and provides extra tenderness to the coating, making the breading more flavorful and crisp.
Dill pickle chips work best, but you can experiment with kosher dill or bread and butter pickles for slightly different flavor profiles.
Use a digital thermometer to ensure the oil reaches exactly 375°F. If you don’t have one, drop a breadcrumb into the oil – it should sizzle immediately but not burn.
The three-step dredging process – flour, egg wash, and breadcrumbs – creates a thick, crunchy exterior that seals in moisture and provides maximum crispiness.
Print
Crispy And Crunchy Fried Pickles Recipe
- Total Time: 25 minutes
- Yield: 4 1x
Description
Crispy and Crunchy Fried Pickles deliver a Southern-style snack that tantalizes taste buds with golden-brown goodness. Zesty pickle slices coated in seasoned breading offer irresistible crunch, perfect for dipping and sharing with friends at any gathering.
Ingredients
Main Ingredients:
- 4 medium pickles
- 1 cup all-purpose flour
- 2 large eggs
- 1 cup breadcrumbs
Seasoning Ingredients:
- 1 tsp salt
- 1/2 tsp black pepper
- 1 tsp garlic powder
- 1/2 tsp paprika
Frying Ingredients:
- 2 cups vegetable oil
- 1/4 cup buttermilk
Instructions
- Thoroughly pat dry pickles with paper towels to remove excess moisture, ensuring crispy coating adherence.
- Prepare three separate shallow dishes: one with flour mixed with salt, black pepper, garlic powder, and paprika; second with beaten eggs and buttermilk; third with breadcrumbs.
- Slice pickles into uniform, thin rounds approximately 1/4-inch thick for consistent cooking.
- Dredge each pickle slice first in seasoned flour mixture, ensuring complete coverage and shaking off excess.
- Dip floured pickle slice into egg-buttermilk blend, allowing excess to drip back into dish.
- Roll coated pickle slice in breadcrumbs, pressing gently to create an even, adherent crust.
- Heat vegetable oil in a deep skillet or heavy-bottomed pan to 375°F, checking temperature with a digital thermometer.
- Carefully lower breaded pickle slices into hot oil, working in small batches to prevent overcrowding.
- Fry for 2-3 minutes, turning once, until golden brown and crispy on both sides.
- Remove fried pickles using a slotted spoon, placing on wire rack or paper towels to drain excess oil.
- Sprinkle with additional salt if desired and serve immediately while hot and crunchy.
Notes
- Always choose crisp, cold dill pickles for maximum crunch and flavor intensity.
- Ensure pickles are completely dry before breading to prevent soggy coating and promote better adhesion.
- Use panko breadcrumbs for extra crispiness and lighter texture compared to traditional breadcrumbs.
- Create gluten-free version by substituting regular flour with almond or rice flour and using gluten-free breadcrumbs.
- Prep Time: 15 minutes
- Cook Time: 10 minutes
- Category: Appetizer, Snacks
- Method: Frying
- Cuisine: American
Nutrition
- Serving Size: 4
- Calories: 250
- Sugar: 2g
- Sodium: 550mg
- Fat: 15g
- Saturated Fat: 2g
- Unsaturated Fat: 12g
- Trans Fat: 0g
- Carbohydrates: 27g
- Fiber: 1g
- Protein: 5g
- Cholesterol: 70mg
Olivia Brooks
Contributing Writer
Expertise
Education
Culinary Institute of America
Accelerated Culinary Arts Certificate Program
Focus: Culinary fundamentals, nutrition, and healthy cooking technique
Olivia believes good food should feed both the body and the soul. She earned her Accelerated Culinary Arts Certificate from the Culinary Institute of America, where she focused on nutrition and practical cooking techniques that make healthy eating easy.
At 10 Below Ice Cream, Olivia shares single-serving recipes that are fresh, plant-forward, and full of heart. She loves helping people eat better, without stress, strict rules, or sacrificing flavor.
Beyond the kitchen, Olivia spends her time tending her backyard garden, practicing yoga, and discovering hidden gems in Portland’s food scene.