Creamy Baked Mac and Cheese Recipe for Comfort
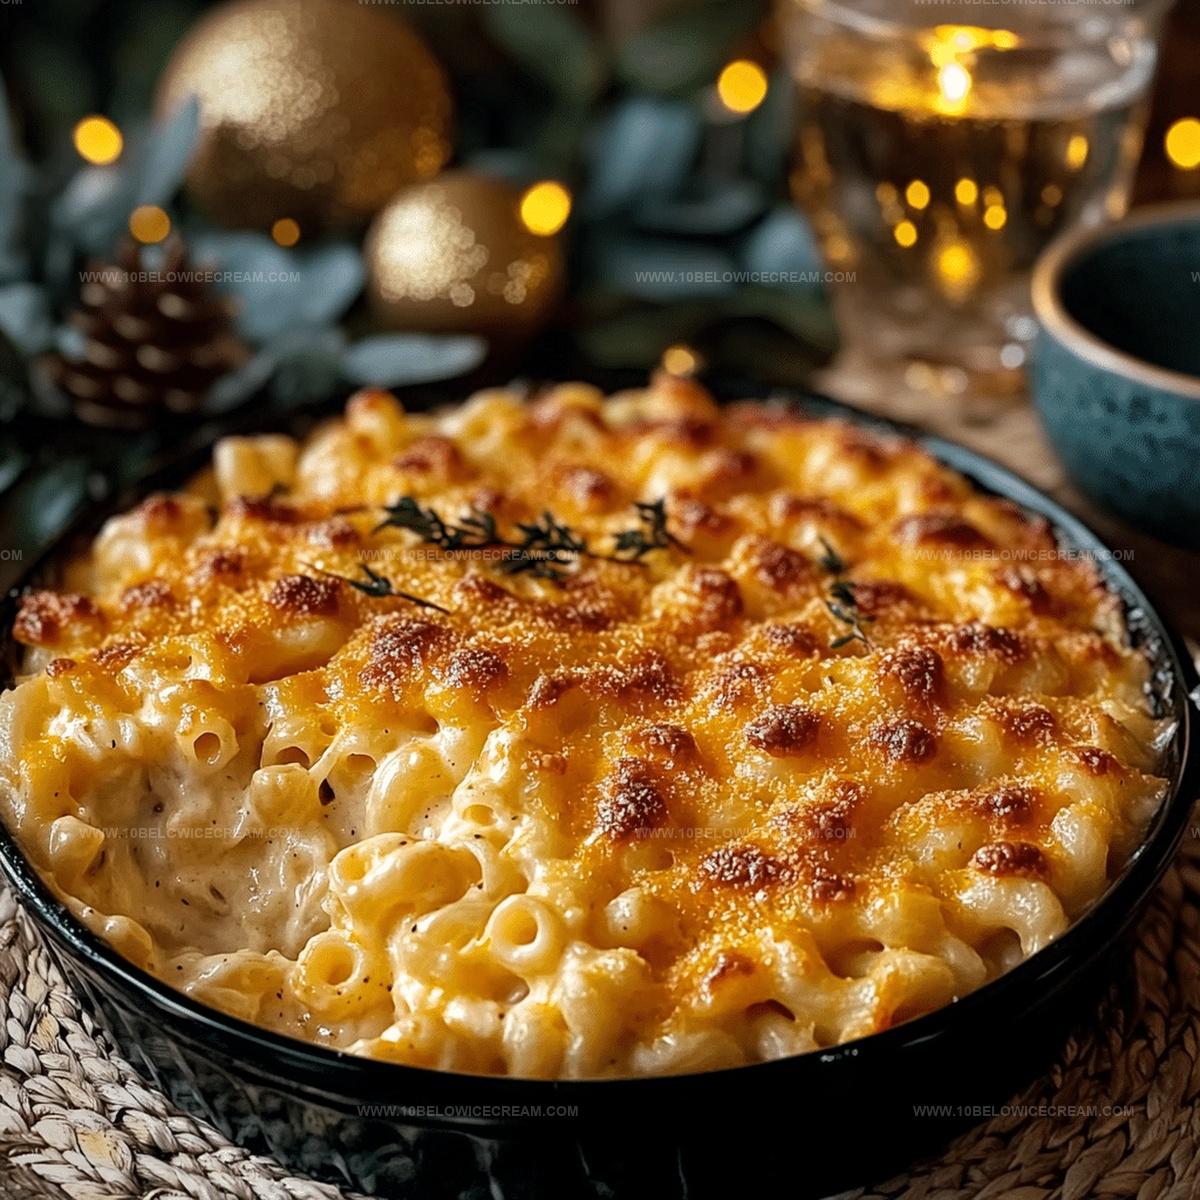
Mac and cheese lovers will adore this creamy baked mac and cheese recipe that promises comfort in every bite.
Warm, gooey cheese melts perfectly into tender pasta shells, creating a dish that feels like a hug on a plate.
Crispy breadcrumbs add a delightful crunch to the smooth, velvety surface.
Rich cheddar and sharp parmesan blend seamlessly, infusing depth and complexity into this classic comfort food.
Minimal ingredients come together quickly, making this recipe ideal for busy weeknights or lazy weekend dinners.
Cheese enthusiasts and pasta fans will fall head over heels for this irresistible combination of flavors and textures.
You cannot resist diving into this mouthwatering masterpiece that elevates the humble mac and cheese to a gourmet experience.
Why Creamy Baked Mac And Cheese Feels So Cozy
Ingredients For Creamy Baked Mac And Cheese
For the Pasta:For the Dairy:For the Seasonings and Toppings:How To Cook Creamy Baked Mac And Cheese At Home
Step 1: Warm Up the Oven
Fire up your oven to a toasty 375°F and grab a 9×13-inch baking dish. Grease that dish like you’re preparing for a cheesy masterpiece, making sure nothing will stick.
Step 2: Cook the Pasta Perfectly
Boil a big pot of salted water and toss in the elbow macaroni. Let it dance around until it’s perfectly tender, usually taking about 8-9 minutes. Drain the pasta and set it aside, ready for its cheesy transformation.
Step 3: Whip Up the Creamy Base
Grab a large mixing bowl and combine:Whisk these ingredients until they become a smooth, dreamy mixture that promises deliciousness.
Step 4: Create a Buttery Foundation
Melt unsalted butter in a skillet, creating a rich and golden base that will add depth to your mac and cheese.
Step 5: Marry the Pasta and Cream
Gently fold the cooked macaroni into the dairy mixture. Make sure each pasta piece gets a luxurious coating of the creamy blend.
Step 6: Cheese It Up
Gradually add in:Stir continuously, watching as the cheeses melt and create a velvety, mouth-watering sauce that hugs every pasta noodle.
Step 7: Prepare for Baking
Transfer the cheesy macaroni into the prepared baking dish. Spread it out evenly, ensuring every bite will be equally delicious.
Step 8: Add a Crunchy Topping
Sprinkle breadcrumbs across the top, creating a golden, crispy layer that will add texture to your creamy dish.
Step 9: Bake to Perfection
Slide the dish into the preheated oven and bake for 25-30 minutes. Watch for a beautiful golden-brown top with slightly crispy edges.
Step 10: Let It Rest
Remove from the oven and let the mac and cheese sit for 5-10 minutes. This helps the cheese sauce set and stabilize, making it even more delectable.
Step 11: Final Touch
Scatter some freshly chopped parsley on top for a pop of color and an extra burst of flavor. Serve and enjoy your ultimate comfort food!
Top Tips For Creamy Baked Mac And Cheese Success
Tasty Twists On Creamy Baked Mac And Cheese
What Goes Well With Creamy Baked Mac And Cheese
Easy Storage For Creamy Baked Mac And Cheese
Creamy Baked Mac And Cheese Questions Answered
Elbow macaroni is the traditional and recommended pasta, as its shape perfectly captures and holds the creamy cheese sauce, ensuring each bite is packed with flavor.
Yes, you can experiment with cheeses like Gruyère, monterey jack, or gouda, but cheddar and mozzarella provide the best melting properties and classic mac and cheese taste.
Breadcrumbs create a crispy, golden-brown topping that adds wonderful textural contrast to the creamy mac and cheese, giving each bite a delightful crunch.
Print
Creamy Baked Mac And Cheese Recipe
- Total Time: 45 minutes
- Yield: 6 1x
Description
Mac and cheese lovers will rejoice over this classic “creamy baked mac and cheese” that blends rich cheddar and smooth gruyère into pure comfort. Crispy breadcrumb topping and golden edges promise a delicious dinner that brings warm memories to your table.
Ingredients
Main Ingredients:
- 450 g (16 oz) elbow macaroni
- 4 cups shredded cheddar cheese
- 2 cups shredded mozzarella cheese
Dairy Components:
- 1/2 cup unsalted butter
- 1/2 cup whole milk
- 1/2 cup heavy cream
- 2 large eggs
Seasonings and Additional Ingredients:
- 1 tsp salt
- 1/2 tsp black pepper
- 1/2 tsp garlic powder
- 1/4 cup breadcrumbs
- 2 tbsp chopped fresh parsley
Instructions
- Preheat the oven to 375°F (190°C) and generously grease a 9×13-inch baking dish to prevent sticking.
- Cook the elbow macaroni in a large pot of salted boiling water until al dente, typically 8-9 minutes, then drain thoroughly and set aside.
- In a large mixing bowl, whisk together eggs, milk, heavy cream, salt, black pepper, and garlic powder until smooth and well-incorporated.
- Melt the unsalted butter in a skillet, creating a rich base for the cheese sauce.
- Fold the cooked macaroni into the dairy mixture, ensuring each pasta strand is evenly coated with the creamy blend.
- Gradually incorporate the shredded cheddar and mozzarella cheeses into the pasta, stirring continuously to create a luxurious, velvety texture.
- Transfer the cheesy macaroni mixture into the prepared baking dish, spreading it evenly to ensure consistent cooking.
- Sprinkle breadcrumbs across the top of the mac and cheese, creating a golden, crispy crust.
- Bake in the preheated oven for 25-30 minutes, or until the top turns a beautiful golden brown and the edges become slightly crispy.
- Remove from the oven and let rest for 5-10 minutes to allow the cheese sauce to set and stabilize.
- Garnish with freshly chopped parsley for a burst of color and added flavor before serving.
Notes
- Select pasta with ridges or curves to hold more cheese sauce, maximizing flavor in every bite.
- Shred cheese directly from block for smoother melting and superior texture compared to pre-shredded varieties.
- Allow ingredients to reach room temperature before mixing to ensure even blending and consistent sauce development.
- Experiment with cheese combinations like gruyere, fontina, or sharp white cheddar for deeper, more complex flavor profiles.
- Prep Time: 15 minutes
- Cook Time: 30 minutes
- Category: Lunch, Dinner, Snacks
- Method: Baking
- Cuisine: American
Nutrition
- Serving Size: 6
- Calories: 563
- Sugar: 3 g
- Sodium: 590 mg
- Fat: 30 g
- Saturated Fat: 18 g
- Unsaturated Fat: 10 g
- Trans Fat: 1 g
- Carbohydrates: 54 g
- Fiber: 2 g
- Protein: 24 g
- Cholesterol: 132 mg
Jackson Reid
Founder & Recipe Developer
Expertise
Education
Holyoke Community College – HCC-MGM Culinary Arts Institute
Certificate in Culinary Arts
Focus: Farm-to-table cuisine, sustainable cooking practices, and hands-on kitchen training
Jackson’s love for cooking began one dish at a time. After earning his Culinary Arts Certificate from Holyoke Community College’s HCC-MGM Culinary Arts Institute, he focused on what mattered most: creating recipes that are simple to follow and full of flavor.
At 10 Below Ice Cream, Jackson brings together global influences and a less-is-more approach. His recipes reflect his belief that good food doesn’t need to be complicated; it just needs to make sense, taste great, and feel right.
When he’s not testing ingredients or adjusting seasonings, you’ll find him hiking near Asheville, exploring local markets, or chasing the best light for food photos.