
Creamy Cottage Cheese Protein Balls Recipe: Snack Smartly
Whipping up delectable cottage cheese protein balls can revolutionize your snack game in minutes.
A quick blend of nutritious ingredients creates a delightful treat perfect for busy days.
Protein-packed morsels deliver serious energy without complicated preparation steps.
Athletes and health enthusiasts adore these compact bites for their convenient nutrition profile.
Simple pantry staples combine effortlessly to craft these wholesome spheres of goodness.
Minimal kitchen skills guarantee success with this foolproof recipe.
You’ll love how these protein-rich snacks satisfy hunger and support your wellness goals.
What’s Great About Easy Cottage Cheese Protein Balls For A Healthy Snack
Must Have Ingredients For Easy Cottage Cheese Protein Balls For A Healthy Snack
Base Ingredients:Chocolate Components:Optional Coating:How To Make Easy Cottage Cheese Protein Balls For A Healthy Snack

Step 1: Combine Core Ingredients
Grab a spacious mixing bowl and toss in all the primary ingredients. You’ll want to blend these thoroughly:Use a sturdy spoon or spatula to mix everything until the texture becomes smooth and consistent. The mixture should start looking creamy and well-incorporated.
Step 2: Sprinkle Chocolate Goodness
Gently fold chocolate chips into the prepared mixture. Distribute them evenly so each bite delivers a delicious chocolate punch. This step transforms your protein balls from basic to extraordinary.
Step 3: Craft Perfect Protein Spheres
Roll the mixture into bite-sized balls using your hands. Aim for consistent sizes around one inch in diameter. Place each formed ball onto a lined baking sheet. Continue until you’ve used all the mixture.
Step 4: Create Optional Chocolate Coating
For chocolate lovers, melt chocolate chips in a microwave-safe bowl. Heat in short 30-second bursts, stirring between each interval until the chocolate becomes silky smooth. Carefully dip each protein ball, ensuring complete coverage.
Step 5: Chill and Solidify
Transfer the baking sheet to the refrigerator. Allow the protein balls to set for at least 30 minutes. This cooling period helps them firm up and enhances their delightful texture.
Step 6: Store and Savor
Move the chilled protein bites to an airtight container. They’ll stay fresh in the refrigerator for up to one week. Enjoy these nutritious snacks whenever hunger strikes or you need a quick energy boost.
Handy Tips For Easy Cottage Cheese Protein Balls For A Healthy Snack
Fun Flavors For Easy Cottage Cheese Protein Balls For A Healthy Snack
What To Pair With Easy Cottage Cheese Protein Balls For A Healthy Snack
How To Keep Easy Cottage Cheese Protein Balls For A Healthy Snack Fresh

Common Questions About Easy Cottage Cheese Protein Balls For A Healthy Snack
Yes, these protein balls are nutrient-dense and low in calories, making them an excellent snack for weight management. The high protein content helps keep you full and supports muscle recovery.
Absolutely! You can substitute protein powder with Greek yogurt or additional almond flour to maintain the consistency. The key is keeping a similar dry-to-wet ingredient ratio.
Definitely! Kids love the sweet taste from chocolate chips and honey. They’re a nutritious alternative to processed snacks and can be a fun recipe to make together. The soft texture is also easy for children to enjoy.
Print
Cottage Cheese Protein Balls Recipe
- Total Time: 15 minutes
- Yield: 12 1x
Description
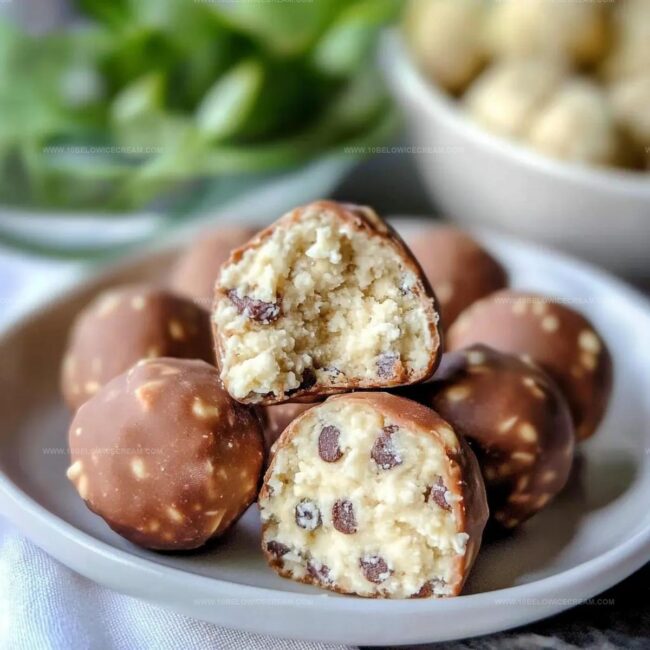
Protein-packed cottage cheese balls blend creamy textures with nutty almonds, delivering powerful nutrition in one delightful bite. Protein enthusiasts and health-conscious snackers will find these quick energy boosters perfect for workout recovery or midday fuel.
Ingredients
Protein Base Ingredients:
- 1 cup (240 milliliters / 8 fluid ounces) cottage cheese
- 1/2 cup (50 grams) rolled oats
- 1/4 cup (30 grams) protein powder (vanilla or unflavored)
- 1/4 cup (30 grams) almond flour
- 2 tablespoons (30 milliliters) honey or maple syrup
- 1/2 teaspoon vanilla extract
Mix-in Ingredients:
- 1/4 cup (45 grams) mini chocolate chips
Coating Ingredients (optional):
- 1/2 cup (90 grams) chocolate chips
Instructions
- In a spacious mixing vessel, amalgamate cottage cheese, rolled oats, protein powder, honey, vanilla extract, and almond flour into a uniform mixture, ensuring thorough incorporation of all ingredients using a sturdy utensil.
- Delicately introduce mini chocolate chips, dispersing them evenly throughout the mixture to guarantee a consistent chocolate experience in each morsel.
- Using clean hands, portion approximately one tablespoon of the mixture and meticulously craft spherical shapes, approximately one inch in diameter, positioning each protein ball onto a parchment-lined baking tray.
- For an optional decadent exterior, melt chocolate chips in a microwave-safe container, utilizing 30-second intervals and stirring between each heating cycle until achieving a silky, smooth consistency.
- Carefully submerge each protein ball into the molten chocolate, ensuring complete coverage, then return to the parchment-lined tray.
- Transfer the tray to the refrigerator, allowing the protein balls to solidify for a minimum of 30 minutes at 40°F, which will enhance their structural integrity and provide a refreshingly cool texture.
- Once set, transfer the protein balls to an airtight storage container and refrigerate. These nutritious bites will maintain optimal quality for up to seven days, offering a convenient and health-conscious snack option.
Notes
- Swap cottage cheese with Greek yogurt for a tangy twist if dairy alternatives are preferred.
- Use sugar-free chocolate chips to reduce overall sugar content for diabetic-friendly version.
- Experiment with different protein powder flavors like vanilla, chocolate, or unflavored to customize taste profile.
- Roll balls in crushed nuts, coconut flakes, or cocoa powder for extra texture and nutrition boost.
- Prep Time: 15 minutes
- Cook Time: 0 minutes
- Category: Snacks, Breakfast, Desserts
- Method: None
- Cuisine: American
Nutrition
- Serving Size: 12
- Calories: 133
- Sugar: 5 g
- Sodium: 58 mg
- Fat: 4.5 g
- Saturated Fat: 2 g
- Unsaturated Fat: 2.5 g
- Trans Fat: 0 g
- Carbohydrates: 19 g
- Fiber: 2 g
- Protein: 6 g
- Cholesterol: 10 mg
Olivia Brooks
Contributing Writer
Expertise
Education
Culinary Institute of America
Accelerated Culinary Arts Certificate Program
Focus: Culinary fundamentals, nutrition, and healthy cooking technique
Olivia believes good food should feed both the body and the soul. She earned her Accelerated Culinary Arts Certificate from the Culinary Institute of America, where she focused on nutrition and practical cooking techniques that make healthy eating easy.
At 10 Below Ice Cream, Olivia shares single-serving recipes that are fresh, plant-forward, and full of heart. She loves helping people eat better, without stress, strict rules, or sacrificing flavor.
Beyond the kitchen, Olivia spends her time tending her backyard garden, practicing yoga, and discovering hidden gems in Portland’s food scene.