
Condensed Milk Ice Cream Recipe for a Quick Chill
Whipping up a creamy condensed milk ice cream takes mere minutes without an expensive machine.
Smooth dairy magic happens through simple kitchen alchemy that surprises most home cooks.
Chilled desserts rarely feel this luxurious yet effortless to create.
Cold and silky textures await you with minimal ingredients and zero complicated techniques.
Sweetness combines perfectly with rich milk components that melt delightfully on your tongue.
Minimal equipment means anyone can craft this dreamy frozen treat in their own kitchen.
You’ll adore how quickly this recipe transforms basic pantry staples into a decadent summer indulgence.
Why Mary Berry Condensed Milk Ice Cream Is A Must-Try
Ingredients For Mary Berry Condensed Milk Ice Cream
Dairy Base:Flavor Enhancer:Preparation Essentials:Step-By-Step Guide To Mary Berry Condensed Milk Ice Cream
Step 1: Combine Creamy Ingredients
In a stand mixer bowl, pour the condensed milk, thickened cream, and vanilla extract. These rich ingredients will create a smooth and decadent base for your homemade ice cream.
Step 2: Whip to Perfection
Attach the wire whisk to your stand mixer and beat the mixture on medium-high speed. Continue whipping until soft, billowy peaks start to emerge, which typically takes about 3-4 minutes. The mixture should look light and airy.
Step 3: Prepare for Freezing
Carefully transfer the whipped mixture into a loaf pan or freezer-safe container. Smooth the top with a spatula to create an even surface. Cover the container completely with plastic wrap, ensuring no air can enter.
Step 4: Freeze and Set
Place the covered container in the freezer and let it sit undisturbed overnight. This resting period allows the ice cream to develop a rich, creamy texture and fully solidify.
Step 5: Store and Serve
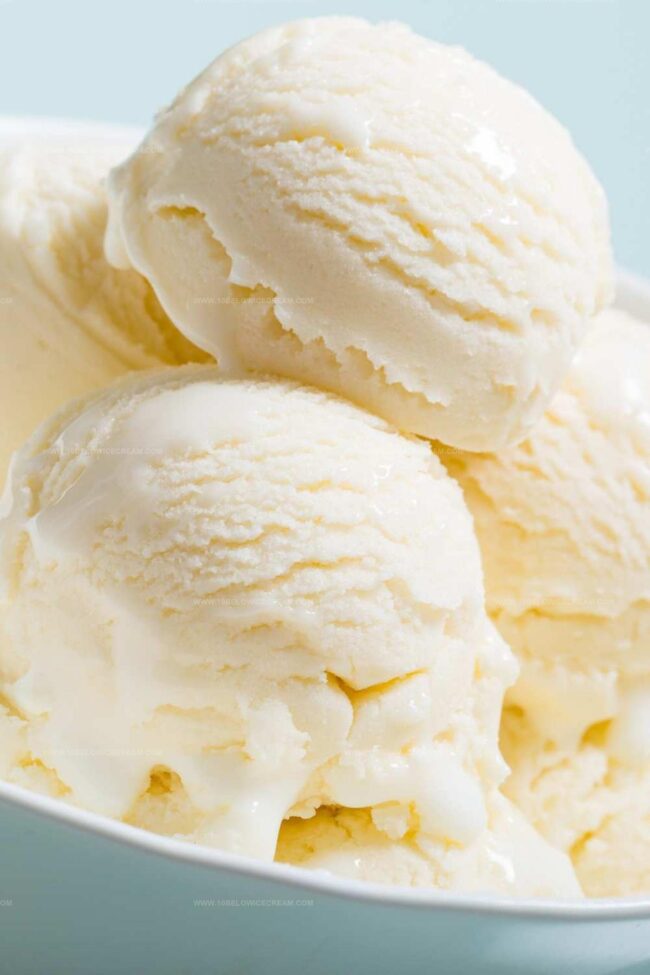
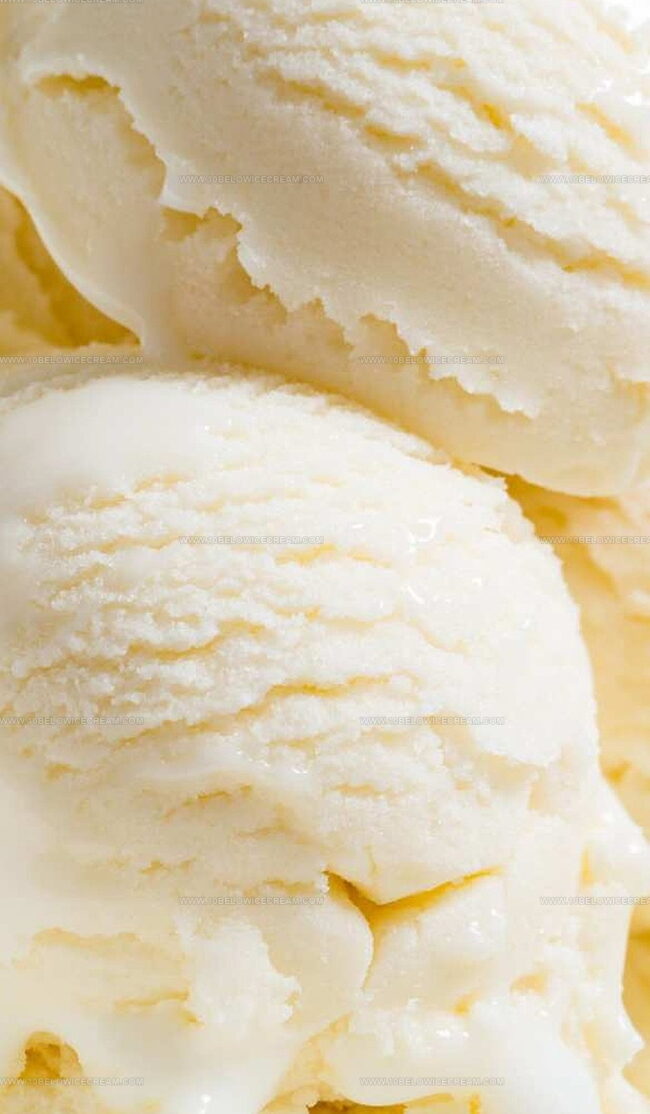
Once the ice cream is completely frozen, you can transfer it to an airtight container for longer-term storage. When ready to enjoy, let it sit at room temperature for a few minutes to soften slightly before scooping.
Tips To Perfect Mary Berry Condensed Milk Ice Cream

Unique Takes On Mary Berry Condensed Milk Ice Cream
What Goes Well With Mary Berry Condensed Milk Ice Cream
How To Store Mary Berry Condensed Milk Ice Cream Effectively
Common Questions About Mary Berry Condensed Milk Ice Cream
Yes, you can use a hand mixer or whisk the ingredients manually, but it will take more effort to achieve soft peaks.
Thickened cream has added stabilizers, while heavy cream is pure cream. Both work, but thickened cream provides a more stable texture.
The ice cream can be stored in the freezer for up to 2 weeks without losing its creamy consistency.
Absolutely! You can fold in chocolate chips, crushed cookies, or fruit before freezing to customize your ice cream.
Print
Condensed Milk Ice Cream Recipe
- Total Time: 10 minutes
- Yield: 6 1x
Description
Sweet summer dreams come alive with this condensed milk ice cream, blending creamy richness and silky smoothness. Cool comfort awaits with minimal ingredients and zero churning, promising delightful simplicity you’ll savor to the last delicious spoonful.
Ingredients
Main Ingredients:
- 395 grams (14 ounces) sweetened condensed milk
- 600 milliliters (2.5 cups) thickened cream
Flavor Enhancer:
- 1 teaspoon vanilla extract
Instructions
- Combine condensed milk, thickened cream, and vanilla extract in a stand mixer fitted with a wire whisk attachment.
- Whip the mixture on medium-high speed until soft, billowy peaks develop, approximately 3-4 minutes.
- Gently transfer the velvety mixture into a chilled loaf pan or freezer-safe container, smoothing the surface with a spatula.
- Carefully seal the container with plastic wrap, ensuring minimal air exposure.
- Place in the freezer for 8-12 hours, or ideally overnight, allowing the mixture to solidify completely.
- Once fully frozen, the ice cream can be stored in an airtight container for up to 2 weeks, maintaining its creamy texture and rich flavor.
Notes
- Whip cream carefully to avoid over-beating, which can turn the mixture grainy and affect the smooth texture of the ice cream.
- Choose high-quality vanilla extract for a richer, more complex flavor profile that enhances the creamy base.
- For a lighter version, substitute thickened cream with Greek yogurt or coconut cream to reduce fat content while maintaining a creamy consistency.
- Experiment with flavor variations by adding crushed cookies, chocolate chips, or fruit purees before freezing to create custom ice cream styles.
- Prep Time: 10 minutes
- Cook Time: 0 minutes
- Category: Desserts
- Method: Freezing
- Cuisine: American
Nutrition
- Serving Size: 6
- Calories: 352
- Sugar: 43g
- Sodium: 75mg
- Fat: 25g
- Saturated Fat: 16g
- Unsaturated Fat: 7g
- Trans Fat: 0.3g
- Carbohydrates: 38g
- Fiber: 0g
- Protein: 4g
- Cholesterol: 92mg
Jackson Reid
Founder & Recipe Developer
Expertise
Education
Holyoke Community College – HCC-MGM Culinary Arts Institute
Certificate in Culinary Arts
Focus: Farm-to-table cuisine, sustainable cooking practices, and hands-on kitchen training
Jackson’s love for cooking began one dish at a time. After earning his Culinary Arts Certificate from Holyoke Community College’s HCC-MGM Culinary Arts Institute, he focused on what mattered most: creating recipes that are simple to follow and full of flavor.
At 10 Below Ice Cream, Jackson brings together global influences and a less-is-more approach. His recipes reflect his belief that good food doesn’t need to be complicated; it just needs to make sense, taste great, and feel right.
When he’s not testing ingredients or adjusting seasonings, you’ll find him hiking near Asheville, exploring local markets, or chasing the best light for food photos.