
Buttery Coconut Tarts Recipe: Island-Inspired Sweet Treats
Sweet memories of childhood rush back when you think about homemade coconut tarts dancing across your taste buds.
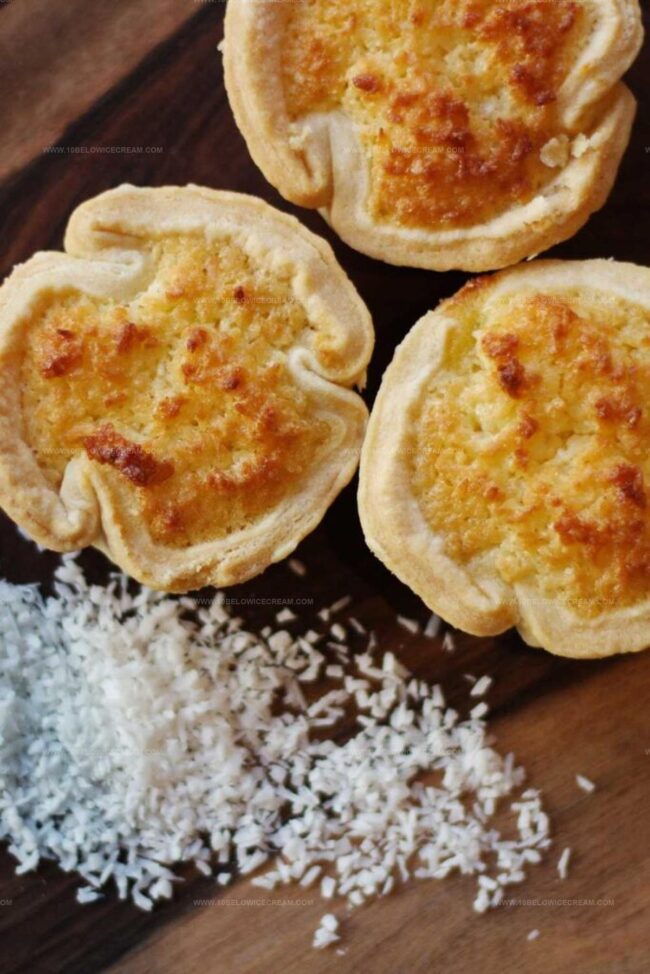
Crisp pastry shells cradle delicate coconut filling with surprising elegance.
Delightful textures merge in this simple yet sophisticated dessert.
Tropical ingredients whisper promises of indulgence and comfort.
Baking these treats connects generations through shared culinary joy.
Smooth, creamy centers nestled in buttery crusts make everyone smile.
One bite guarantees pure bliss that calls you to start mixing ingredients right now.
Tips To Nail Bero Coconut Tarts
New Takes On Bero Coconut Tarts
Good Sides For Bero Coconut Tarts
How To Store Bero Coconut Tarts The Right Way
Bero Coconut Tarts Questions And Answers
Yes, you can substitute shredded coconut for flaked coconut. The texture might be slightly different, but the flavor will remain the same.
Evaporated milk adds richness and depth to the filling. If you don’t have it, you can use whole milk, but the result might be slightly less creamy.
You can prepare the tart shells and filling in advance, but it’s best to assemble and bake them just before serving to maintain the crisp texture.
By adding the jam first and covering it with the coconut mixture, you create a protective layer that prevents burning and helps distribute the sweetness evenly.
What Makes Bero Coconut Tarts So Tasty
What You Need For Bero Coconut Tarts
Base Ingredients:Sweet Additions:Binding Ingredients:Step-By-Step Guide For Bero Coconut Tarts

Step 1: Prepare the Oven
Heat your oven to 190°C (375°F) to ensure the perfect baking environment for these sweet treats.
Step 2: Arrange Tart Shells
Spread tart shells on a baking sheet. If they’re frozen, let them thaw slightly for easier filling.
Step 3: Blend Creamy Filling
In a mixing bowl, whisk together:Blend until the mixture becomes smooth and silky.
Step 4: Add Coconut Texture
Fold flaked coconut into the mixture. The filling will transform into a thick, sticky consistency that promises rich flavor.
Step 5: Create Jam Base
Carefully drop a small dollop of jam into the center of each tart shell. This adds a delightful fruity surprise.
Step 6: Top with Coconut Mixture
Generously spoon the coconut mixture over the jam, completely covering the fruity base. Ensure each tart shell is filled to the brim.
Step 7: Bake to Golden Perfection
Place the baking sheet in the preheated oven. Bake for 18-20 minutes until the tops turn a beautiful golden brown and the edges become delightfully crisp.
Step 8: Cool and Set
Allow the tarts to cool completely before gently removing them from their shells. Patience ensures they hold their shape.
Step 9: Serve and Enjoy
These coconut tarts are best enjoyed fresh on the day of baking. Pack them in a lunchbox for a sweet midday treat that’s sure to bring a smile.
Print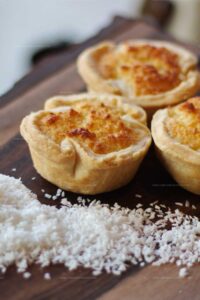
Coconut Tarts Recipe
- Total Time: 28-30 minutes
- Yield: 12 1x
Description
Irresistible coconut tarts blend Caribbean sweetness with delicate pastry, creating a tropical dessert experience. Crisp buttery shells cradle silky coconut filling, promising pure culinary delight you cannot resist.
Ingredients
Main Ingredients:
- 1 cup flaked coconut
- 12 (2-inch) frozen mini tart shells
- 1 egg
Filling Ingredients:
- 1/4 cup white sugar
- 1/4 cup melted butter
- 2 teaspoons evaporated milk
- 1 teaspoon vanilla extract
Topping Ingredient:
- 2 tablespoons strawberry jam
Instructions
- Heat oven to 190C (375F), preparing a baking sheet for the tart shells.
- Arrange tart shells on the sheet, allowing slight thawing if frozen.
- Combine melted butter, sugar, egg, evaporated milk, and vanilla in a mixing bowl, whisking until thoroughly blended and silky.
- Fold flaked coconut into the mixture, creating a dense, textured filling.
- Place a dollop of jam at the base of each tart shell, ensuring even distribution.
- Generously cover the jam with coconut mixture, spreading to the edges of each shell.
- Slide the baking sheet into the preheated oven, baking for 18-20 minutes until the tops turn golden and edges become crisp.
- Remove from oven and allow tarts to cool completely before gently extracting from their shells.
- Serve fresh on the day of baking or pack as a delightful lunchtime treat.
Notes
- Jam Selection Matters: Choose a high-quality fruit preserve like raspberry or strawberry to complement the coconut’s sweetness, creating a more complex flavor profile.
- Precise Mixing Technique: Whisk ingredients thoroughly to ensure a smooth, lump-free filling that will bake evenly and create a silky texture.
- Temperature Control: Allow tarts to cool completely before removing from shells to prevent cracking and maintain their delicate structure.
- Dietary Adaptations: Swap regular butter for dairy-free margarine and use gluten-free tart shells to make these treats suitable for those with dietary restrictions.
- Prep Time: 10 minutes
- Cook Time: 18-20 minutes
- Category: Desserts, Snacks
- Method: Baking
- Cuisine: Southeast Asian
Nutrition
- Serving Size: 12
- Calories: 152 kcal
- Sugar: 11 g
- Sodium: 37 mg
- Fat: 9 g
- Saturated Fat: 7 g
- Unsaturated Fat: 2 g
- Trans Fat: 0.1 g
- Carbohydrates: 17 g
- Fiber: 1 g
- Protein: 1.5 g
- Cholesterol: 27 mg
Jackson Reid
Founder & Recipe Developer
Expertise
Education
Holyoke Community College – HCC-MGM Culinary Arts Institute
Certificate in Culinary Arts
Focus: Farm-to-table cuisine, sustainable cooking practices, and hands-on kitchen training
Jackson’s love for cooking began one dish at a time. After earning his Culinary Arts Certificate from Holyoke Community College’s HCC-MGM Culinary Arts Institute, he focused on what mattered most: creating recipes that are simple to follow and full of flavor.
At 10 Below Ice Cream, Jackson brings together global influences and a less-is-more approach. His recipes reflect his belief that good food doesn’t need to be complicated; it just needs to make sense, taste great, and feel right.
When he’s not testing ingredients or adjusting seasonings, you’ll find him hiking near Asheville, exploring local markets, or chasing the best light for food photos.