
Soft & Fluffy Coconut Buns Recipe: A Sweet Homemade Delight
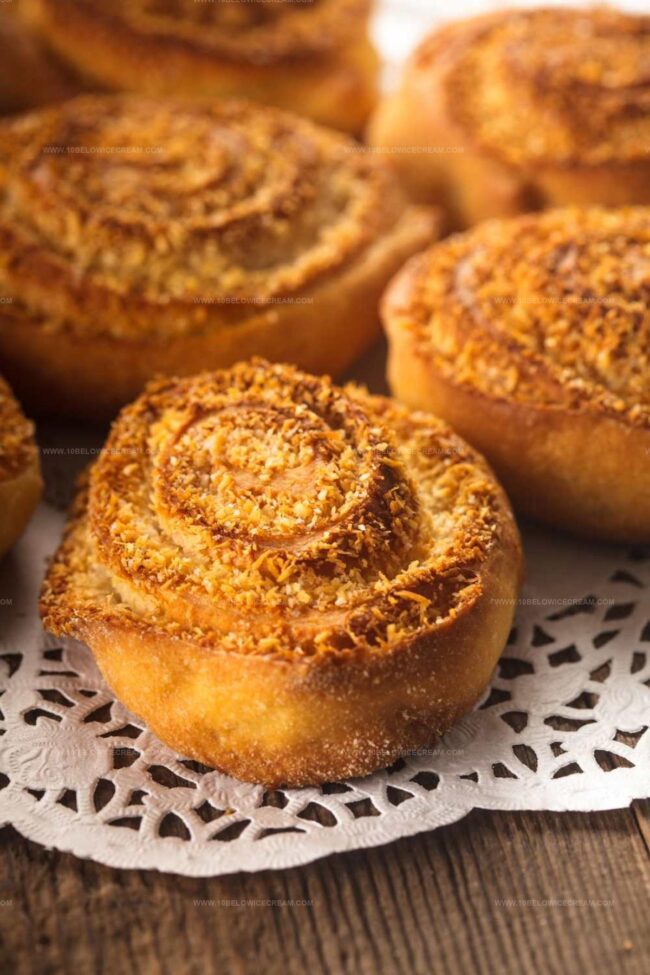
Soft and pillowy coconut buns dance with tropical flavors that transport you to sunny beaches.
Delicate dough embraces sweet coconut filling, creating a mouthwatering treat.
Baking these delights fills your kitchen with an irresistible aroma.
Simple ingredients come together effortlessly, making this recipe perfect for novice bakers.
Warm, freshly baked buns promise comfort and pure satisfaction.
Each bite brings a delightful hint of island-inspired sweetness.
You’ll fall in love with these tender, golden treasures that melt in your mouth.
Grab an apron and let’s start this delicious adventure!
Creative Spins On Mary Berry Coconut Buns
What To Serve With Mary Berry Coconut Buns
How To Store Mary Berry Coconut Buns Properly
Frequently Asked Questions About Mary Berry Coconut Buns
All-purpose flour is perfect for this recipe, providing the right texture and structure for the buns.
Yes, desiccated coconut works well and will give a slightly different but equally delicious texture to the buns.
Look for a golden-brown color and a slightly firm touch. They should be light and have a slightly crisp exterior when done.
Sifting helps remove lumps and ensures even distribution of baking powder and salt, creating a more consistent and lighter bun texture.
Why Mary Berry Coconut Buns Are Soft And Sweet
Ingredients List For Mary Berry Coconut Buns
Main Ingredients:Dry Ingredients:Liquid Ingredients:Step-By-Step Guide For Mary Berry Coconut Buns

Step 1: Prepare the Baking Station
Warm up your oven to a toasty 200°C (400°F). Get your baking trays ready by greasing them or laying down parchment paper for easy cleanup.
Step 2: Create the Dry Flour Blend
Grab a large mixing bowl and sift together:Ensure the dry ingredients are completely mixed and free of lumps.
Step 3: Work in the Butter
Use your fingertips to gently rub cold butter into the flour mixture. Keep working until the texture looks like coarse breadcrumbs – light and crumbly.
Step 4: Add Sweet and Tropical Touches
Sprinkle in:Stir these ingredients until they’re evenly distributed throughout the flour mixture.
Step 5: Create the Wet Mixture
In a separate bowl, whisk together:Pour this liquid blend into the dry ingredients and mix gently. Be careful not to overmix – you want the batter to be just combined.
Step 6: Shape the Buns
Use a spoon to drop rounded portions of the mixture onto your prepared baking trays. Leave some space between each bun for spreading.
Step 7: Bake to Golden Perfection
Slide the trays into the preheated oven and bake for 15-20 minutes. Watch for a beautiful golden color that signals they’re done.
Step 8: Cool and Enjoy
Transfer the buns to a wire rack and let them cool completely. This helps them set and makes them easier to handle.
Handy Tips For Mary Berry Coconut Buns
Print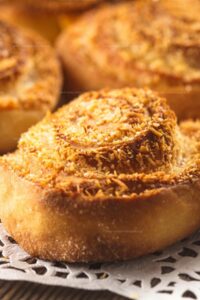
Coconut Buns Recipe
- Total Time: 25-30 mins
- Yield: 8 1x
Description
Delightful Coconut Buns bring tropical sweetness straight from Caribbean kitchens to your table. Pillowy bread rounds infused with rich coconut flavor promise a delectable escape that will transport you to sun-drenched shores with each delicious bite.
Ingredients
Main Ingredients:
- 225 grams (8 ounces) cream plain flour
- 50 grams (2 ounces) desiccated coconut
- 1 egg
- 150 milliliters (14 pint) milk
Dry Ingredients:
- 1 teaspoon baking powder
- 75 grams (3 ounces) golden caster sugar
- 1 pinch salt
Fat Ingredient:
- 75 grams (3 ounces) butter or margarine
Instructions
- Sift dry ingredients (flour, salt, baking powder) into a large mixing bowl, ensuring no lumps remain.
- Using fingertips, gently incorporate butter into the dry mixture until it reaches a crumbly, sandy texture resembling fine breadcrumbs.
- Fold sugar and coconut into the crumbly mixture, distributing evenly throughout.
- Whisk egg and milk together in a separate bowl until well combined.
- Pour liquid mixture into dry ingredients, using a light folding technique to create a soft, cohesive dough without overmixing.
- Prepare baking trays by lightly greasing or lining with parchment paper.
- Drop spoonfuls of dough onto prepared trays, creating rustic round shapes with slight spacing between each bun.
- Place trays in preheated oven at 200C (400F) and bake for 15-20 minutes, watching for a golden-brown color across the surface.
- Remove buns from oven and transfer immediately to a wire cooling rack to prevent further browning and allow complete cooling.
Notes
- Swap regular flour with gluten-free flour blend for celiac or gluten-sensitive individuals, ensuring texture remains light and crumbly.
- Add extra coconut flakes on top before baking for enhanced coconut flavor and delightful crispy texture.
- Reduce sugar content by using alternative sweeteners like stevia or monk fruit for a lower-calorie version without compromising taste.
- Create savory variation by adding herbs like rosemary or thyme for a unique twist on traditional sweet buns.
- Prep Time: 10 mins
- Cook Time: 15-20 mins
- Category: Breakfast, Snacks
- Method: Baking
- Cuisine: Chinese
Nutrition
- Serving Size: 8
- Calories: 195 kcal
- Sugar: 9 g
- Sodium: 150 mg
- Fat: 8 g
- Saturated Fat: 5 g
- Unsaturated Fat: 2 g
- Trans Fat: 0.1 g
- Carbohydrates: 26 g
- Fiber: 1.5 g
- Protein: 4 g
- Cholesterol: 40 mg
Jackson Reid
Founder & Recipe Developer
Expertise
Education
Holyoke Community College – HCC-MGM Culinary Arts Institute
Certificate in Culinary Arts
Focus: Farm-to-table cuisine, sustainable cooking practices, and hands-on kitchen training
Jackson’s love for cooking began one dish at a time. After earning his Culinary Arts Certificate from Holyoke Community College’s HCC-MGM Culinary Arts Institute, he focused on what mattered most: creating recipes that are simple to follow and full of flavor.
At 10 Below Ice Cream, Jackson brings together global influences and a less-is-more approach. His recipes reflect his belief that good food doesn’t need to be complicated; it just needs to make sense, taste great, and feel right.
When he’s not testing ingredients or adjusting seasonings, you’ll find him hiking near Asheville, exploring local markets, or chasing the best light for food photos.