Sweet & Rustic Chocolate Cherry Dump Cake Recipe
Sweet memories flood back when a chocolate cherry dump cake lands on my plate, promising pure dessert magic.
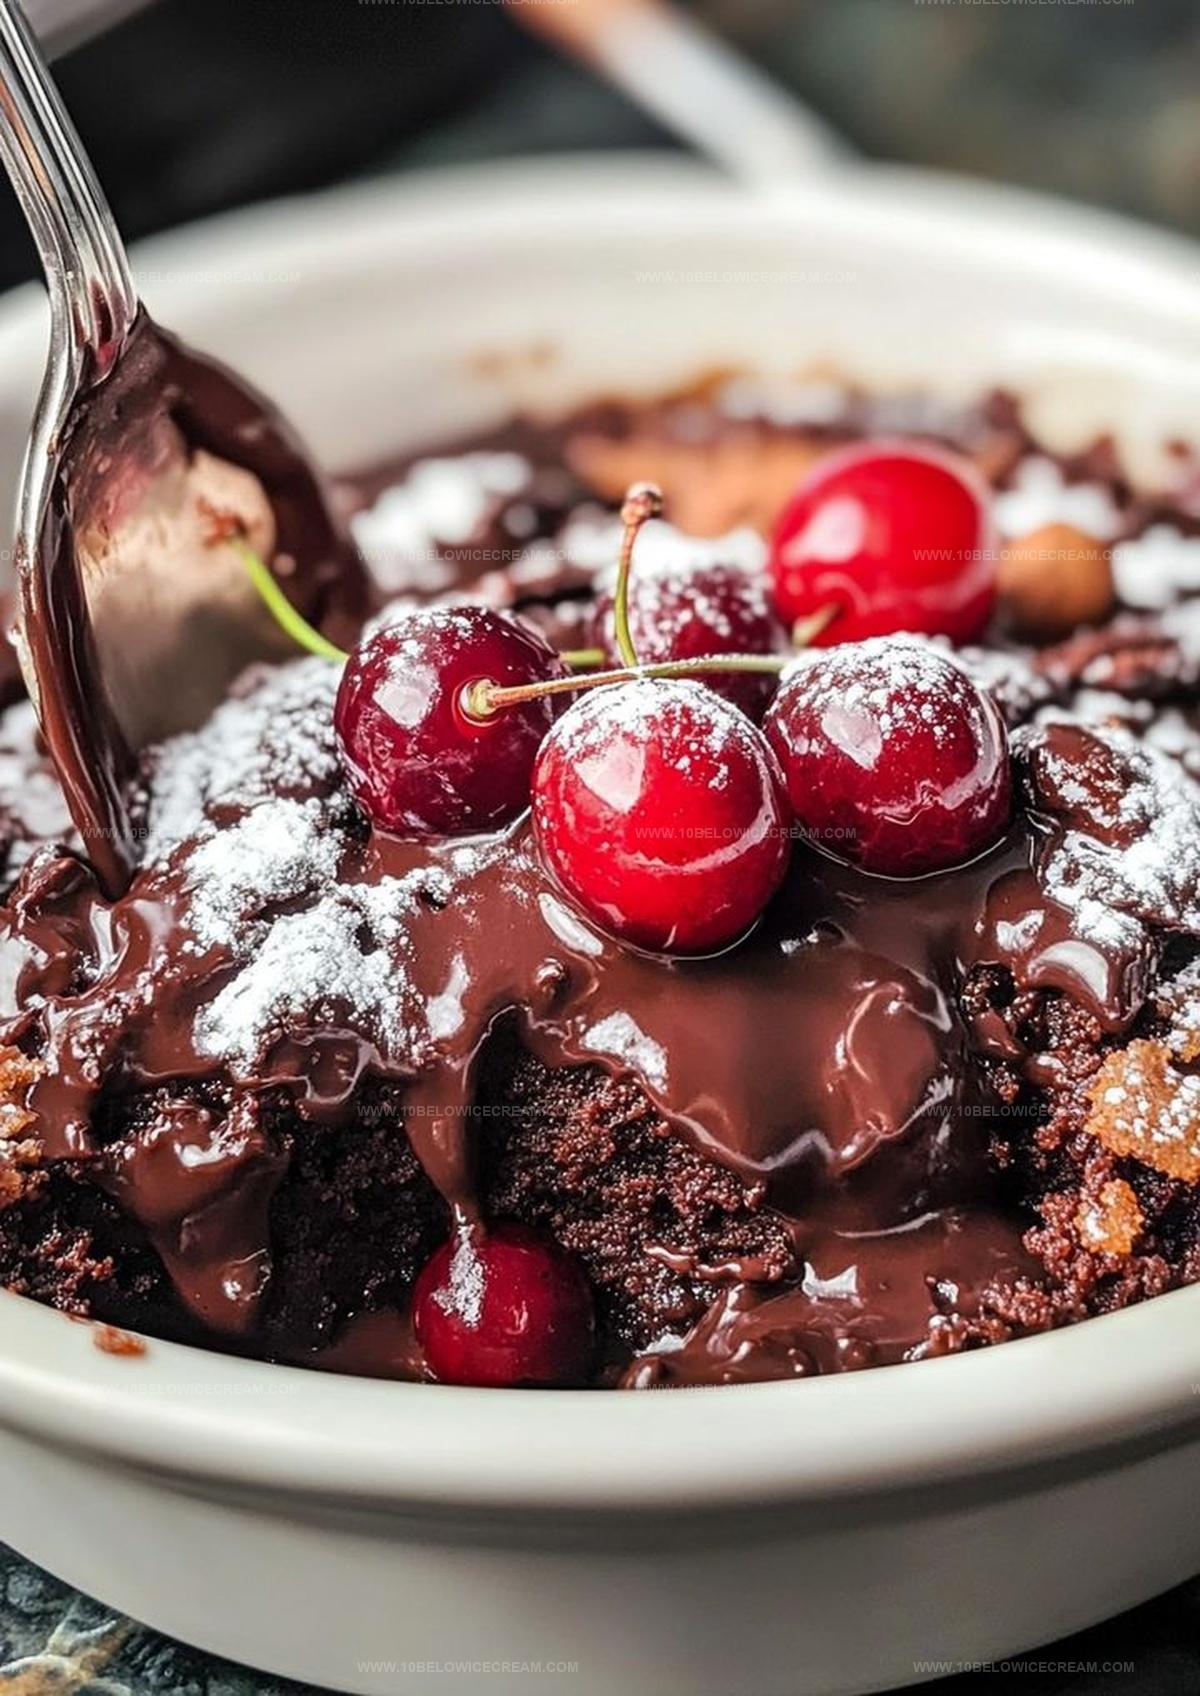
Layers of rich chocolate mingle with tart cherries in this effortless treat.
Minimal effort yields maximum flavor in this rustic masterpiece.
Pantry staples transform into a decadent dessert that surprises everyone at the table.
No complicated techniques or fancy equipment needed for this delightful creation.
Kitchen novices and seasoned bakers alike will fall in love with its simplicity.
Let’s uncover how a few ingredients can create such an irresistible comfort classic.
Chocolate Cherry Dump Cake Perfection
Ingredients for Chocolate Cherry Dump Cake
Fruit Base:Cake Layer:Moisture and Topping Ingredients:Optional Serving Suggestion:How to Make Chocolate Cherry Dump Cake
Step 1: Prepare the Baking Space
Warm up your oven to 350F (175C). Grab a 9×13-inch baking dish and give it a quick spray or butter coating to prevent sticking.
Step 2: Create the Cherry Base
Open your cherry pie filling and spread it smoothly across the bottom of the baking dish. Make sure it creates an even, tempting layer that will peek through later.
Step 3: Blanket with Chocolate
Grab your chocolate cake mix and gently shower it over the cherry filling. Don’t mix or stir – let the dry mix sit prettily on top of the bright red cherries.
Step 4: Drench with Liquid Gold
Melt your butter until it’s silky and smooth. Carefully pour the golden liquid over the entire surface of the cake mix, ensuring you cover as much of the dry mix as possible.
Step 5: Add Extra Excitement
If you’re feeling adventurous, sprinkle on some delightful extras:Step 6: Bake to Perfection
Slide the dish into the preheated oven. Let it bake for 45-50 minutes. You’ll know it’s ready when the top turns a gorgeous golden brown and the cherry filling starts bubbling with excitement.
Step 7: Serve and Indulge
Pull the cake out and let it rest for a few minutes. Scoop some vanilla ice cream alongside if you want to take this dessert to the next level. Dive in while it’s warm and enjoy the magical combination of chocolate and cherries!
Expert Tips for Chocolate Cherry Dump Cake
Variations of Chocolate Cherry Dump Cake
Best Pairings for Chocolate Cherry Dump Cake
Storing Chocolate Cherry Dump Cake Properly
Chocolate Cherry Dump Cake FAQs
Fresh cherries work, but you’ll need to cook them first with sugar and cornstarch to create the right consistency for the dump cake.
Use a gluten-free chocolate cake mix and ensure all ingredients are gluten-free certified to make this recipe safe for those with gluten sensitivities.
Look for a golden-brown top and bubbling cherry filling around the edges. The cake mix should look set and slightly crisp when it’s done baking.
Yes, you can prepare the dump cake in advance and reheat it in the oven before serving. It stays delicious for 2-3 days when stored in the refrigerator.
Print
Chocolate Cherry Dump Cake Recipe
- Total Time: 55-60 minutes
- Yield: 8 1x
Description
Chocolate cherry dump cake brings pure dessert magic to your table with minimal effort. Rich chocolate and sweet cherries combine in a rustic, comforting treat you’ll crave again and again.
Ingredients
Cake Base:
- 1 box (15.25 ounces / 432 grams) chocolate cake mix
Fruit Layer:
- 1 can (21 ounces / 595 grams) cherry pie filling
Toppings and Extras:
- 1 cup (227 grams / 8 ounces) unsalted butter, melted
- 1 cup (100 grams) chopped walnuts or pecans
- 1/2 cup (85 grams) chocolate chips
Instructions
- Prepare the baking vessel by coating a 9×13-inch dish with grease and heating the oven to 350°F (175°C).
- Create a smooth, even foundation by spreading the cherry pie filling across the entire bottom of the greased dish.
- Distribute the dry chocolate cake mix uniformly over the cherry layer, ensuring complete coverage without mixing the ingredients.
- Generously drizzle melted butter across the cake mix surface, aiming to cover as much of the dry mixture as possible.
- Enhance the texture and flavor by scattering chopped walnuts or pecans and chocolate chips over the top layer.
- Transfer the dish to the preheated oven and bake for 45-50 minutes, watching for a golden-brown crust and bubbling cherry filling.
- Remove from the oven and let the dessert rest for a few minutes to set, allowing the layers to slightly cool and stabilize.
- Serve warm, optionally accompanied by a scoop of vanilla ice cream for an extra indulgent touch.
Notes
- Swap cherry pie filling with fresh cherries during summer for a more vibrant, homemade taste and reduced sugar content.
- Mix chocolate cake mix with gluten-free alternative for those with wheat sensitivities, ensuring equally delicious results.
- Boost nutritional value by sprinkling sliced almonds or chia seeds on top for added protein and texture.
- Create a lower-calorie version by using light butter and reducing chocolate chip quantity without compromising rich flavor.
- Prep Time: 10 minutes
- Cook Time: 45-50 minutes
- Category: Desserts, Snacks
- Method: Baking
- Cuisine: American
Nutrition
- Serving Size: 8
- Calories: 375 kcal
- Sugar: 30 g
- Sodium: 280 mg
- Fat: 22 g
- Saturated Fat: 8 g
- Unsaturated Fat: 12 g
- Trans Fat: 0.5 g
- Carbohydrates: 44 g
- Fiber: 3 g
- Protein: 4 g
- Cholesterol: 35 mg
Olivia Brooks
Contributing Writer
Expertise
Education
Culinary Institute of America
Accelerated Culinary Arts Certificate Program
Focus: Culinary fundamentals, nutrition, and healthy cooking technique
Olivia believes good food should feed both the body and the soul. She earned her Accelerated Culinary Arts Certificate from the Culinary Institute of America, where she focused on nutrition and practical cooking techniques that make healthy eating easy.
At 10 Below Ice Cream, Olivia shares single-serving recipes that are fresh, plant-forward, and full of heart. She loves helping people eat better, without stress, strict rules, or sacrificing flavor.
Beyond the kitchen, Olivia spends her time tending her backyard garden, practicing yoga, and discovering hidden gems in Portland’s food scene.