
Easy Sweet & Spicy Chili Jam Recipe: Homemade Flavor Burst
Crafting a vibrant chili jam brings unexpected excitement to your culinary adventures.
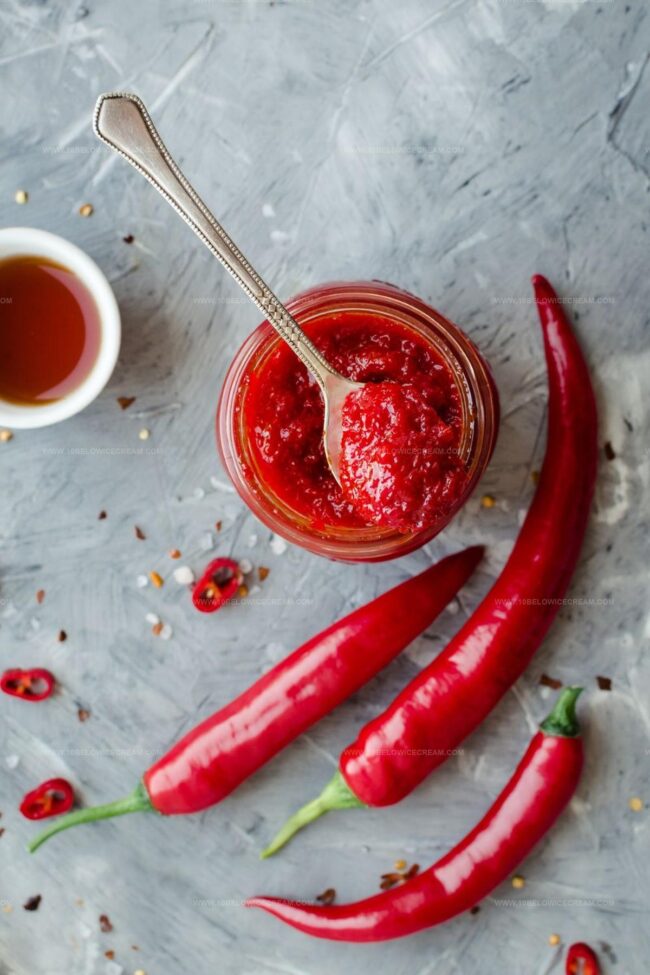
Sweet and spicy notes dance across your palate with each tangy spoonful.
Homemade condiments always taste more delicious than store-bought alternatives.
Local peppers and fresh ingredients make this recipe truly special.
Creative cooks love experimenting with heat levels and unique flavor combinations.
Summer gatherings become memorable when you serve this zesty spread alongside grilled meats or crispy appetizers.
Unleash your inner chef and surprise everyone with this simple yet spectacular condiment.
How To Make Nigella Chili Jam From Scratch
Step 1: Prepare Vibrant Peppers
Grab a mix of red bell peppers and fiery chilies. Toss them into a food processor and pulse until they transform into a colorful, finely chopped medley. The peppers should look like a zesty confetti ready to dance into your jam.
Step 2: Dissolve Sugar Magic
Select a wide pan and pour in cider vinegar. Sprinkle jam sugar over the liquid and let it gently dissolve, creating a sweet and tangy base that will make your chili jam sing with flavor.
Step 3: Boil the Flavor Bomb
Pour the chopped pepper mixture into the sugar-vinegar blend. Crank up the heat and bring the mixture to a rolling, vigorous boil. Let it bubble and simmer intensely for 10 full minutes, allowing the ingredients to meld and concentrate their delicious essence.
Step 4: Cool and Set
Remove the pan from heat and let the jam cool naturally for about 40 minutes. Give it an occasional stir to ensure even cooling and consistent texture. The mixture will start to thicken and develop a glossy, rich appearance.
Step 5: Jar and Preserve
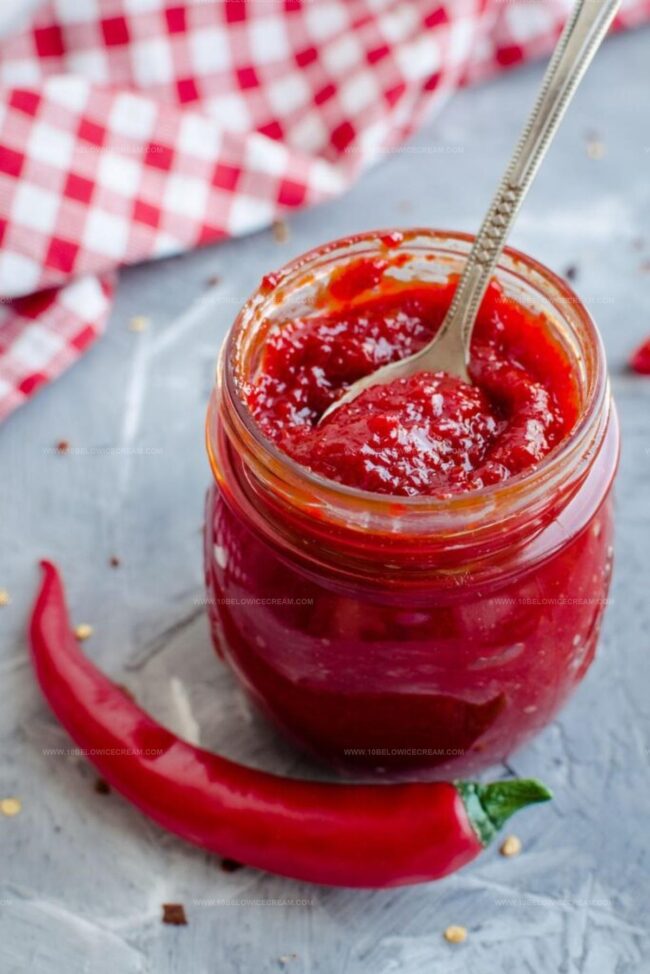
Carefully spoon the vibrant chili jam into sterilized glass jars. Seal the lids tightly, ensuring a perfect preservation of your homemade condiment. These jars will store beautifully, ready to add a spicy kick to sandwiches, cheese plates, or marinades.
Useful Tips For Nigella Chili Jam Success
Tasty Ways To Tweak Nigella Chili Jam
What Pairs Well With Nigella Chili Jam
How To Store Nigella Chili Jam After Cooking
Nigella Chili Jam FAQs Made Easy
Red bell peppers, chilies, jam sugar, and cider vinegar are the primary ingredients that create a sweet and spicy condiment.
A food processor for chopping peppers and a wide pan for cooking are essential tools for preparing this recipe successfully.
When properly sealed in sterilized jars, the chili jam can typically last 3-4 months in a cool, dark pantry, and should be refrigerated after opening.
Yes, you can control the heat by varying the type and quantity of chilies used, allowing you to create a milder or more intense version according to your preference.
What’s To Love About Nigella Chili Jam
Nigella Chili Jam Ingredient Guide
Peppers:Sugar and Acid:Preparation Components: Print
Chili Jam Recipe
- Total Time: 55 minutes
- Yield: 5 1x
Description
Spicy-sweet chili jam dances with bold flavors, bringing Southeast Asian zest to your kitchen. Heat from red chilies and sugar’s caramel notes create a perfect condiment that will elevate sandwiches, grilled meats, and cheese plates with one delicious swipe.
Ingredients
Vegetables:
- 150 grams (5.3 ounces) long red chilies, deseeded and chopped
- 150 grams (5.3 ounces) red bell peppers, chopped
Sugar and Vinegar:
- 1 kilogram (2.2 pounds) jam sugar
- 600 milliliters (20.3 fluid ounces) cider vinegar
Instructions
- Thoroughly blend red peppers and chili peppers in a food processor until they reach a fine, uniform consistency.
- Select a spacious saucepan and carefully melt jam sugar into cider vinegar, stirring until completely dissolved.
- Incorporate the processed pepper mixture into the vinegar-sugar liquid, raising heat to trigger a vigorous boil that continues intensely for precisely 10 minutes.
- Monitor the mixture closely, ensuring it maintains a robust bubbling action without overflowing or burning.
- After 10 minutes, remove the pan from heat source and allow the jam to rest and cool for approximately 40 minutes, occasionally stirring to prevent surface film formation.
- While cooling, prepare clean, sterilized glass jars with secure lids.
- Once the jam reaches a slightly thickened, spreadable texture, carefully transfer the mixture into prepared jars using a clean spoon.
- Seal jars tightly, ensuring a complete vacuum seal to preserve the jam’s freshness and prevent contamination.
- Allow sealed jars to cool completely at room temperature before storing in a cool, dark pantry or refrigerator.
Notes
- Chop peppers and chilies with varying heat levels to customize spiciness according to personal preference.
- Select jam sugar with pectin for perfect consistency and ensure a glossy, spreadable texture.
- Test jam’s readiness by placing a small amount on a cold plate – it should wrinkle when pushed with a finger, indicating proper setting.
- Sterilize jars thoroughly by washing in hot, soapy water or running through a dishwasher cycle to prevent bacterial growth and extend shelf life.
- Prep Time: 5 minutes
- Cook Time: 10 minutes
- Category: Appetizer, Snacks
- Method: Boiling
- Cuisine: Southeast Asian
Nutrition
- Serving Size: 5
- Calories: 200
- Sugar: 50g
- Sodium: 0mg
- Fat: 0g
- Saturated Fat: 0g
- Unsaturated Fat: 0g
- Trans Fat: 0g
- Carbohydrates: 50g
- Fiber: 1g
- Protein: 1g
- Cholesterol: 0mg
Jackson Reid
Founder & Recipe Developer
Expertise
Education
Holyoke Community College – HCC-MGM Culinary Arts Institute
Certificate in Culinary Arts
Focus: Farm-to-table cuisine, sustainable cooking practices, and hands-on kitchen training
Jackson’s love for cooking began one dish at a time. After earning his Culinary Arts Certificate from Holyoke Community College’s HCC-MGM Culinary Arts Institute, he focused on what mattered most: creating recipes that are simple to follow and full of flavor.
At 10 Below Ice Cream, Jackson brings together global influences and a less-is-more approach. His recipes reflect his belief that good food doesn’t need to be complicated; it just needs to make sense, taste great, and feel right.
When he’s not testing ingredients or adjusting seasonings, you’ll find him hiking near Asheville, exploring local markets, or chasing the best light for food photos.